
The Best Fluffy Pancakes recipe you will fall in love with. Full of tips and tricks to help you make the best pancakes.

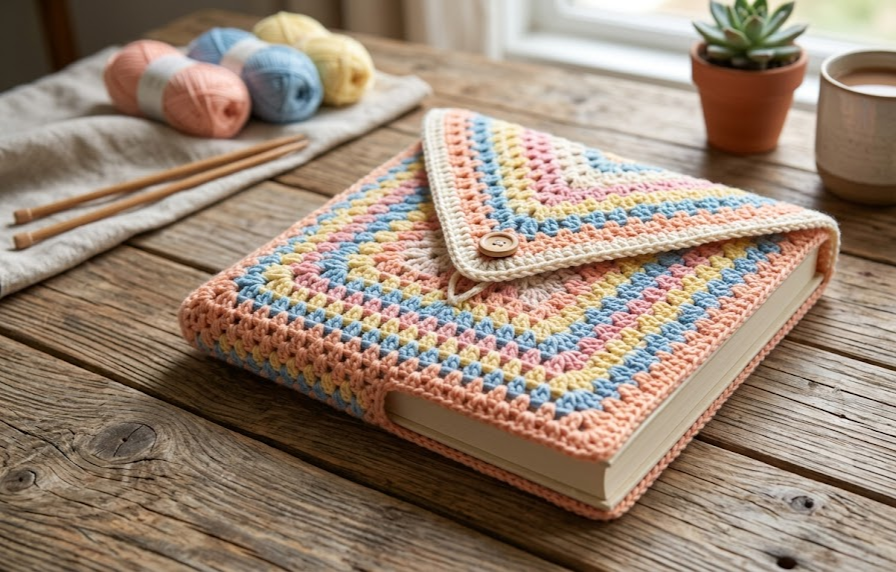
There’s something deeply satisfying about slipping a favorite paperback into a handmade cover before tossing it into a tote bag or beach bag. This crochet envelope book sleeve does exactly that, wrapping your current read in a soft, pastel granny-square fabric that folds diagonally like a letter, with a pointed flap that tucks neatly over the top. It’s worked from the center outward in concentric granny rounds, so the construction is simple and meditative, yet the finished piece looks intricate thanks to the diagonal color blocking.
This pattern is ideal for book lovers, gift-givers, and anyone who wants a portable project that uses up scraps of pastel yarn. Because it’s built from one continuous granny square that’s later folded and seamed into an envelope shape, there’s no fiddly shaping or increasing math to track beyond the standard granny square formula. It works equally well for paperbacks, journals, e-readers, or even small tablets, making it a versatile handmade accessory for commuters, students, and cozy reading nooks alike.
The pastel palette featured here uses five rotating colors, but this pattern is endlessly customizable. Swap in your own color family, add a button closure, or size it up for a larger hardcover. Once you understand the construction, you’ll find yourself making one for every book on your shelf.
|
Difficulty
Intermediate
|
Time
6-8 hours
|
Hook Size
4.5mm (US 7)
|
Yarn Weight
Worsted (4)
|
Finished Size
~26cm x 26cm (diamond)
|
Gauge
Using a 4.5mm (US 7) hook with worsted weight (Category 4) yarn, one granny cluster repeat measures approximately 4 stitches and 2 rounds per 10cm square when blocked. Gauge is not critical for this project since the sleeve is sized to your book rather than a fixed measurement, but a consistent gauge keeps your color rounds even and your corners symmetrical.
Gauge swatch: Work a granny square of 4 rounds. It should measure approximately 12cm x 12cm after light blocking. If your swatch is smaller, size up your hook; if larger, size down.
Materials List
- Worsted weight yarn (Category 4), approximately 180–220g total, in 5 colors:
- Color A – Cream (background/border)
- Color B – Peach
- Color C – Dusty Pink
- Color D – Mustard Yellow
- Color E – Sky Blue
- 4.5mm (US 7) crochet hook
- Yarn needle for weaving in ends and seaming
- Stitch markers (2)
- Scissors
- Measuring tape
- Optional: one button and matching thread for closure
Abbreviations
| Abbreviation | Meaning |
|---|---|
| ch | chain |
| sl st | slip stitch |
| sc | single crochet |
| dc | double crochet |
| sk | skip |
| sp | space |
| rnd | round |
| rep | repeat |
| ( ) | stitch count at end of round |
| MR | magic ring |
Technique note (first use): A magic ring (MR) is an adjustable loop that lets you crochet your first round of stitches into it and then pull the center closed tightly, leaving no hole.
Pattern Instructions
Part 1: Center Square (Color A)
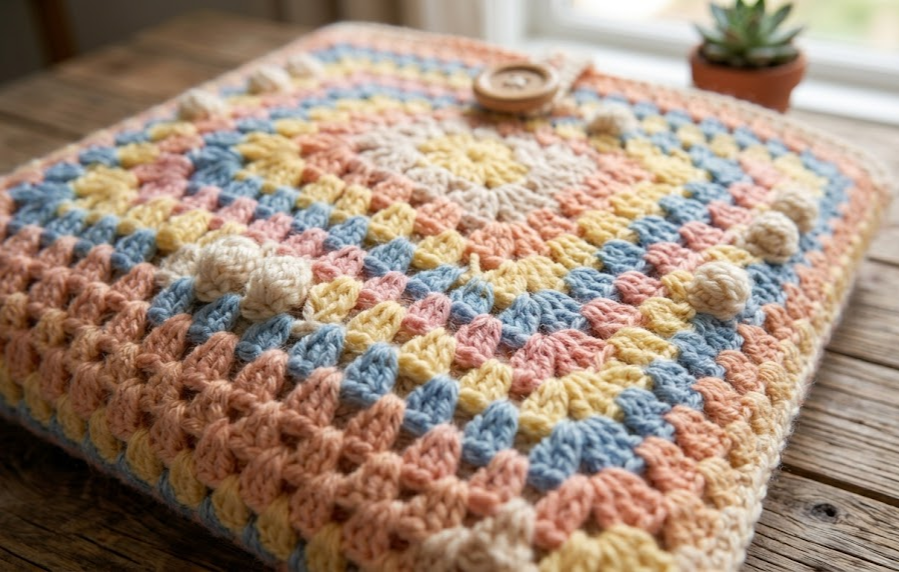
Round 1: MR, ch 3 (counts as first dc), 2 dc into ring, ch 2, [3 dc into ring, ch 2] 3 times, join with sl st to top of ch-3. Pull tail to close ring. (12 dc, 4 ch-2 corner spaces)
Round 2: Join Color B in any ch-2 corner space. Ch 3 (counts as first dc), [2dc, ch2, 3dc] all in same corner space (first corner complete), ch 1, *[3dc, ch2, 3dc] in next corner space, ch 1; rep from * twice more, join with sl st to top of ch-3. (24 dc, 4 corner spaces, 4 ch-1 side spaces)
Round 3: Join Color C in any ch-2 corner space. Ch 3, [2dc, ch2, 3dc] in same space, ch 1, 3dc in next ch-1 space, ch1, *[3dc, ch2, 3dc] in next corner, ch1, 3dc in next ch-1 sp, ch1; rep from * twice more, join. (36 dc, 4 corners, 8 side spaces total)
Round 4: Join Color D in any corner. Ch3, [2dc, ch2, 3dc] in same sp, ch1, *(3dc in next ch1 sp, ch1) rep across side to next corner, [3dc, ch2, 3dc] in corner, ch1; rep from * around, join. (48 dc)
Round 5: Join Color E. Work as Round 4, adding one more 3dc/ch1 repeat per side. Join. (60 dc)
Round 6: Join Color A. Repeat the established pattern, increasing corners and side repeats by one set. Join. (72 dc)
Continue working rounds in this manner, rotating colors B, C, D, E, A in sequence, increasing 12 dc per round, until your square’s diagonal (corner to opposite corner) is large enough to wrap your book with at least 5cm of overlap on each side when folded into a diamond. For a standard paperback (11cm x 18cm), this typically takes 14–16 total rounds.
Final Round (Border): Join Color A. Ch1, sc evenly around entire square working 3 sc into each corner space to keep it flat, sl st to join, fasten off. (Stitch count will vary by final size — ensure corners have exactly 3 sc each so the square lies flat.)
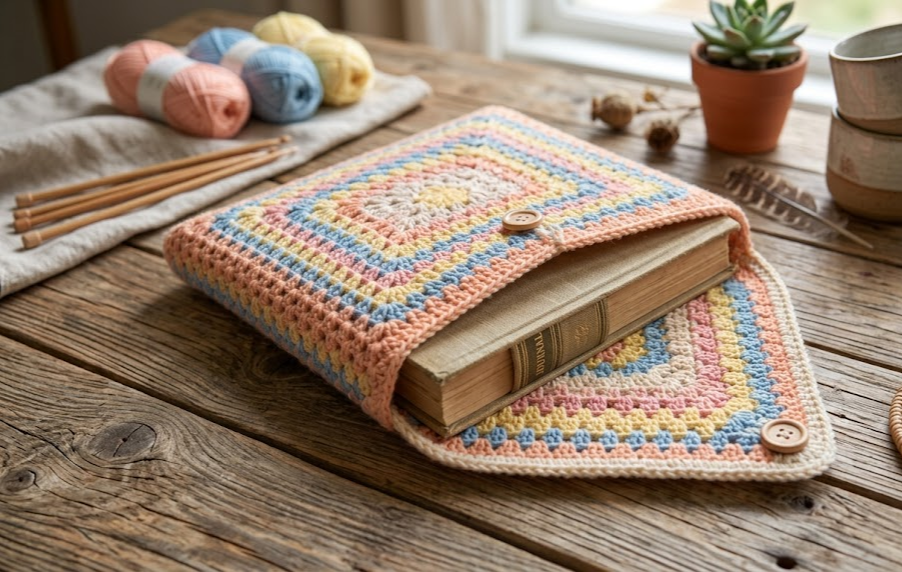
Part 2: Folding and Seaming the Envelope
Lay the finished square flat in a diamond orientation, with one corner pointing up (this becomes the flap) and the opposite corner pointing down.
- Fold the bottom corner up toward the center so it reaches roughly two-thirds of the way to the top point — this forms the front pocket.
- Fold the left and right corners inward so they overlap the bottom fold by approximately 2cm on each side, forming the side panels of the envelope pocket.
- Using Color A and a yarn needle, whip stitch the bottom edges of the side panels to the bottom pocket fold, working through both layers along the diagonal seam lines, leaving the top point (flap) free and unattached.
- Weave in all ends securely on the wrong side.
Assembly Steps
- Insert your book into the pocket to test fit before final seaming — the pocket should hold the book snugly with about 1cm of ease on each side.
- Seam the left side panel to the pocket base along approximately 9–10cm of diagonal edge, depending on book size.
- Seam the right side panel to the pocket base the same way, mirroring the left.
- Fold the top point down over the book as the closure flap; it should reach 3–4cm past the top edge of the pocket opening.
- Optional: sew a button to the front pocket center and add a ch-15 loop to the underside of the flap point to create a working closure.
- Block the finished sleeve lightly by pinning into shape and steaming gently to flatten the seams.
Tips for Beginners and Intermediate Crocheters
- Keep tension even across color changes by giving the working yarn a gentle tug before starting each new round.
- When joining a new color, leave a 15cm tail so you have enough length to weave in without it pulling loose under the stitch.
- Use stitch markers in two opposite corners during early rounds so you don’t lose track of your corner repeats as the square grows.
- If your corners start to ripple or cup, you’re increasing too much; if they pull in tightly, add an extra stitch into the corner space.
Variations
- Solid Color Version: Use a single color throughout for a minimalist, modern look instead of the pastel rainbow.
- Mini Journal Size: Stop increasing after 8 rounds for a compact sleeve that fits a small notebook or passport.
- Tablet Cover: Increase rounds until the diagonal reaches 28cm+ and add a soft fabric lining for device protection.
- Tassel Trim: Attach coordinating tassels to each of the three folded corners for a boho finishing touch.
Save This Pattern
Loved this cozy envelope book sleeve? Save this pattern to your Pinterest boards so you always have it on hand for your next cozy reading project! #FoodieRippleCrochet



