
The Best Fluffy Pancakes recipe you will fall in love with. Full of tips and tricks to help you make the best pancakes.

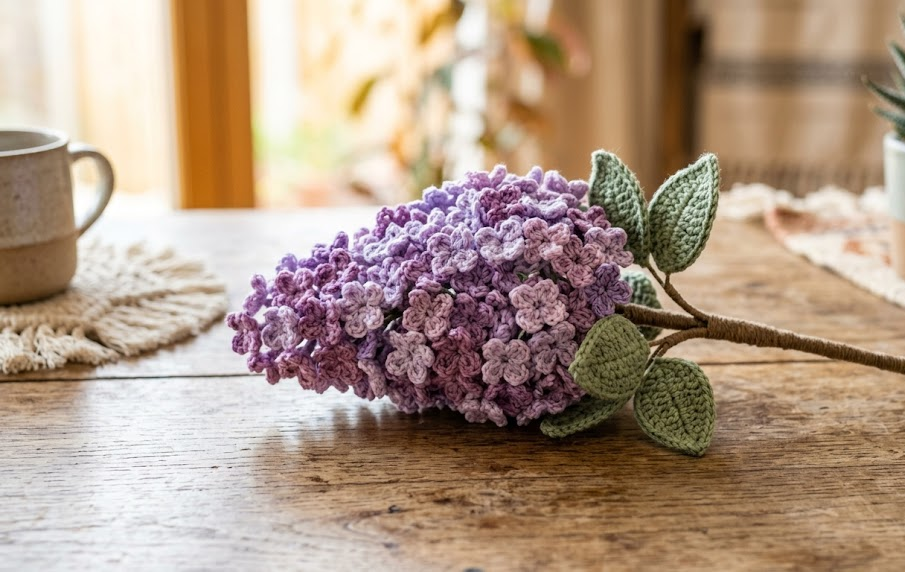
There’s something magical about lilacs — the way dozens of tiny blossoms crowd together into one soft, fragrant cone of color every spring. This crochet lilac flower pattern captures that same charm in yarn, using a simple five-petal tiny flower motif repeated again and again until it blooms into a full, textured cluster. Best of all, each individual flower is incredibly quick and easy to make, which means this project is perfect for beginners who want big, beautiful results without complicated stitches.
Whether you’re crocheting a single spray for a vase, building a bouquet for a gift, or adding lilacs to a larger floral arrangement, this pattern walks you through every step — from the tiniest flower to the finished, shaped cluster. Grab your hook and a couple of skeins of lavender and purple yarn, and let’s get started.
|
Difficulty
Beginner
|
Time
4-5 hours
|
Hook Size
2.25mm (B/1)
|
Yarn Weight
DK / Sport
|
Finished Size
~25-30cm tall
|
Gauge
Gauge isn’t critical for this project since the flowers are tiny and forgiving, but for consistency:
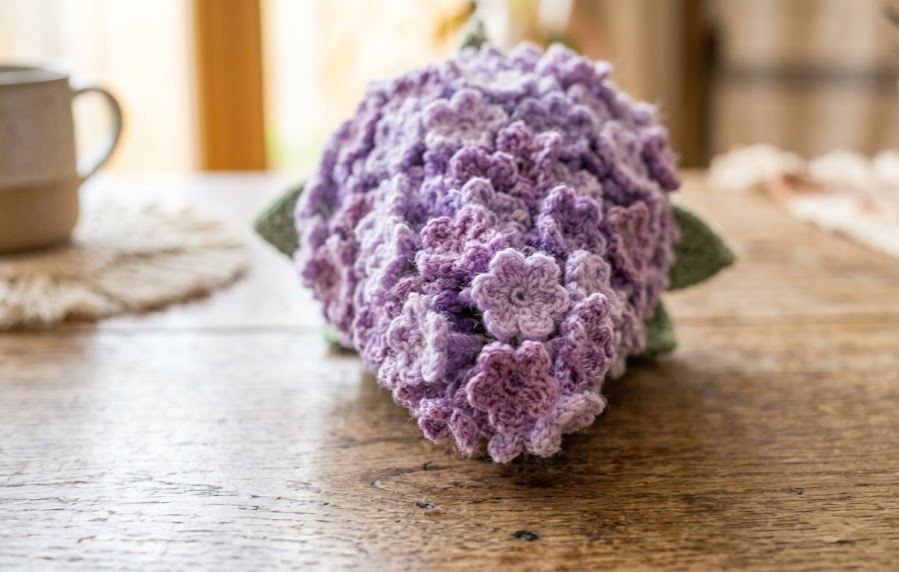
- Tiny flower gauge: One completed tiny flower measures approximately 1.5–2cm in diameter
- Stitch gauge: Approximately 20 sc sts and 22 rows = 10cm square using a 2.25mm hook and DK/sport weight yarn (measured in plain single crochet for reference)
- Hook used: 2.25mm (US size B/1)
- Yarn used: DK or Sport weight yarn
Because each flower is worked in the round and finished quickly, exact gauge matters less than keeping your tension even from flower to flower so the cluster looks uniform.
Materials List
- DK or Sport weight yarn in Lilac (main petal color) — approx. 1 skein
- DK or Sport weight yarn in Lavender (accent petal color, slightly lighter or darker shade) — approx. 1 skein
- DK or Sport weight yarn in Green (for leaves and stem wrapping) — approx. 1 skein
- 2.25mm (US B/1) crochet hook
- Tapestry needle (for weaving in ends)
- Scissors
- Floral wire or covered floral stem wire, cut into 15–20cm lengths
- Green floral tape or pipe cleaners (for wrapping the main stem)
- Optional: fiberfill or hot glue (for securing the cluster base)
Abbreviations
| Abbreviation | Meaning |
|---|---|
| ch | chain |
| sc | single crochet |
| sl st | slip stitch |
| dc | double crochet |
| mr | magic ring |
| rep | repeat |
| FO | fasten off |
| BLO | back loop only (not used in this pattern, listed for reference) |
| st(s) | stitch(es) |
Pattern Instructions
Part 1: Tiny Flower (make 20–40, depending on cluster fullness)
Each tiny flower is worked in two quick rounds. Make as many as you like — the more you make, the fuller your lilac cluster will be. A good starting batch is 25–30 flowers.
Round 1: Using Lilac or Lavender yarn, make a magic ring (mr). A magic ring is an adjustable loop that lets you crochet stitches into it and then pull it closed tightly, leaving no gap at the center. Ch 1 (does not count as a stitch), work 5 sc into the ring, sl st to first sc to join. (5 sc)
Round 2: *Ch 3, sl st in 3rd ch from hook (this forms your first petal — working a slip stitch back down the chain creates a small pointed loop), sl st into next sc. Repeat from * around all 5 stitches. (5 petals)
FO, leaving a 10–15cm tail for attaching later. Weave in the starting tail only; keep the FO tail long for assembly.
Technique note: Working “sl st in 3rd ch from hook” means you’re going back down the chain you just made and slip stitching into it to close the loop into a petal shape — this is what gives each tiny flower its rounded 5-petal look instead of pointed spikes.
Part 2: Leaves (make 6–10)
Row 1: Using Green yarn, ch 8. Starting in 2nd ch from hook, sc in each ch across. (7 sc)
Technique note: “starting in 2nd ch from hook” means skip the first chain closest to your hook and begin your first single crochet in the next one — this avoids a tight, twisted edge.
Row 2: Ch 1, turn. Sc in first 2 sts, (sc2tog) twice, sc in last 2 sts. (4 sc)
Technique note: sc2tog (single crochet 2 together) is a simple decrease — insert hook into next stitch, pull up a loop, insert hook into the following stitch, pull up a second loop, yarn over and pull through all 3 loops on hook.
Row 3: Ch 1, turn. Sc2tog twice. (2 sc)
FO, leaving a 10cm tail. Weave in starting tail; keep FO tail for attaching to stem.
Part 3: Stem and Wire Armature
- Cut a length of floral wire 15–20cm long for each stem branch you plan to make (3–5 branches is a good cluster size).
- Wrap each wire completely in green floral tape, stretching the tape slightly as you wrap so it sticks to itself — this covers the wire fully and gives it a stem-like texture. If using pipe cleaners instead of wire, they’re already fuzzy and can be used as-is or wrapped for extra thickness.
- For the thicker main stem (the one holding the whole cluster together), twist 3–4 wrapped wires together and re-wrap the twisted bundle with floral tape until smooth.
Assembly
- Attach tiny flowers to branch wires: Using the long FO tail on each tiny flower, tie or wrap it tightly around a thin wire branch, starting about 2cm from the tip of the wire. Space flowers 0.5–1cm apart as you work down the wire, clustering them densely near the top and slightly less densely toward the bottom, mimicking a natural lilac bloom shape.
- Build each branch: Repeat step 1 until each thin wire branch is covered with 6–10 tiny flowers along its top 6–8cm.
- Attach leaves: Using the FO tail on each leaf, tie 1–2 leaves near the base of each flower branch, about 1cm below where the flowers begin.
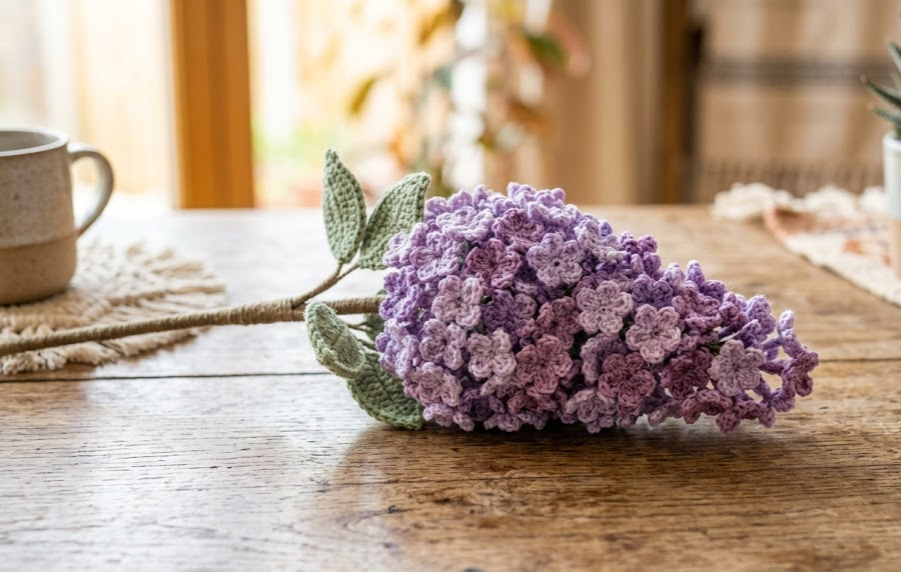
- Assemble the cluster: Gather 3–5 completed flower branches together and twist their bare wire ends together, about 3–4cm below the flowers, to form the main stem.
- Finish the main stem: Wrap the twisted joint and the remaining stem length with green floral tape, covering all raw wire and yarn ends completely.
- Shape the cluster: Gently bend and fan out the individual branches so the flowers sit at slightly different heights and angles, mimicking the cone-shaped bloom of a real lilac. Curve the top branches inward slightly and let the lower branches splay outward for a natural, full look.
Tips
- Keep your tension even across all 20–40 tiny flowers so the finished cluster looks cohesive rather than mismatched — try to crochet them in one or two sittings rather than spread across many days.
- A slightly smaller hook (try 2mm) can make petals even daintier if you want a more delicate, miniature look.
- If your petals feel floppy or curl inward, lightly steam-block the flowers before attaching them to wire — hold a steaming iron a few centimeters away (never touch it directly to the yarn) and let the fibers relax into shape.
- Build your cluster gradually: attach a few flowers, step back and look at the shape, then keep adding rather than pre-planning an exact number. Natural florals look best when they’re a little imperfect.
- Secure stubborn tails with a small dot of hot glue at the base of each flower if they keep slipping while you tie them to the wire.
Variations
- Two-Tone Ombre Lilac: Use three shades of purple (light, medium, dark) and cluster the darkest flowers at the base of the bloom, transitioning to the lightest at the tip, for a realistic ombre lilac effect.
- White Lilac Spray: Swap the lilac and lavender yarn for white and pale cream to make a bridal-style lilac spray, perfect for wedding bouquets or centerpieces.
- Mini Potted Lilac: Make a shorter, denser cluster (2–3 branches, 15 flowers total) and anchor the stems in a small pot filled with floral foam or dried moss for a tabletop lilac plant.
- Lilac Wreath: Attach multiple small lilac branches around a wire or foam wreath base, layering leaves and blossoms to create a full floral spring wreath.
- Lilac Hair Clip or Brooch: Make a single small branch (5–8 flowers) and glue it to a hair clip or brooch backing for a wearable floral accessory.
Once your lilac cluster is finished, arrange it in a small vase, tuck it into a bouquet, or gift it as a everlasting bloom that never wilts. Save this pattern to your crochet board so you can come back to it anytime — and don’t forget to tag your finished lilacs with #FoodieRippleCrochet!



