
The Best Fluffy Pancakes recipe you will fall in love with. Full of tips and tricks to help you make the best pancakes.

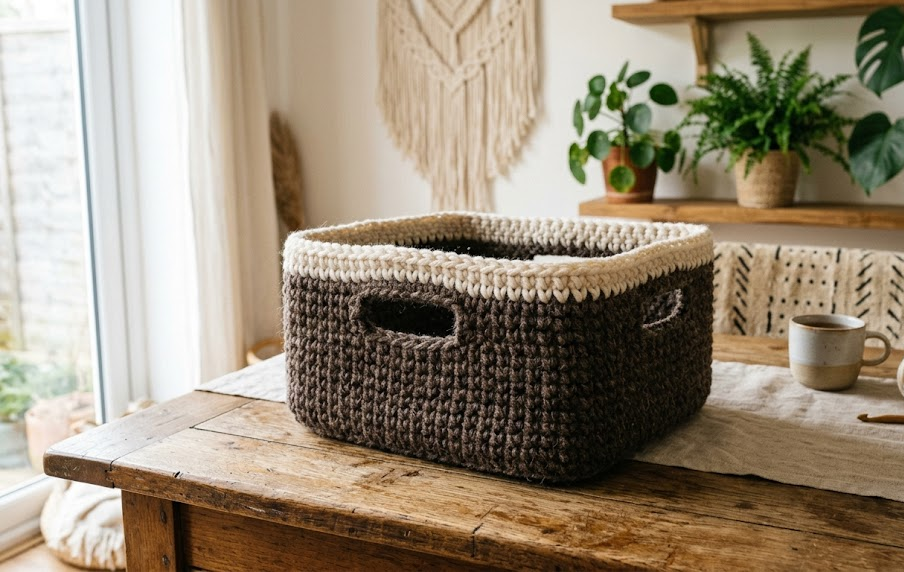
If you’ve been searching for a crochet basket pattern that’s both practical and beautiful, this two-tone storage basket is exactly what you need. With its deep chocolate brown body, soft ivory rim, and built-in cutout handles, this basket brings a modern boho touch to any room — whether it’s holding yarn scraps in your craft corner, magazines by the couch, or toys in a playroom.
Made with super bulky yarn and worked entirely in single crochet, this basket comes together fast. There’s no complicated shaping, no counting gauge swatches for hours, and no fussy techniques — just simple, satisfying stitches that build a sturdy, structured basket in just a few hours. It’s an ideal project for a beginner who wants their very first “wow, I made that?!” home decor piece, and it’s equally satisfying for an experienced crocheter looking for a quick, gratifying weekend make.
The secret to this basket’s sturdiness is the yarn choice. Bulky or super bulky yarn — including recycled t-shirt yarn — naturally creates a dense, firm fabric that holds its shape without needing cardboard inserts or wire reinforcement. Paired with a large hook, every stitch packs in tightly, giving you a basket that stands up on its own and holds real weight.
Let’s get into the pattern details so you can start hooking your own.
|
Difficulty
Beginner
|
Time
3–4 Hours
|
Hook Size
9mm (N-13)
|
Yarn Weight
Super Bulky (6)
|
Finished Size
24 x 16 x 14cm
|
Gauge
8 stitches x 8 rows = 10cm x 10cm square, worked in single crochet (sc), using a 9mm (US N-13) hook and super bulky (Weight 6) yarn.
Gauge is not critical for this project since it’s a basket rather than a garment, but working a quick swatch helps confirm your tension and yarn will produce a firm, sturdy fabric. If your fabric feels loose or floppy, size down your hook; if it’s too stiff to work with comfortably, size up.
Materials List
- Super bulky (Weight 6) yarn in dark brown — approximately 150g / 120m
- Super bulky (Weight 6) yarn in cream/ivory — approximately 80g / 65m
- 9mm (US N-13) crochet hook
- Yarn needle (large-eye, for weaving in ends)
- Stitch marker
- Scissors
Abbreviations
| Abbreviation | Meaning |
|---|---|
| ch | chain |
| sc | single crochet |
| sc2tog | single crochet 2 together (decrease) |
| sl st | slip stitch |
| st(s) | stitch(es) |
| rnd(s) | round(s) |
| MR | magic ring |
| BLO | back loop only |
| ( ) | stitch count at end of round |
Pattern Instructions
Technique Note — Magic Ring (MR): A magic ring lets you start crocheting in a circle without leaving a hole in the center. Wrap the yarn around your fingers into a loop, chain 1, then work your first round of stitches into the loop before pulling the tail to close it.
Technique Note — Working in the Oval: Instead of a round base, this basket starts with an oval (also called a “stadium” shape) to create the rectangular basket profile. You’ll chain a foundation, then work around both sides of the chain.
Part 1: Base (Dark Brown)
Row/Rnd 1: Ch 15. Starting in 2nd ch from hook, sc in each ch across (14 sc). Do not turn — continue working down the opposite side of the foundation chain, working 3 sc into the last stitch to turn the corner, then sc in each remaining loop across the bottom of the chain (14 sc), then 3 sc into the first stitch to close the round. Join with sl st to first sc. (34)
Rnd 2: Ch 1 (does not count as st). 2 sc in first st, sc in next 12 sts, 2 sc in next 3 sts, sc in next 12 sts, 2 sc in next 3 sts. Join with sl st. (40)
Rnd 3: Ch 1. Sc in each st around, working 2 sc in each corner stitch (the 3 stitches at each rounded end). Join with sl st. (46)
Rnd 4: Ch 1. Sc evenly in each st around, no increases. Join with sl st. (46)
Part 2: Basket Sides (Dark Brown)
Rnd 5–14 (10 rounds): Ch 1, sc in BLO of each st around. Join with sl st at end of each round. (46 each round)
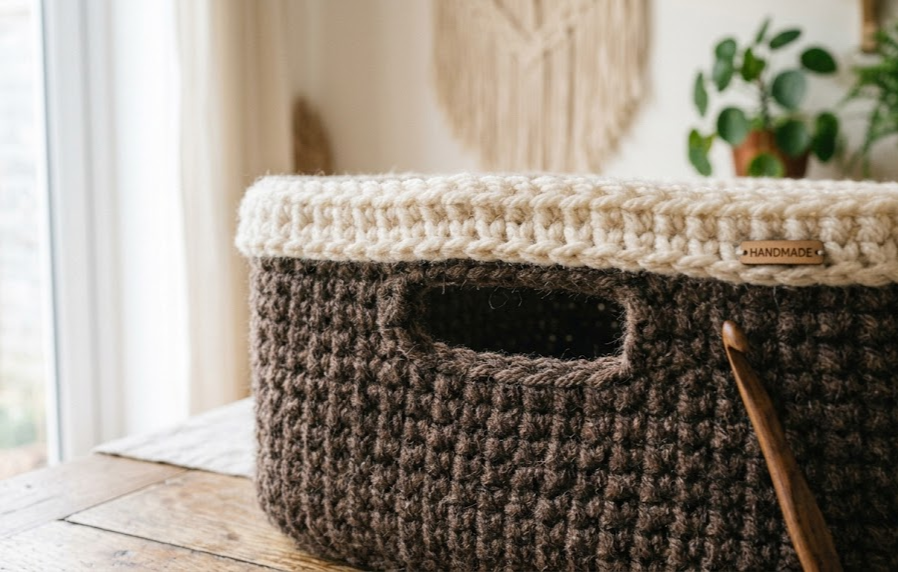
Technique Note — BLO (Back Loop Only): Working in the back loop only creates a visible ridge line on the right side of your fabric and gives the basket sides a firmer, more structural texture — this is what creates that ribbed look in the walls of the basket.
At the end of Rnd 14, your basket body should measure approximately 10cm tall. This is your dark brown body.
Part 3: Handle Cutouts (Dark Brown)
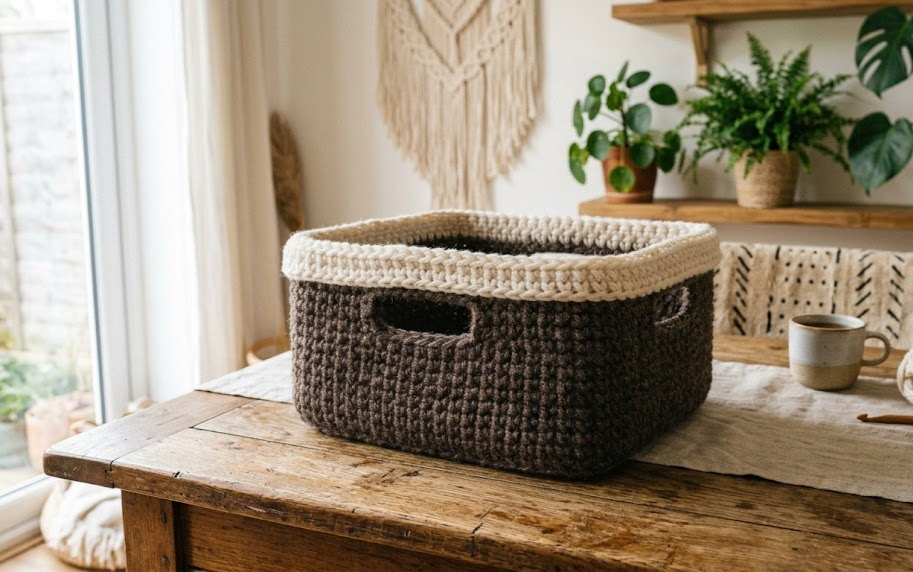
Rnd 15: Ch 1. Sc in next 8 sts. Ch 6, skip next 6 sts (this creates the handle opening). Sc in next 11 sts. Ch 6, skip next 6 sts (second handle opening). Sc in remaining 8 sts. Join with sl st. (34 sc + 2 ch-6 spaces = 46 sts total)
Rnd 16: Ch 1. Sc in each st around, working 6 sc evenly across each ch-6 space to close it back into solid fabric on this round. Join with sl st. (46)
Part 4: Rim (Cream/Ivory)
Join cream yarn with a sl st in any stitch, and cut/weave in brown tail.
Rnd 17–19 (3 rounds): Ch 1, sc in each st around (not BLO — work through both loops for a smoother, contrasting rim texture). Join with sl st at end of each round. (46 each round)
Rnd 20 (Fold-Over Finish): Ch 1, sl st in each st around to create a neat, non-bulky edge for folding the rim outward. Fasten off, leaving a 20cm tail for seaming.
Assembly Steps
- Weave in all loose ends from color changes using a yarn needle, running the tail through several stitches on the wrong side.
- Fold the cream rim (Rnds 17–20) down and outward over the top edge of the brown body by approximately 4–5cm, so the fold line sits right where the color change happens.
- Using the leftover cream tail, tack the folded rim down at 3–4 evenly spaced points around the basket to help it hold its folded shape (optional — the fold will also hold on its own thanks to the firm gauge).
- Check that both handle openings are centered and even; if any cutout looks uneven, reinforce the edge with a round of sl st worked directly around the opening.
- Steam-block lightly if your basket sides are curling, by hovering a steam iron 5cm above the fabric (do not touch the iron directly to synthetic yarns).
Beginner/Intermediate Tips
- Because this basket uses BLO stitches for the walls, count your stitches every couple of rounds — it’s easy to accidentally skip the last stitch before the join, especially in a large project like this.
- Super bulky yarn splits less than thinner yarns, making this a forgiving project for new crocheters still building consistent tension.
- If you’re using t-shirt yarn, keep the ball tension loose to avoid your basket walls curling inward.
- Use a stitch marker on Rnd 1 to keep track of your starting point — with no clear “first stitch” marker in a plain oval, it’s easy to lose your place.
Variations
- Monochrome Version: Skip the color change and make the entire basket in one shade for a minimalist look.
- Mini Catch-All Size: Reduce the base chain to Ch 10 and work only 6 rounds of sides for a small desk organizer version.
- No-Handle Display Basket: Skip Part 3 entirely and continue straight sides for a plant pot cover or vase basket.
- Striped Body: Alternate 2 rounds brown / 2 rounds cream throughout the sides instead of a solid color block, for a bold striped look.
- Chunky Braided Handles: Instead of cutout handles, attach two braided yarn straps to the sides for a tote-style carry basket.
Save this pattern so you always have it on hand for your next crochet session, and don’t forget to share your finished basket! Tag your project with #FoodieRippleCrochet so we can see your beautiful makes. 🧶



