
The Best Fluffy Pancakes recipe you will fall in love with. Full of tips and tricks to help you make the best pancakes.

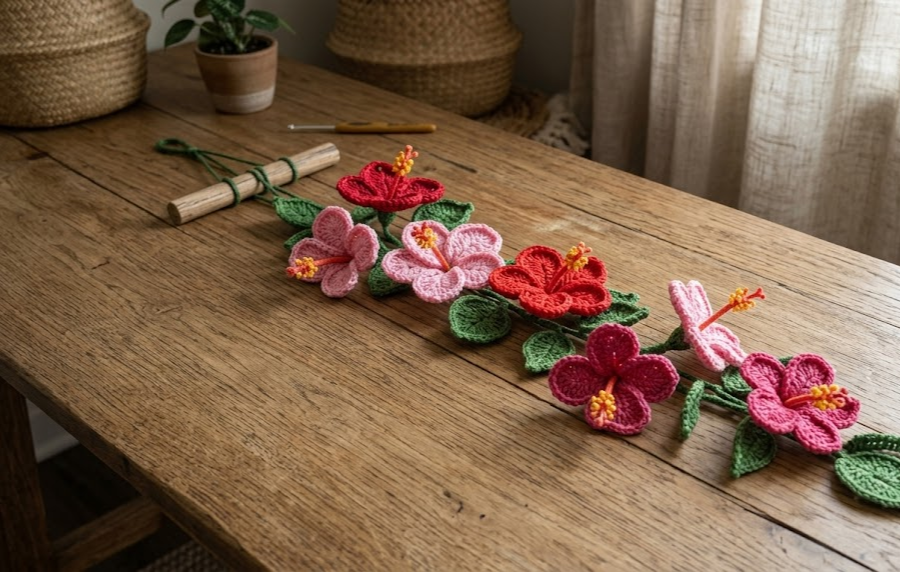
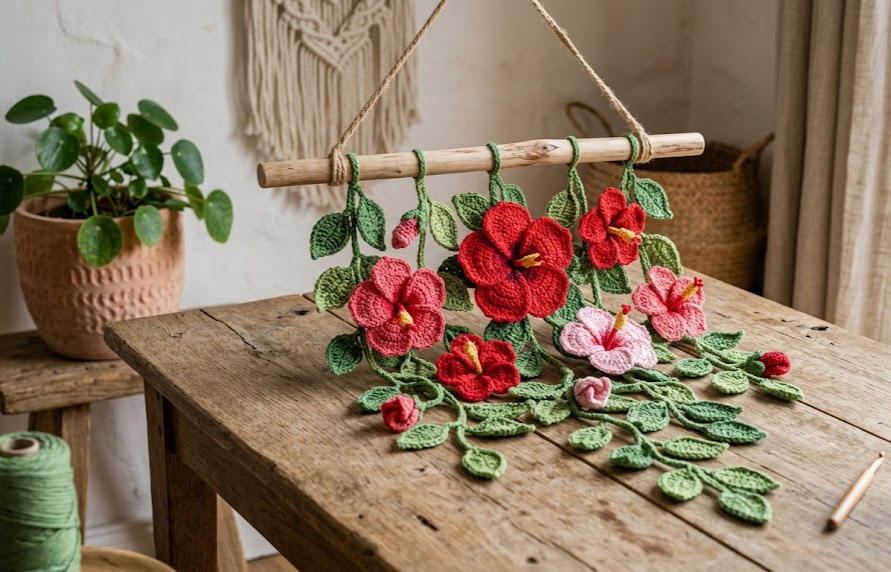
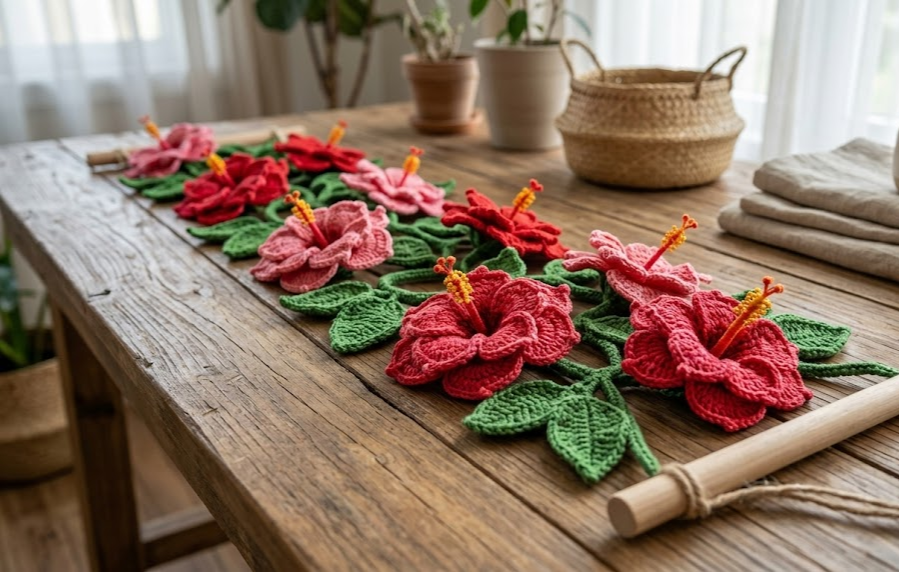
Bring a piece of tropical garden charm into your home with this crochet hibiscus flower wall hanging. Six vibrant hibiscus blooms in deep red, blush pink, and hot pink cascade down a slim wooden dowel, surrounded by textured crochet leaves that mimic a trailing vine. It’s the kind of piece that instantly warms up a blank wall, a reading nook, or a bedroom corner, and it makes a beautiful housewarming or Mother’s Day gift.
This project is a wonderful next step for crocheters who have mastered basic stitches and want to try shaping realistic flower petals, working with wire armature, and assembling a multi-piece display item. Each flower is worked as a flat motif, layered for dimension, then attached to a wire-reinforced vine so the whole piece keeps its graceful, curved shape on the wall. Even though there are several components, none of them are difficult on their own — you’re simply combining familiar stitches in a new way.
Grab your hook, a handful of yarn colors, and a length of floral wire, and let’s get started.
|
Difficulty
Intermediate
|
Time
10–12 hours
|
Hook Size
3mm (D/3)
|
Yarn Weight
DK (Light Worsted)
|
Finished Size
~70cm x 12cm
|
Gauge
18 sts x 20 rows = 10cm x 10cm square in single crochet (sc), using a 3mm (US size D/3) hook with DK weight (light worsted, weight 3) yarn.
Gauge is not critical for the flowers or leaves since they are shaped motifs, but it matters for keeping your petal and leaf sizes consistent with one another. Always work a quick swatch before starting so your flowers turn out proportional.
Materials List
- DK weight (weight 3) cotton or cotton-blend yarn:
- Deep Red – 30g
- Blush Pink – 20g
- Hot Pink – 20g
- Moss Green – 40g
- Small amount of Yellow (for stamens)
- 3mm (US D/3) crochet hook
- 2.5mm crochet hook (for tight petal detail, optional)
- Tapestry needle
- Floral stem wire (24-gauge), approx 2 meters total
- Wire cutters
- Wooden dowel, 20cm long, 1cm diameter
- Jute or cotton cord, 1.5 meters, for hanging ties
- Fabric or craft glue (optional, to secure knots)
- Stitch markers
Abbreviations Table
| Abbreviation | Meaning |
|---|---|
| ch | chain |
| sc | single crochet |
| hdc | half double crochet |
| dc | double crochet |
| tr | treble crochet |
| sl st | slip stitch |
| st(s) | stitch(es) |
| rep | repeat |
| sk | skip |
| MR | magic ring |
| BLO | back loop only |
| RS | right side |
Pattern Instructions
Part 1: Hibiscus Flower (make 6 — 2 in Deep Red, 2 in Blush Pink, 2 in Hot Pink)
Each flower has 5 petals worked in continuous rounds from a magic ring, plus a wired stamen center.
Round 1: Using flower color, MR, ch 1, 10 sc into ring, sl st to join. (10 sts)
A magic ring is an adjustable loop that lets you cinch the center hole closed after your first round, which keeps your flower center neat.
Round 2 (Petal foundation): *Ch 4, sk next st, sl st in next st; rep from * around. (5 loops)
Round 3 (Petals): Work into each ch-4 loop from Round 2: (sl st, hdc, 2 dc, tr, 2 dc, hdc, sl st) into loop. Rep in all 5 loops. (5 petals)
Petal shaping: After completing all 5 petals, gently stretch each petal outward with your fingers and press flat to encourage a natural hibiscus curve.
Stamen: Cut a 6cm piece of yellow yarn, fold in half, and knot 4-5 small loops along the folded end to mimic hibiscus stamens. Thread the tail through the flower center and secure on the back with a knot and a dab of glue.
Part 2: Leaves (make 10, Moss Green)
Row 1: Ch 10. Starting in 2nd ch from hook, sc in next 2 sts, hdc in next 2 sts, dc in next 3 sts, working into the second side of the same chain: dc in next 3 sts, hdc in next 2 sts, sc in next 2 sts, 3 sc in last st to turn the tip. (15 sts)
Working into the “second side of the chain” means flipping your starting chain over and working back down the unused bottom loops, which lets you build both sides of the leaf from one foundation chain.
Row 2: Ch 1, sl st evenly around the entire leaf edge to create a clean border. (15 sts)
Fasten off, leaving a 10cm tail for attaching to the vine.
Part 3: Vine / Stem (main structure)
Row 1: Using Moss Green, ch 60.
Row 2: Sc in 2nd ch from hook and in each ch across. (59 sts)
Fasten off. Lay the wire along the back of this strip.
Wire insertion: Cut a 55cm length of floral wire. Lay it along the center back of the sc strip. Fold the strip in half lengthwise around the wire and whip stitch the long edge closed using a tapestry needle, fully encasing the wire inside the crochet tube. This wire core lets the vine hold a curved, trailing shape on the wall. Leave 3cm of bare wire exposed at each end to anchor into the dowel later.
Assembly Steps
- Lay the wired vine strip flat and gently curve it into a loose S-shape, mimicking a natural trailing vine.
- Starting 3cm from the top of the vine, attach flowers using their yarn tails, spacing them roughly 8-10cm apart, alternating colors (red, pink, hot pink, red, pink, hot pink) down the length.
- Tuck 1-2 leaves behind or beside each flower and stitch them to the vine with the leftover tail, angling leaves outward for a natural look.
- Insert the exposed 3cm wire end at the top of the vine 1cm into the underside of the wooden dowel (drill a small pilot hole if needed) and secure with a drop of glue.
- Cut two 40cm lengths of jute cord. Tie one end of each around the dowel, 3cm in from each end.
- Bring both cord ends up to meet 15cm above the dowel and tie together in a knot to form a hanging loop.
- Trim any excess cord and fluff the leaves and petals into their final positions.
Beginner/Intermediate Tips
- When working the petal round, keep tension slightly loose on the treble crochet stitches so each petal curves outward rather than cupping inward.
- If your wire pokes through the crochet tube, wrap the wire tip with a small piece of tape before threading it through, then remove the tape once the wire is fully encased.
- Steam-block your leaves lightly (hover a steaming iron a few centimeters away, don’t touch) to help them lie flat before assembly.
- Space your flowers out on a flat surface first and take a photo before stitching them down permanently — it’s much easier to adjust placement this way.
Variations
- Sunset Ombré: Use a gradient of orange, coral, and yellow yarn for a tropical sunset color palette.
- Mini Version: Work with a 2.5mm hook and lace-weight yarn to create a smaller, delicate 30cm version for a shelf or mirror accent.
- Potted Display: Skip the dowel and instead anchor the wired stems into a small terracotta pot filled with dried moss for a tabletop piece.
- Single Stem Bookmark: Make just one flower and leaf on a short wired stem to create a coordinating bookmark or hair clip.
Save This Pattern
Love how this turned out? Save this pin so you can come back to this pattern anytime you’re ready to crochet your own hibiscus wall hanging. #FoodieRippleCrochet



