
The Best Fluffy Pancakes recipe you will fall in love with. Full of tips and tricks to help you make the best pancakes.

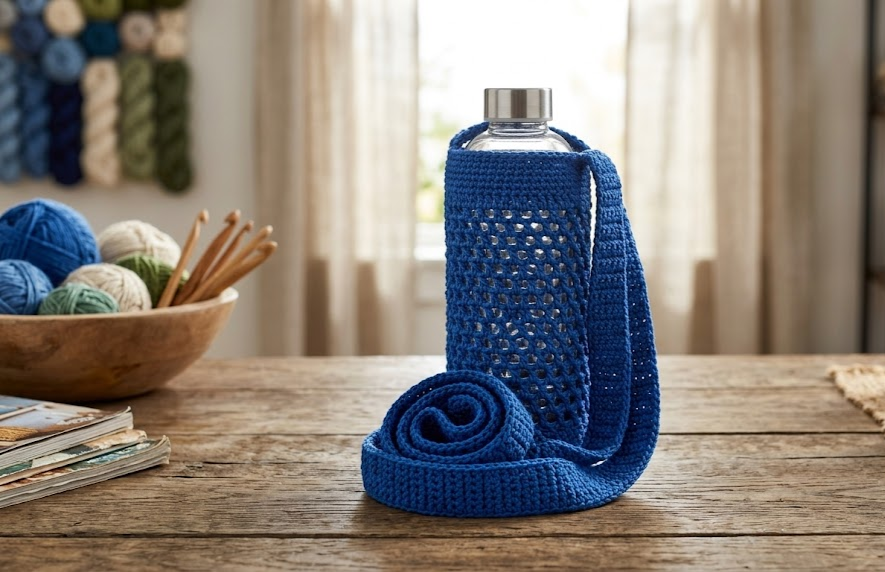
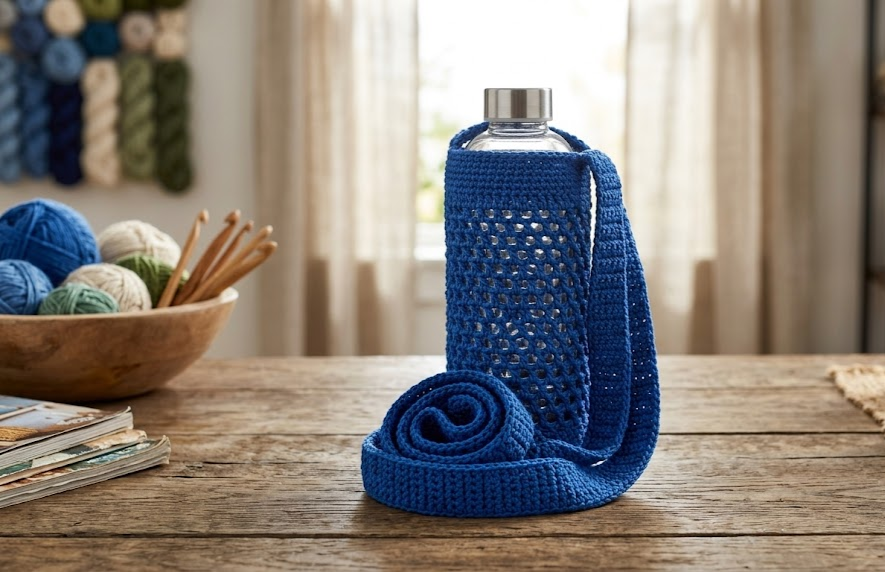
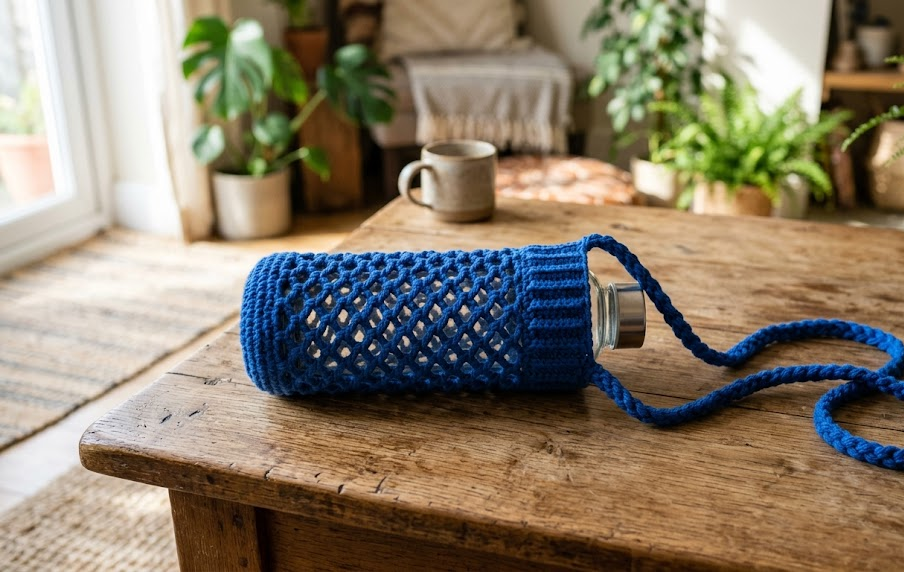
If you’re tired of carrying your water bottle in your hand or stuffing it into an overcrowded bag, this crochet water bottle holder is about to become your new favorite accessory. With its breezy mesh body, sturdy ribbed neckband, and a long strap that lets you wear it crossbody or over one shoulder, this project is as practical as it is beautiful. The open mesh pattern isn’t just decorative — it helps keep your bottle cool and lets moisture escape, so you’re not stuck with a soggy carrier after a hot walk.
This pattern is perfect for anyone who wants a portable, hands-free way to carry their water bottle to the gym, on hikes, to school, or on errands around town. It works up quickly, uses just one skein of yarn, and is a wonderful way to practice mesh stitch patterns while making something genuinely useful. Whether you’re relaxing on your porch with a cup of tea or tackling a weekend project list, this holder is a satisfying, fast finish that you’ll reach for again and again.
The construction is simple: you’ll crochet a ribbed neckband first, then work down into an open mesh body, and finish with a long strap that attaches to both sides. No complicated shaping, no fussy finishing — just clean, repeatable stitches that build up into something you’ll actually use every single day.
|
Difficulty
Intermediate
|
Time
4–5 Hours
|
Hook Size
4mm (G/6)
|
Yarn Weight
Worsted (#4)
|
Finished Size
25cm x 7cm, 85cm strap
|
Gauge
14 stitches x 8 rows = 10cm x 10cm in mesh pattern, using a 4mm hook and worsted weight yarn.
Gauge is not critical for this project since it’s a flexible carrier, but it will affect how snugly the finished holder fits your bottle. If your gauge runs looser, sizing down to a 3.5mm hook will tighten the mesh. If it runs tighter, sizing up to 4.5mm will loosen it.
Materials List
- Worsted weight yarn (Medium, #4), royal blue — approximately 120g (1 skein)
- 4mm (US G/6) crochet hook
- Yarn needle for weaving in ends
- Stitch marker
- Scissors
- Measuring tape
Abbreviations Table
| Abbreviation | Meaning |
|---|---|
| ch | chain |
| sl st | slip stitch |
| sc | single crochet |
| dc | double crochet |
| hdc | half double crochet |
| sp | space |
| st(s) | stitch(es) |
| rnd | round |
| rep | repeat |
| yo | yarn over |
| BLO | back loop only |
Pattern Instructions
Part 1: The Neckband (Ribbed Section)
The neckband sits at the top of the bottle, just under the cap, and gives the holder structure so it doesn’t sag.
Row 1: Ch 16, hdc in 2nd ch from hook and each ch across (15 sts). Ch 1, turn.
Rows 2–8: Working in BLO (back loop only — this means inserting your hook under only the back strand of each stitch instead of both loops, which creates the ridged rib texture), hdc in each st across (15 sts). Ch 1, turn.
Technique note: BLO ribbing is what gives this band its stretchy, corrugated look. Always check that you’re catching only the back loop, not both loops, for the full 7 rows.
After Row 8, do not fasten off. Fold the strip in half lengthwise and sl st the short edges together to form a ring. This ring will be the top opening of your holder, sized to fit snugly around your bottle’s neck.
Part 2: The Mesh Body
Now you’ll work stitches around the long edge of the neckband ring to build the open mesh body downward.
Rnd 1: Ch 1, work 30 sc evenly around one long edge of the neckband ring, join with sl st to first sc (30 sts).
Rnd 2: Ch 3 (counts as first dc), skip next st, *dc in next st, ch 1, skip next st; rep from * around, join with sl st to top of ch-3 (15 dc, 15 ch-1 sps).
Rnds 3–14: Ch 3 (counts as first dc), dc in first ch-1 sp from previous round, *ch 1, skip next dc, dc in next ch-1 sp; rep from * around, join with sl st to top of ch-3 (15 dc, 15 ch-1 sps).
Repeat Rnd 3–14 pattern until your mesh body measures approximately 18cm from the base of the neckband, checking length against your bottle as you go.
Part 3: The Base
Rnd 15: Ch 1, sc in each dc and each ch-1 sp around (30 sc).
Rnd 16: *Sc2tog, sc in next st; rep from * around (20 sts).
Rnd 17: *Sc2tog; rep from * around (10 sts).
Fasten off, leaving a 20cm tail. Weave the tail through the front loops of the remaining 10 stitches, pull tight to close the base, and secure with a knot. Weave in the end.
Part 4: The Strap
Row 1: Ch 8, sc in 2nd ch from hook and each ch across (7 sts). Ch 1, turn.
Rows 2–150: Sc in each st across (7 sts). Ch 1, turn.
Continue repeating Row 2 until the strap measures approximately 85cm long, or your desired length for crossbody wear. Fasten off, leaving a 15cm tail on each end for attaching.
Technique note: working this many rows in a straight strip is straightforward, but count your rows in batches of 10 with a stitch marker to avoid losing track over such a long strap.
Assembly Steps
- Lay your finished mesh body flat with the neckband ring at the top.
- Position one end of the strap at the neckband seam, overlapping it by about 2cm.
- Using a yarn needle and the tail end, sew the strap end securely to the inside of the neckband ring with 6–8 small whip stitches.
- Measure directly across to the opposite side of the neckband ring (roughly 180 degrees around) and repeat step 3 to attach the second strap end, making sure the strap isn’t twisted.
- Weave in all remaining ends on the inside of the piece so nothing shows on the outside.
- Insert your bottle through the neckband opening to test the fit — the ribbing should stretch snugly around the neck of the bottle without gapping.
Beginner/Intermediate Tips
- Count your ch-1 spaces at the end of every mesh round before moving on — it’s easy to accidentally skip one, which throws off the whole pattern.
- When working the BLO ribbing, hold your work close to your eyes for the first row or two until identifying the back loop feels automatic.
- If your strap curls while working the long rows, block it flat with a warm iron and damp cloth before attaching it to the body.
- Use a stitch marker to mark the beginning of each mesh round — with no obvious seam, it’s easy to lose your place.
Variations
- Two-tone version: Work the neckband in one color and switch to a contrasting color for the mesh body for a bold color-block look.
- Chunky mini version: Use bulky yarn and a 6mm hook for a smaller, quicker-to-make holder that fits a smaller bottle.
- Beaded strap: Thread wooden or glass beads onto your yarn before starting the strap for a boho, festival-ready accessory.
- Fringe finish: Add a row of fringe tassels around the base for extra texture and movement.
Save This Pattern
Love this project? Save this pin so you can find it again next time you’re ready to crochet! Tag your finished holder with #FoodieRippleCrochet — we’d love to see your version.



