
The Best Fluffy Pancakes recipe you will fall in love with. Full of tips and tricks to help you make the best pancakes.

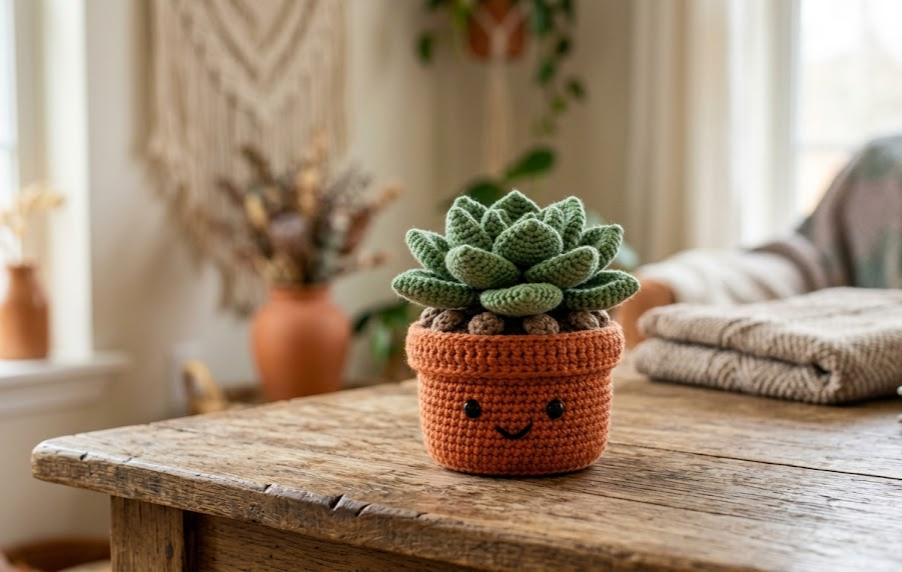
If you’ve ever killed a real succulent (no judgment — we’ve all been there), this crochet kawaii succulent planter is your forever-plant solution. With its layered rosette leaves, cheerful embroidered face, and cozy terracotta-style pot, this little planter brings personality to any windowsill, desk, or bookshelf without ever needing water, sunlight, or forgiveness. This pattern is perfect for intermediate crocheters who’ve made a few amigurumi pieces before and are ready to practice spiral shaping, layered petal construction, and simple face embroidery. The finished piece works up in an afternoon and makes a wonderful handmade gift, a plant-lover’s desk companion, or a sweet addition to a “no-kill garden” collection you can build one pot at a time.
|
Difficulty
Intermediate
|
Time
4–5 Hours
|
Hook Size
3.5mm
|
Yarn Weight
Worsted (4)
|
Finished Size
10cm x 9cm
|
Gauge
17 stitches x 18 rows = 10cm x 10cm square in single crochet, using a 3.5mm hook and worsted weight (Weight 4) yarn. Gauge is not critical for this project since it’s worked in the round and stuffed, but matching gauge will help you hit the finished size listed above. If your piece is coming out looser or tighter than expected, size down or up a half hook size.
Materials List
- Worsted weight yarn (Weight 4), approx. 40g in green (main succulent color)
- Worsted weight yarn, approx. 25g in terracotta-orange (pot color)
- Small amount of black yarn or embroidery floss (face)
- Small amount of pink yarn or floss (cheek blush, optional)
- Small amount of white yarn or floss (eye highlights, optional)
- 3.5mm crochet hook
- Yarn needle
- Polyester fiberfill stuffing
- Stitch marker
- Scissors
- Small amount of dark brown or black yarn (for the “soil” top layer, optional)
Abbreviations Table
| Abbreviation | Meaning |
|---|---|
| ch | chain |
| sc | single crochet |
| inc | increase (2 sc in same stitch) |
| dec | invisible decrease |
| sl st | slip stitch |
| st(s) | stitch(es) |
| rnd | round |
| MR | magic ring |
| BLO | back loop only |
| rep | repeat |
| [ ] | repeat instructions inside brackets the stated number of times |
Pattern Instructions
Technique Note — Magic Ring (MR): A magic ring lets you start a round with no visible hole in the center. Wrap yarn around two fingers, insert hook through the loop, pull up a loop, and work your first round of stitches into the ring before pulling the tail to close it.
Technique Note — Invisible Decrease (dec): Insert hook into front loop only of next stitch, then front loop only of the following stitch, yarn over and pull through both loops, then yarn over and pull through the last loop. This creates a smoother decrease than a standard sc2tog.
Technique Note — Back Loop Only (BLO): Working into only the back loop of each stitch (instead of both loops) creates a visible ridge line, useful for defining the rim of the pot.
Part 1: The Pot (make 1, terracotta-orange yarn)
Rnd 1: MR, 6 sc into ring (6)
Rnd 2: inc in each st around (12)
Rnd 3: [sc 1, inc] rep around (18)
Rnd 4: [sc 2, inc] rep around (24)
Rnd 5: [sc 3, inc] rep around (30)
Rnd 6: [sc 4, inc] rep around (36)
Rnd 7–11: sc in each st around (36) — 5 rounds total, this forms the base and lower body
Rnd 12: BLO sc in each st around (36) — creates the rim ridge line
Rnd 13–14: sc in each st around (36)
Fasten off, leaving a long tail for assembly.
Part 2: Face (embroidered onto pot, black yarn/floss)
Using a yarn needle threaded with black yarn, embroider two small oval eyes about 2cm apart, centered on rounds 8–9 of the pot. Below the eyes, embroider a simple curved smile using backstitch. Optionally add tiny white highlight dots to each eye and pink blush marks below the eyes using satin stitch for a rosy cheek effect.
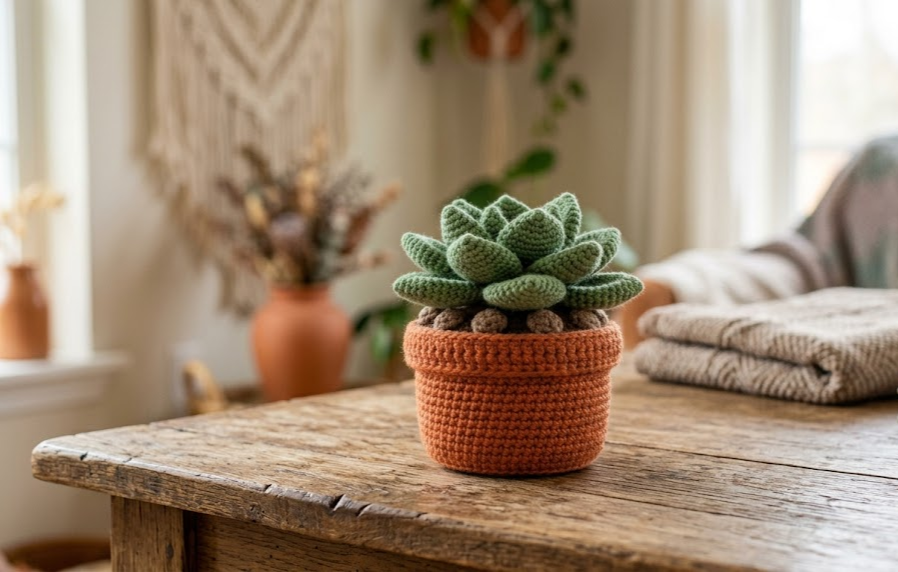
Part 3: Succulent Leaves — Petal Layer A (make 5, green yarn)
Ch 8.
Row 1: Starting in 2nd ch from hook, sc in each ch across (7 sts).
Technique Note — Working Along a Chain: After completing Row 1 along the top of the chain, you will rotate the piece and work back down the opposite (bottom) side of the same foundation chain to close the petal into a leaf shape.
Row 2: Rotate piece, sc in each st along bottom of starting chain (7 sts). Do not turn.
Fasten off, leaving a 15cm tail for assembly. Fold the flat piece slightly to create a gentle petal curve.
Repeat to make 5 petals total for the outer layer.
Part 4: Succulent Leaves — Petal Layer B (make 5, green yarn, slightly smaller)
Ch 6.
Row 1: Starting in 2nd ch from hook, sc in each ch across (5 sts).
Row 2: Rotate piece, sc in each st along bottom of starting chain (5 sts).
Fasten off, leaving a 12cm tail.
Repeat to make 5 petals total for the inner layer.
Part 5: Succulent Leaves — Center Bud (make 3, green yarn)
Ch 4.
Row 1: Starting in 2nd ch from hook, sc in each ch across (3 sts).
Row 2: Rotate piece, sc in each st along bottom of starting chain (3 sts).
Fasten off, leaving a 10cm tail.
Assembly Steps
- Stuff the pot piece firmly with fiberfill, filling it about 80% full so it holds its shape but the top stays slightly open to anchor the leaves.
- Using the fastened-off tail, sew the top opening of the pot mostly closed, leaving a 3cm gap in the center for inserting leaf tails.
- Arrange the 5 Layer A petals in a circle around the outer rim of the pot’s opening, with each petal tail pushed 1cm down into the stuffing and stitched in place. Space them evenly, about 1.5cm apart at the base.
- Layer the 5 Layer B petals on top of and slightly overlapping the Layer A petals, offsetting each one so it sits in the gap between two outer petals. Stitch each tail down into the same central point.
- Finish by tucking the 3 center bud pieces into the very middle, stitching them 0.5cm deep so they stand upright, creating the illusion of a young rosette center.
- Weave in all remaining tails through the base of the pot.
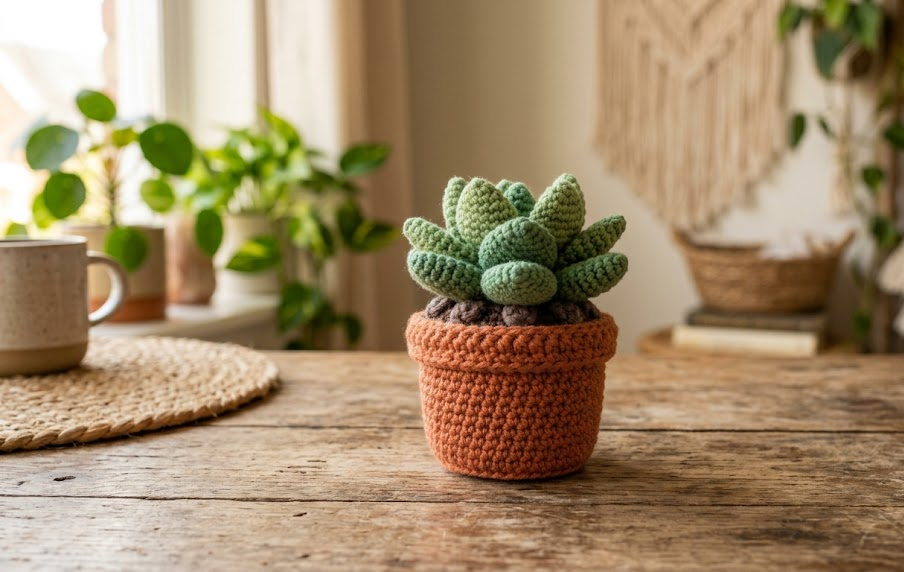
- Optional: embroider a few short straight stitches in dark brown yarn across the visible stuffing gap to look like a thin layer of soil peeking between the leaves.
Beginner/Intermediate Tips
- Curl each petal gently between your fingers before attaching it — this pre-shapes the leaf so it holds a natural, slightly cupped succulent form instead of lying flat.
- Attach petals in layers from outer to inner, not all at once — this keeps your rosette symmetrical and stops leaves from sliding out of place while you sew.
- If your invisible decreases are leaving small holes on the pot base, snug up the last stitch a little tighter than usual; this is common with worsted yarn at this hook size.
- Use stitch markers to mark the start of each round on the pot — with 14 rounds in solid color, it’s easy to lose track.
Variations
- Color Swap: Make the pot in dusty blue or cream instead of terracotta for a more pastel, farmhouse look.
- Size Up: Add 2 more rounds to the pot before the rim, and make 3 extra petals for a fuller, larger succulent.
- Hanging Version: Skip the flat pot base and instead crochet a small round pouch with a 3-chain loop at the top to hang the succulent as a mini wall planter.
- Multi-Pot Family: Make three planters in graduating sizes (using fewer stitches per round) to create a nesting succulent trio for a shelf display.
Save this pattern now so you don’t lose it in your feed — pin it to your crochet board and tag your finished piece with #FoodieRippleCrochet!



