
The Best Fluffy Pancakes recipe you will fall in love with. Full of tips and tricks to help you make the best pancakes.

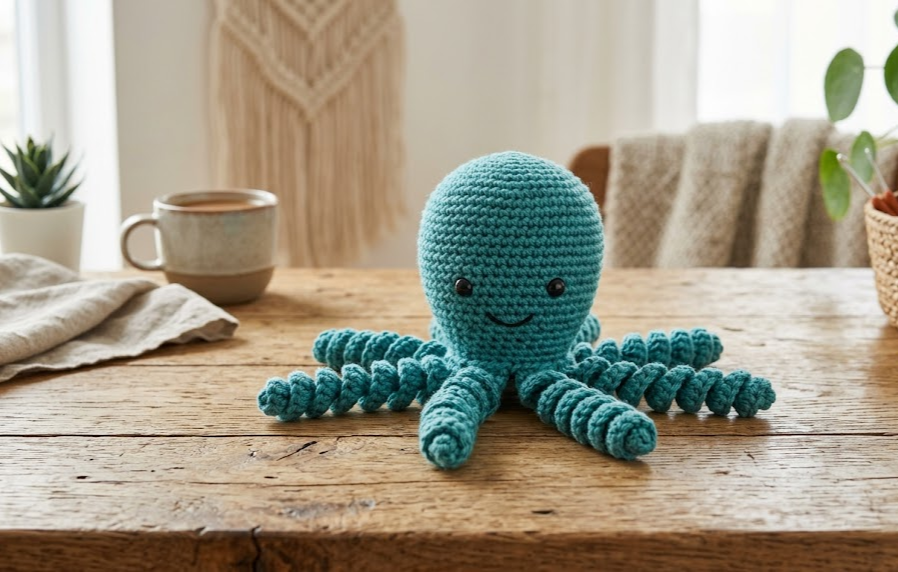
If you’ve been searching for a crochet project that’s equal parts whimsical and satisfying to make, this teal octopus amigurumi checks every box. With its plump rounded head and eight playfully curled tentacles, this little sea creature makes a wonderful shelf sitter, a nursery decoration, or a handmade gift for anyone who loves ocean-themed crafts. The spiral tentacles give this pattern a fun textural challenge that’s a step up from a basic amigurumi ball, making it perfect for confident beginners ready to try something new or intermediate crocheters looking for a quick, rewarding weekend make.
This octopus works up in a rich teal worsted weight yarn, though it looks just as charming in coral, purple, or even a soft pastel palette. The tentacles are worked flat and curled using a simple slip stitch technique that gives them their signature spiral shape without any wire or special tools. Once assembled, this little guy has just enough personality to become a favorite on any craft shelf.
|
Difficulty
Intermediate
|
Time
5-6 Hours
|
Hook Size
3.5mm
|
Yarn Weight
Worsted (4)
|
Finished Size
13cm x 28cm
|
Gauge
18 stitches x 20 rows = 10cm x 10cm square in single crochet, worked with a 3.5mm hook and worsted weight (Medium #4) yarn. Gauge is not critical for this project since it’s worked in the round and stuffed, but matching gauge will keep your finished octopus close to the size listed below.
Materials List
- Worsted weight yarn (Medium #4) in teal — approximately 120g / 250 yards
- Small amount of black or dark brown worsted yarn for eye embroidery (or 2 x 8mm safety eyes)
- 3.5mm crochet hook
- Polyester fiberfill stuffing
- Stitch marker
- Yarn needle for weaving in ends and embroidery
- Scissors
Abbreviations Table
| Abbreviation | Meaning |
|---|---|
| ch | chain |
| sc | single crochet |
| inc | increase (2 sc in same stitch) |
| dec | invisible decrease |
| sl st | slip stitch |
| st(s) | stitch(es) |
| rnd | round |
| MR | magic ring |
| BLO | back loop only |
| ( ) | stitch count at end of round |
Technique note: A magic ring (MR) is an adjustable loop used to start amigurumi pieces without leaving a hole in the center. An invisible decrease (dec) is worked by inserting your hook into the front loops of the next two stitches, then pulling through both at once, which keeps decreases smooth and nearly invisible.
Pattern Instructions
Part 1: Head/Body
Worked in a continuous spiral. Use a stitch marker to track the start of each round.
Rnd 1: MR, 6 sc into ring (6)
Rnd 2: inc in each st around (12)
Rnd 3: (sc, inc) repeat around (18)
Rnd 4: (sc 2, inc) repeat around (24)
Rnd 5: (sc 3, inc) repeat around (30)
Rnd 6: (sc 4, inc) repeat around (36)
Rnd 7: (sc 5, inc) repeat around (42)
Rnd 8-14: sc around, no increases (42) — 7 rounds even
Rnd 15: (sc 5, dec) repeat around (36)
Rnd 16: (sc 4, dec) repeat around (30)
At this point, place safety eyes (or plan embroidered eye placement) between rounds 10-11, spaced about 6 stitches apart. Begin stuffing firmly as you continue.
Rnd 17: (sc 3, dec) repeat around (24)
Rnd 18: (sc 2, dec) repeat around (18)
Finish stuffing the head firmly, making sure it holds a rounded shape.
Rnd 19: (sc 1, dec) repeat around (12)
Rnd 20: dec around (6)
Fasten off, leaving a long tail. Cinch the remaining 6 stitches closed and weave in the end.
Part 2: Tentacles (Make 8)
Each tentacle is worked flat in rows, then curled and tacked in place during assembly.
Ch 16.
Row 1: Starting in 2nd ch from hook, sc in each ch across (15)
Technique note: Starting in the 2nd chain from the hook means skipping the very first loop closest to your hook, which becomes your turning chain equivalent.
Row 2: ch 1, turn, sc in BLO across (15)
Technique note: Working in the back loop only (BLO) means inserting your hook under just the back strand of each stitch instead of both loops, which creates a subtle ridge and helps the tentacle curl naturally.
Row 3: ch 1, turn, sc in BLO across, then sl st down the opposite side of the starting chain (15, plus sl st edge)
Fasten off, leaving a 15cm tail for attaching to the body. Do not stuff the tentacles — they should stay flat and flexible so they curl nicely.
Repeat this section 8 times total to make all tentacles.
Assembly Steps
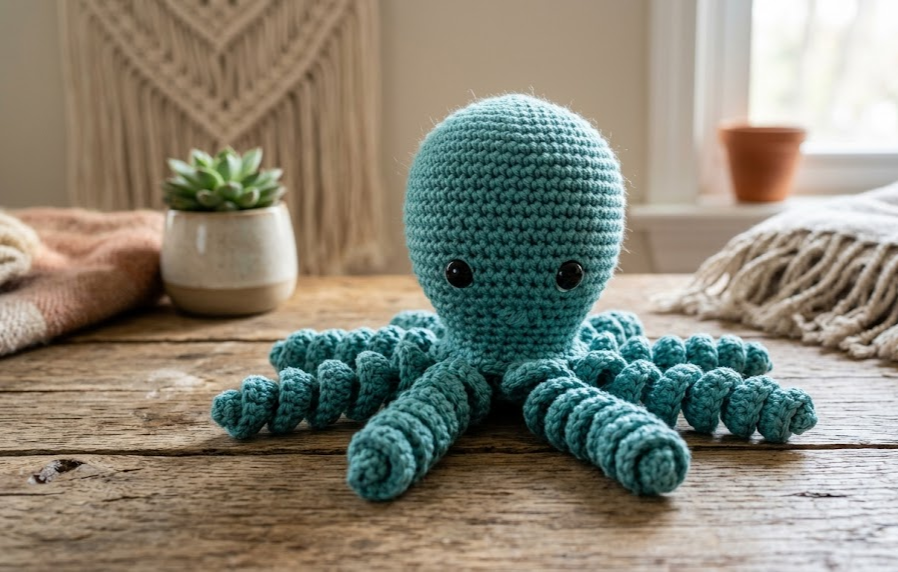
- Lay the finished head/body with the cinched-closed bottom facing up — this is where tentacles attach.
- Arrange all 8 tentacles evenly around the base opening, spacing them approximately 2cm apart around the circumference.
- Using the yarn tail on each tentacle, sew the flat end of the tentacle to the base of the head, overlapping onto the body by about 1cm for a secure hold.
- Once all 8 tentacles are attached, gently curl the tip of each tentacle inward (like a spiral) and take one small tacking stitch through the curl to hold the shape permanently. Curl 2-3 tentacles inward and let 5-6 trail outward for a natural, playful pose.
- If using embroidered eyes instead of safety eyes, use black yarn and satin stitch to create two small ovals about 1.5cm apart on the front of the head, positioned around round 10-11.
- Weave in all remaining yarn tails securely and trim.
Beginner/Intermediate Tips
- If your tentacles are curling too tightly, try skipping the BLO step and work both loops instead — this relaxes the curl.
- Stuff the head before closing the last few rounds; it’s much harder to add stuffing once the opening gets too small.
- Keep tension slightly tighter on the tentacle rows than you normally would — this helps them hold their curled shape once tacked.
- If your safety eyes don’t come with washers, secure them from the inside with a small felt square and a few stitches instead.
Variations
- Rainbow Octopus: Make each of the 8 tentacles a different color for a fun, colorful twist.
- Mini Octopus Keychain: Use a lighter weight yarn (DK or sport weight) with a smaller hook to make a pocket-sized version perfect for bag charms.
- Ombre Tentacles: Use a color-changing or gradient yarn for the tentacle rows so each one fades from dark to light.
- Sparkle Octopus: Add a strand of fine metallic thread alongside your main yarn for a shimmery, under-the-sea look.
Pinterest CTA
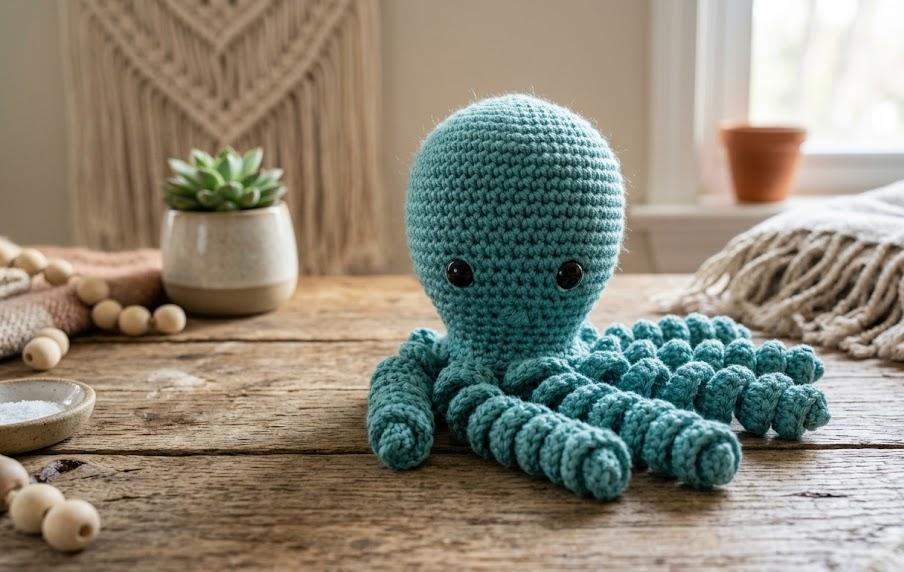
Loved this pattern? Save it to your Pinterest board so you can come back to it anytime you’re ready to crochet your own teal octopus amigurumi! #FoodieRippleCrochet



