
The Best Fluffy Pancakes recipe you will fall in love with. Full of tips and tricks to help you make the best pancakes.

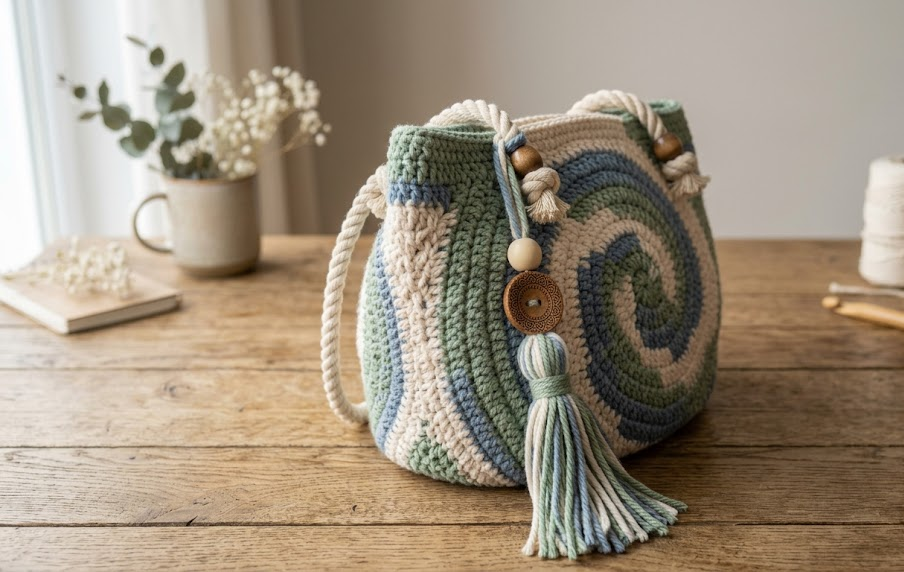
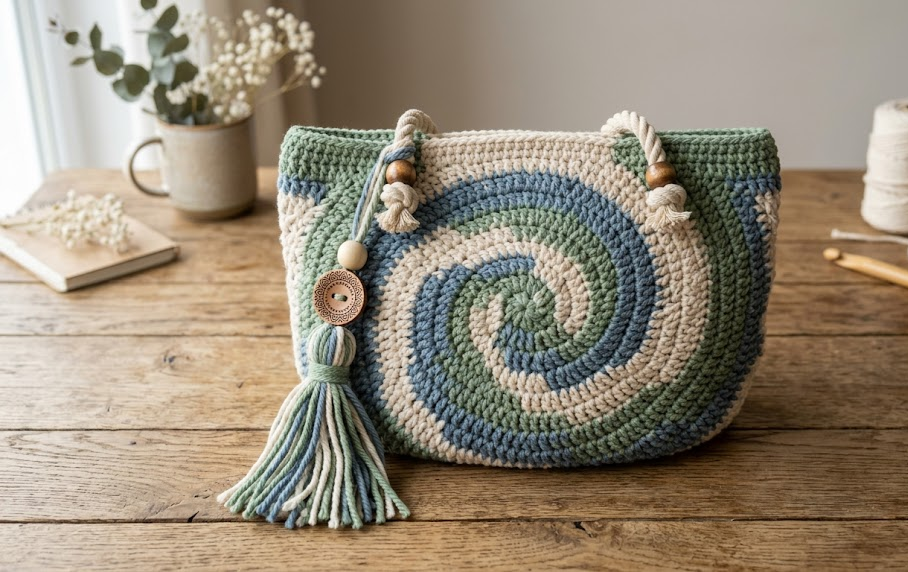
There’s something deeply satisfying about watching a crochet project spiral into shape right before your eyes — literally. This Spiral Swirl Crochet Tote Bag combines soft sage green, dusty blue, and warm cream yarn into a hypnotic pinwheel design that grows from a tiny center ring into a full, functional bag base. Finished off with sturdy rope handles, natural wooden beads, and a swingy yarn tassel, this tote is equal parts eye-catching accessory and everyday workhorse.
This pattern is ideal for the intermediate crocheter who has mastered basic single crochet and is ready to take on color changes and simple color management. If you’ve made an amigurumi or two and are comfortable reading a pattern without hand-holding on every stitch, you’re ready for this project. The spiral technique used here is more approachable than it looks — there’s no complicated tapestry crochet involved, just strategic color switching worked in continuous rounds.
Whether you’re building it for a farmer’s market run, a beach day, or simply as a statement piece to sling over your shoulder on a coffee run, this bag holds its shape beautifully thanks to a firm gauge and sturdy worsted weight yarn. Let’s get into the details.
|
Difficulty
Intermediate
|
Time
8–10 Hours
|
Hook Size
4mm (G/6)
|
Yarn Weight
Worsted (#4)
|
Finished Size
30cm x 25cm
|
Gauge
16 sts x 18 rows = 10cm x 10cm (4in x 4in) in single crochet, worked in continuous rounds, using a 4mm (US G/6) hook and worsted weight (Aran, #4) yarn.
Always make a gauge swatch before starting. If your swatch is coming out larger than 10cm, size down to a 3.5mm hook. If smaller, size up to a 4.5mm hook. Gauge matters most here for structural firmness — a looser gauge will make the bag body floppy and less able to hold its shape.
Materials List
- Worsted weight yarn (Aran, #4) in three colors:
- Sage green — approximately 150g
- Dusty blue — approximately 150g
- Cream — approximately 100g
- 4mm (US G/6) crochet hook
- Yarn needle for weaving in ends
- Stitch marker
- Two lengths of cotton rope, 60cm each, for handles
- Two wooden craft beads with a hole large enough to thread the rope through
- Scissors
- Optional: fabric bag liner and craft glue, for a finished interior
Abbreviations Table
| Abbreviation | Meaning |
|---|---|
| ch | chain |
| sc | single crochet |
| sc2tog | single crochet 2 together (invisible decrease) |
| inc | increase (2 sc in same stitch) |
| st(s) | stitch(es) |
| rnd(s) | round(s) |
| sl st | slip stitch |
| MR | magic ring |
| BLO | back loop only |
| ( ) | stitch count at end of round |
Pattern Instructions
Part 1: The Spiral Base
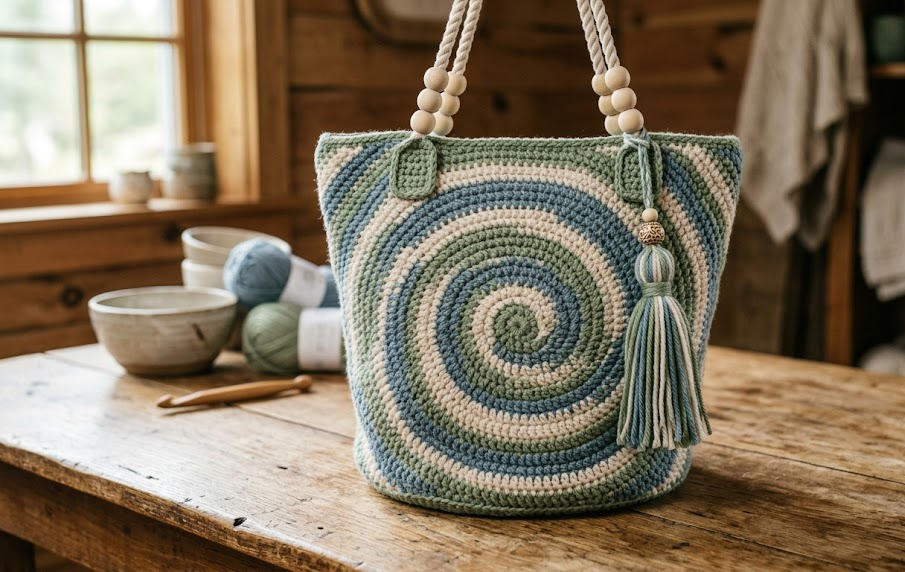
The base is worked in continuous rounds (no joining, no turning) using a magic ring start. A magic ring lets you crochet your first round of stitches into an adjustable loop, then pull it snug afterward, closing the center hole completely.
Rnd 1: Using cream, MR, 6 sc into ring. Pull ring closed. (6)
Rnd 2: Inc in each st around. (12)
Rnd 3: *Sc 1, inc; repeat from * around. (18)
Rnd 4: *Sc 2, inc; repeat from * around. (24)
Rnd 5: Switch to dusty blue. *Sc 3, inc; repeat from * around. (30)
Rnd 6: *Sc 4, inc; repeat from * around. (36)
Rnd 7: *Sc 5, inc; repeat from * around. (42)
Rnd 8: Switch to sage green. *Sc 6, inc; repeat from * around. (48)
Rnd 9: *Sc 7, inc; repeat from * around. (54)
Rnd 10: *Sc 8, inc; repeat from * around. (60)
To create the spiral illusion, colors are switched every 3 rounds but the increase points stay staggered, causing each color band to shift position and curve outward. Continue this pattern — increasing by 6 sts every round and rotating through cream, dusty blue, and sage green every 3 rounds — until your base measures approximately 30cm across (roughly Rnd 18, ending around 108 sts). Place a stitch marker in your last stitch of the base to mark the transition point to the sides.
Part 2: The Bag Sides
Rnd 19 (transition rnd): Working into BLO only, sc in each st around. (108) Working in the back loop only means you insert your hook under just the back strand of each stitch instead of both loops — this creates a visible ridge that marks a clean fold line between the base and the sides.
Rnds 20–32: Sc in each st around, continuing your established color sequence (3 rounds cream, 3 rounds dusty blue, 3 rounds sage green, repeat) to keep the spiral effect climbing up the sides. (108 throughout)
Rnd 33 (final rnd): Sl st in each st around to create a neat finished edge. Fasten off, leaving a 30cm tail for weaving in.
The sides should measure approximately 22–25cm tall. Adjust the number of rounds if you’d like a deeper or shallower bag.
Part 3: Handle Rope Wrapping
For each handle (make 2):
Cut a 60cm length of cotton rope. Using cream yarn, wrap the yarn tightly and evenly around the rope, covering it completely, working from one end to the other. Secure the starting and ending yarn tails with a few small hidden knots and trim close. This wrapped section will become the visible handle.
Part 4: Tassel
Wrap dusty blue yarn around a 10cm piece of cardboard 25 times. Slide the loops off carefully. Tie a separate strand tightly around the top of the bundle, leaving long tails for attaching. Wrap another strand around the bundle about 1.5cm below the top to form the tassel “neck,” and knot securely. Cut the bottom loops open and trim ends even. Tassel should measure approximately 8cm long.
Assembly Steps
- Fold the rope handle ends under by 2cm and stitch them securely to the inside top edge of the bag, positioning each handle end about 8cm apart on opposite sides of the bag opening.
- Thread one wooden bead onto each rope handle, sliding it down to sit approximately 3cm above the bag rim, and secure in place with a few small stitches through the rope wrapping so the bead doesn’t slide.
- Repeat handle attachment on the opposite side of the bag rim, ensuring both handle loops are even in height (approximately 15cm from bag rim to top of handle arc).
- Attach the finished tassel to the bottom corner of the bag using the long tail strands, weaving through 3–4 stitches and knotting securely on the inside.
- Weave in all remaining yarn ends using a yarn needle, running each tail through several stitches on the wrong side before trimming.
- Optional: cut a fabric liner to match the interior dimensions of the bag, hem the edges, and glue or hand-stitch it just inside the rim for added structure and a finished look.
Beginner/Intermediate Tips
- When switching colors, always drop the old color and pick up the new one during the last yarn-over of the final stitch in the old color — this keeps color transitions clean and prevents visible gaps.
- Don’t cut your yarn between color changes if you’re likely to use that color again within the next few rounds; simply carry it loosely up the inside of the work.
- If your spiral rounds start to look uneven, check that your increases are staggered (not stacked directly on top of each round’s increase point) — this staggering is what creates the curved swirl look rather than a pie-slice pattern.
- Use a stitch marker at the start of every round since this pattern is worked continuously with no joining — it’s easy to lose track of where a round begins.
Variations
- Two-Tone Swirl: Use just two contrasting colors (like terracotta and cream) instead of three for a bolder, simpler spiral.
- Mini Version: Reduce the base to 40 sts (Rnd 6) before starting the sides for a small crossbody pouch.
- Chunky Yarn Upgrade: Work the same pattern in bulky weight yarn with a 6mm hook for an oversized, textured statement tote.
- Beaded Handles: Add 3–4 wooden beads spaced evenly along each rope handle instead of just one for a boho-market look.
- Ombré Version: Instead of 3 distinct colors, use 5–6 shades of the same color family transitioning gradually for a sunset-style ombré swirl.
Save this pattern now so you don’t lose it in your feed — and tag your finished tote when you share it! #FoodieRippleCrochet



