
The Best Fluffy Pancakes recipe you will fall in love with. Full of tips and tricks to help you make the best pancakes.

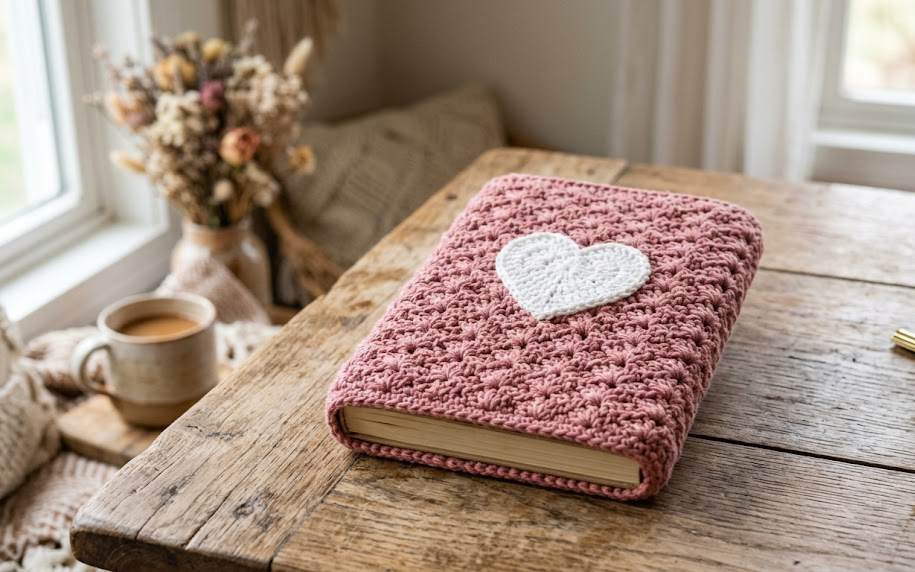
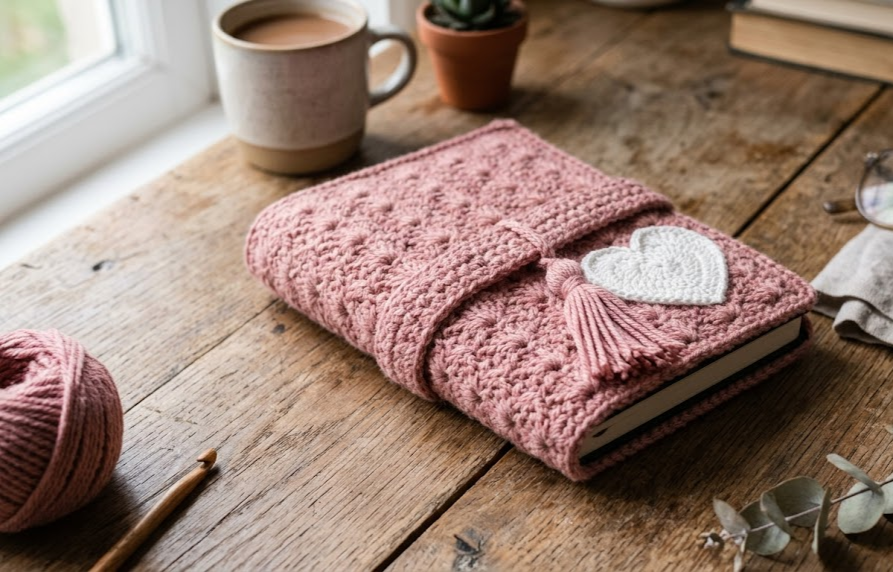
If you’ve ever wanted a journal cover that feels like a hug every time you open your notebook, this is the pattern for you. This dusty rose crochet journal cover wraps snugly around your favorite notebook, planner, or sketchbook, and finishes off with a sweet white heart appliqué on the front panel and a wraparound tie closure with a tiny tassel. It’s soft, textured, and endlessly giftable — perfect for journaling enthusiasts, teachers, book club friends, or anyone who wants a little handmade charm on their desk.
This project is a wonderful “next step” pattern for crocheters who’ve mastered the basics and are ready to combine shaping, appliqué work, and finishing techniques into one cohesive piece. The shell stitch panel gives it beautiful texture without being fussy, and the heart appliqué is a simple standalone piece you can whip up in under thirty minutes. Whether you’re making this as a gift or treating yourself to a prettier way to carry your thoughts, this cover will quickly become your favorite accessory.
By the end of this pattern, you’ll have a fully lined-feeling, structured book cover that slips on and off your notebook easily, protects the corners, and adds a cozy, boho touch to your everyday carry.
|
Difficulty
Intermediate
|
Time
6–8 Hours
|
Hook Size
3.5mm (E/4)
|
Yarn Weight
DK (Light Worsted)
|
Finished Size
21 x 14cm
|
Gauge
20 stitches x 22 rows = 10cm x 10cm in shell stitch pattern, using a 3.5mm hook and DK weight yarn.
Always make a gauge swatch before starting — cover fit depends on accurate gauge more than almost any other project, since it needs to wrap snugly around your notebook.
Materials List
- DK weight yarn (light worsted, #3), approximately 150g in dusty rose/blush pink
- Small amount of white DK weight yarn for the heart appliqué (under 10g)
- 3.5mm (US E/4) crochet hook
- Yarn needle for weaving in ends and sewing the appliqué
- Stitch markers (at least 2)
- Scissors
- Measuring tape
- Notebook or journal to fit (standard A5 size, approximately 21cm x 14cm x 2cm thick, works well)
Abbreviations
| Abbreviation | Meaning |
|---|---|
| ch | chain |
| sc | single crochet |
| dc | double crochet |
| sl st | slip stitch |
| sk | skip |
| st(s) | stitch(es) |
| sp | space |
| shell | 5 dc worked into the same stitch |
| rep | repeat |
| RS | right side |
| WS | wrong side |
| BLO | back loop only |
Pattern Instructions
Part 1: Main Cover Panel
Worked flat in one long rectangle that wraps around the notebook (front panel, spine, back panel, plus two inner flaps to hold the notebook in place).
Ch 43.
Row 1 (RS): Sc in 2nd ch from hook and in each ch across (42 sts).
Row 2: Ch 1, turn. Sc in each st across (42 sts).
Row 3 (Shell Row): Ch 3 (counts as first dc), sk next st, *shell in next st, sk next 2 sts; rep from * across to last 2 sts, dc in next st, sk last st, dc in top of turning ch (42 sts).
Row 4: Ch 1, turn. Sc in each st and each shell st across, working 1 sc into each of the 5 dc that make up a shell (42 sts).
Rep Rows 3–4 until piece measures 46cm long (this covers front flap, back flap, front panel, spine, and back panel in one continuous strip). End after a Row 4.
Final Row: Ch 1, turn. Sc in each st across (42 sts). Fasten off, leaving a 30cm tail for sewing.
Part 2: Inner Flaps (make 2)
These are smaller rectangles sewn to the inside edges of the main panel to create pockets that hold the notebook’s front and back covers in place.
Ch 25.
Row 1: Sc in 2nd ch from hook and in each ch across (24 sts).
Rows 2–14: Ch 1, turn. Sc in each st across (24 sts).
Fasten off, leaving a 20cm tail for sewing.
Part 3: Heart Appliqué
Worked in white yarn, in the round, starting with two half-circles joined at the base.
Round 1: Using white yarn, ch 4, join with sl st to form a ring. Ch 1, 8 sc into ring, join with sl st to first sc (8 sts).
Make 2 of these small rings — these will become the two lobes of the heart.
Join the two rings together with a sl st where they touch, forming a figure-eight base for the heart top.
Round 2: Working around the outer edge of both joined rings, ch 1, sc evenly around the entire outer shape, decreasing 2 sts at the center dip between the lobes and increasing gradually toward the bottom point to shape the heart. Work approximately 22 sc total around (22 sts).
Round 3: Sl st into the point at the bottom to close it neatly. Fasten off, leaving a 20cm tail.
Technique note: shaping a heart from two joined rings is easier than it sounds — the key is working slightly more stitches around the top curves and pulling the bottom point tight with your fastening-off stitch.
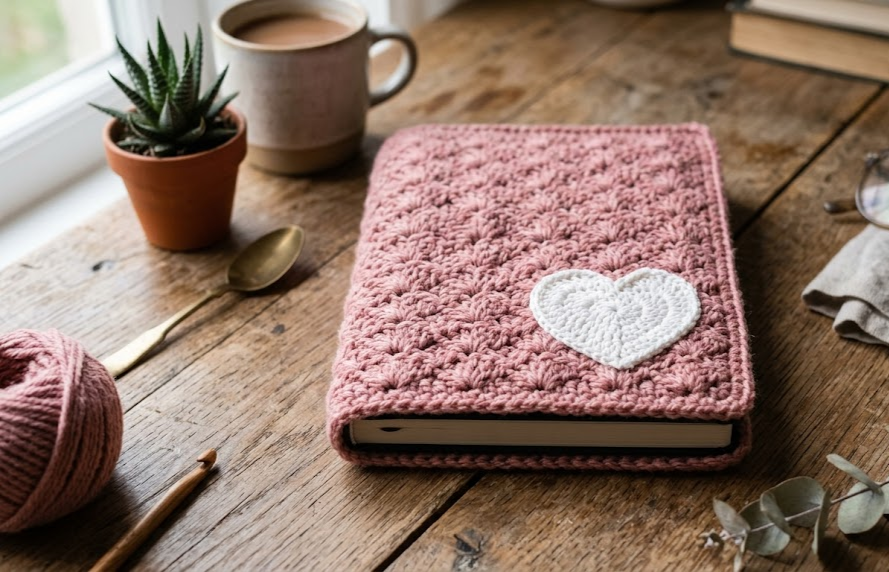
Weave in the starting tail. Use the fastening tail to sew the heart flat onto the center of the front panel once the main cover is complete.
Assembly
- Lay the main panel flat, RS facing up. Measure and mark the center point (23cm from either end) — this will be the spine.
- Fold the panel so the two 21cm sections face each other, spine in the middle, wrong sides touching where they’ll meet the notebook covers.
- Position one inner flap along the inside edge of the front panel, lining up the outer edges. Using the tail from the flap, whipstitch the flap to the panel along the top, bottom, and outer edge only, leaving the inner edge open to slide the notebook cover into (this creates a 24cm x 14cm pocket).
- Repeat Step 3 on the back panel with the second inner flap.
- Center the heart appliqué on the front panel, approximately 10cm from the top edge and centered side to side. Pin in place, then whipstitch around the entire outer edge using the appliqué’s tail.
- For the closure strap, chain 60, then sc back across each chain (59 sts). Fasten off, leaving both ends long. Attach one end to the spine edge of the cover, centered vertically. Weave the free end around the front of the notebook when closed and tie in a bow or knot.
- Weave in all remaining ends securely.
- Insert your notebook’s front and back covers into the two flap pockets. The cover should sit snugly with the spine strip running along the notebook’s spine.
Tips
- If your notebook is thicker or thinner than 2cm, adjust the length of your starting chain in Part 1 by adding or subtracting 4–6 stitches per cm of thickness difference.
- Keep tension consistent through the shell stitch rows — shells can pull tighter than plain sc rows, so check your row width every few rows against your gauge swatch.
- Block the finished panel lightly before assembly; this helps the shell stitch texture lie flat and evens out the width along the full 46cm length.
- When sewing the heart appliqué, use a whipstitch close to the edge and pull gently but firmly so the heart sits flat without puckering the background fabric.
Variations
- Color-block version: Work the spine section in a contrasting color for a two-tone look.
- Mini size: Reduce the starting chain to fit a pocket-sized notebook (A6), and shrink the heart appliqué by working one fewer round.
- Floral version: Swap the heart appliqué for a simple 5-petal crochet flower for a different aesthetic.
- Button closure: Skip the tie strap and instead add a crochet button loop with a wooden button for a more structured, vintage look.
Save this pattern to your Pinterest board so you always have it on hand, and tag your finished cover with #FoodieRippleCrochet — I’d love to see your version!



