
The Best Fluffy Pancakes recipe you will fall in love with. Full of tips and tricks to help you make the best pancakes.

There’s something irresistibly charming about a crochet bandana scarf — that playful triangle shape tied at the neck, equal parts cozy and cool. This particular design takes the classic bandana silhouette and elevates it with a lattice of joined flower granny motifs, each one blooming with a tiny center flower surrounded by delicate picot lace. The result is a scarf that feels handmade in the very best way: textured, romantic, and a little bit vintage.
This pattern is perfect for the crocheter who has mastered the basics and is ready to try motif joining. If you’ve made granny squares before but never linked them into a finished garment, this project is your next step. It’s also a wonderful stash-buster if you have leftover DK weight yarn in a color you love, and it makes a gorgeous handmade gift for birthdays, holidays, or “just because” occasions. Wear it knotted at the front for a cottagecore look, or looped loosely over a denim jacket for an easy boho layer.
Grab your hook, a couple of skeins of yarn, and let’s get stitching.
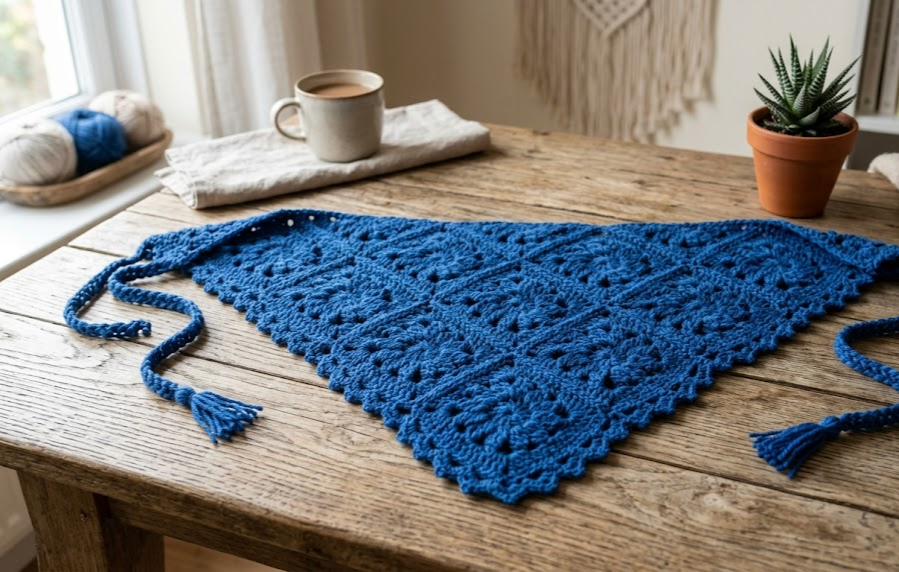
|
Difficulty
Intermediate
|
Time
7–9 Hours
|
Hook Size
3.5mm (E/4)
|
Yarn Weight
DK (Light Worsted)
|
Finished Size
24″ x 13″ + Ties
|
Gauge
One flower motif square measures 3.5″ x 3.5″ using a 3.5mm (E/4) hook and DK weight yarn. In single crochet, gauge is approximately 18 stitches and 20 rows per 10cm (4″) square. Always make a gauge swatch first — motif size directly affects your finished scarf dimensions, and even a small tension difference will change how many motifs you need.
Materials List
- DK weight yarn (Weight 3), approximately 350–400 yards in your main color (sapphire blue shown; see Variations for alternate colorways)
- 3.5mm (E/4) crochet hook
- Yarn needle for weaving in ends
- Scissors
- Stitch markers (optional, but helpful for tracking motif rounds)
- Blocking pins and a blocking mat (optional, for a crisp finished shape)
Abbreviations
| Abbreviation | Meaning |
|---|---|
| ch | chain |
| sl st | slip stitch |
| sc | single crochet |
| dc | double crochet |
| tr | treble crochet |
| ch-sp | chain space |
| MR | magic ring |
| picot | ch 3, sl st into first ch of the 3 to form a small loop |
| rep | repeat |
| st(s) | stitch(es) |
| (…) | stitch count at end of round/row |
Pattern Instructions
Part 1: The Flower Motif Square
Each motif is worked in the round from the center out, then squared off with a picot lace border. You’ll need multiple motifs joined together to build the triangle (see Assembly for exact quantity based on your desired size).
Round 1 (Center Flower): Using MR (magic ring: wrap yarn around your fingers into a loop, work stitches into it, then pull the tail to close the loop tight — this avoids a hole at the center), ch 3 (counts as first dc), work 11 dc into ring. Pull tail to close ring. Sl st to top of beginning ch-3 to join. (12 dc)
Round 2 (Petals): Ch 1, sc into same st as join. *Ch 3, skip next dc, sc into next dc; rep from * around, ending with ch 3, sl st to first sc to join. (6 ch-3 sps)
Round 3 (Petal Build-Up): Sl st into first ch-3 sp. Ch 1, work (sc, 3 dc, sc) into same ch-3 sp — this forms one petal. Rep (sc, 3 dc, sc) into each remaining ch-3 sp around. Sl st to first sc to join. (6 petals)
Round 4 (Squaring the Motif): This round turns your round flower into a square shape by working corner clusters. Ch 3 (counts as dc), working behind the petals into the round 2 sc sts, *dc into next round 2 sc, ch 2 (this forms a corner), dc into same st, ch 3, skip one petal, dc into next round 2 sc; rep from * around, adjusting the last repeat to end with ch 3, sl st to top of beginning ch-3. You should have 4 corners (each a ch-2 space) and 4 side ch-3 spaces. (4 corners, 4 sides)
Round 5 (Picot Border): Sl st into first corner ch-2 sp. Ch 1, (sc, picot, sc) into same corner sp. *Ch 2, sc into next ch-3 side sp, ch 2, (sc, picot, sc) into next corner sp; rep from * around. Sl st to first sc to join. Fasten off, leaving a 12″ tail for joining. (4 corners with picots, 4 side sps)
Repeat this motif until you have the number of squares needed for your chosen scarf size (see Assembly).
Part 2: Joining the Motifs
Motifs are joined as you complete the final round of each new motif, using the join-as-you-go method so you don’t have to sew squares together afterward.
Join-as-you-go technique: When working Round 5 of a new motif, instead of working a picot at the corner or side point that touches an already-completed motif, replace that picot with a slip stitch into the corresponding picot loop of the neighboring motif. This locks the two motifs together invisibly while keeping the lace open and airy.
Arrange your motifs in a triangle: one row of 1 motif at the top point, growing by one motif per row as you work downward (1, 2, 3, 4, 5, 6 — six rows makes a generous scarf; see Assembly for your target row count). Join each motif to its neighbor on the left and, where applicable, to the motif above it.
Part 3: Border and Ties
Border Round: Once all motifs are joined into your triangle, work one full round of sc evenly around the entire outer edge, working 3 sc into each outer corner point to keep the edge flat. Ch 1 to turn corners smoothly, and adjust stitch count as needed so the edge lies flat without rippling or cupping.
Ties: At each of the two top corners of the triangle (the ends that will tie around the neck), join yarn with a sl st and ch 100 (approximately 20″ — adjust chain length to your preferred tie length). Sl st back down the chain into every stitch to reinforce it and prevent stretching, then fasten off and weave in ends. Repeat on the opposite top corner.
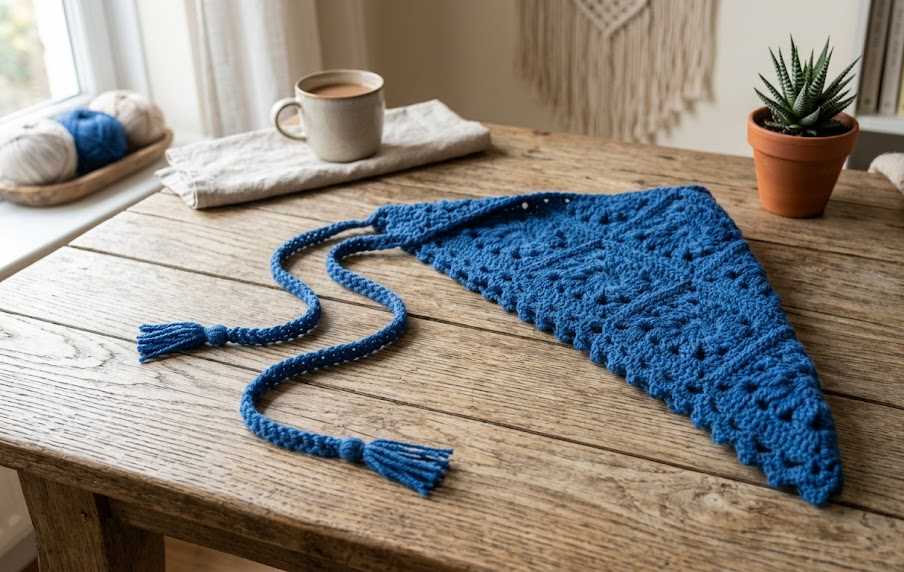
Assembly Steps
- Block all motifs individually before joining if your yarn allows it — this squares them up and makes joining much easier. Pin each motif to 3.5″ x 3.5″ and steam or wet-block, then let dry fully.
- Lay out your motifs in a triangle formation: 1 motif in row 1, 2 in row 2, up to 6 in row 6 for a full-size scarf (21 motifs total), or scale down to 4 rows (10 motifs) for a smaller, choker-style bandana.
- Join motifs row by row using the join-as-you-go picot technique described above, working left to right, then row to row.
- Once fully joined, work the sc border round around the entire triangle perimeter, being careful to keep tension even so the piece lies flat.
- Attach a 20″ tie to each top corner as described in Part 3.
- Weave in all ends securely using a yarn needle, running each tail through several stitches on the wrong side.
- Give the finished scarf a final light steam block, pinning out the picot points along the bottom edge for a crisp, defined lace border.
Tips for This Pattern
- Use stitch markers on Round 4 of each motif to mark your 4 corners — it’s easy to lose track of corner placement when working behind the petals.
- If your join-as-you-go slip stitches look too tight or puckered, try joining with a sc instead of a sl st for a slightly looser, more flexible seam.
- Keep a consistent tension on your magic rings; a loose center ring is the most common cause of a hole at the center of the flower.
- Count your ch-3 spaces at the end of Round 2 every time — six is correct, and starting Round 3 with the wrong count will throw off your entire square.
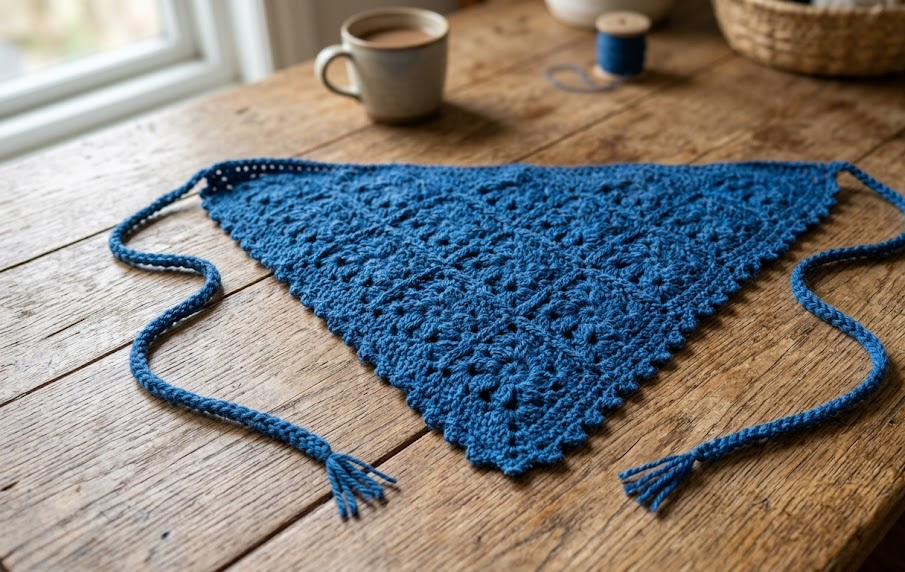
Variations
- Ombre Edge: Work the center flower (Rounds 1–3) in your main color, then switch to a contrasting shade for the squaring and picot border rounds for a two-tone motif effect.
- Mini Choker Version: Reduce to 3 rows of motifs (6 total) for a short neck-hugging bandana instead of a full triangle scarf.
- Tassel Finish: Instead of chain ties, attach short yarn tassels to the two top corners and wear the scarf pinned or knotted with a separate ribbon.
- Rainbow Motifs: Make each individual flower motif a different color from your stash for a scrappy, boho patchwork look.
Save this pattern to your Pinterest boards so you always have it on hand for your next boho crochet project! #FoodieRippleCrochet



