
The Best Fluffy Pancakes recipe you will fall in love with. Full of tips and tricks to help you make the best pancakes.

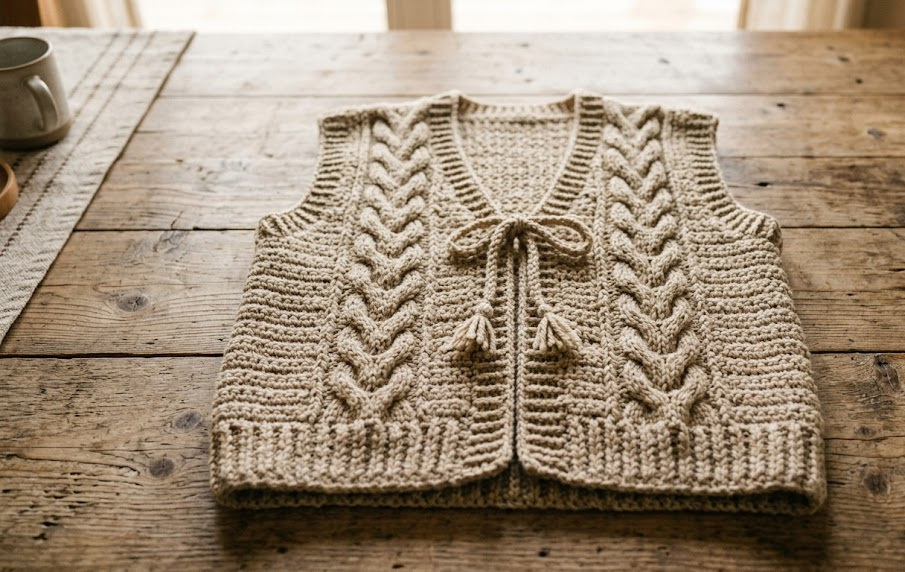
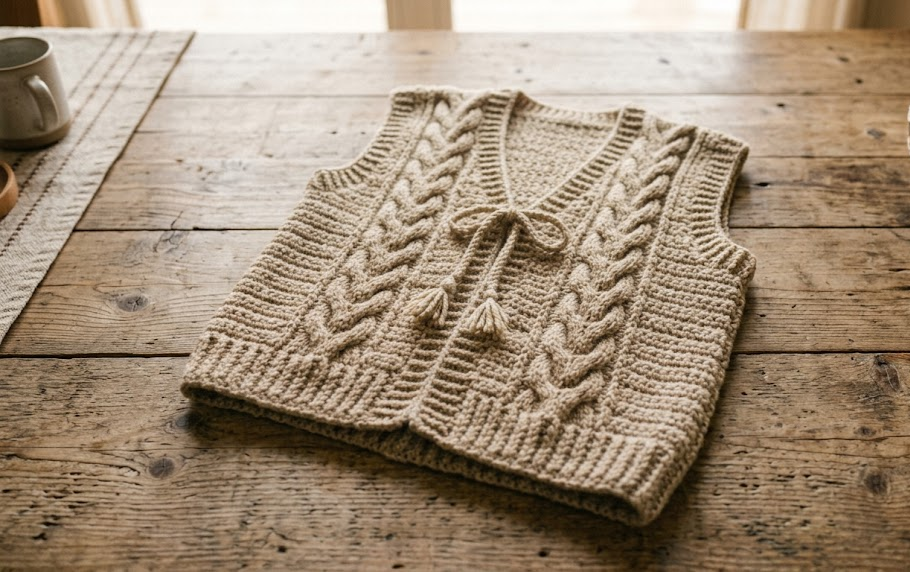
There’s something about a hand-crocheted vest that instantly elevates a simple outfit. This Cable-Knit Tie-Front Crochet Vest combines the warmth of a cardigan with the effortless layering power of a waistcoat, finished with a soft drawstring tie at the neckline instead of buttons. The raised cable panels running down the front and back give it serious texture without adding bulk, making it the kind of piece you’ll reach for over a plain tee, a turtleneck, or even a slip dress on cooler evenings.
This pattern is designed for intermediate crocheters who are comfortable with basic stitches and ready to try front post double crochet cabling. The techniques are repetitive once you get the rhythm down, so even if cables are new to you, you’ll have the hang of it within the first few rows. The finished vest is oversized and relaxed, with an open front held together by a simple corded tie, so it skips fiddly buttonholes entirely.
Whether you’re building out a capsule wardrobe of handmade layers or looking for your next statement piece to photograph for your feed, this vest delivers cozy texture, a flattering drape, and a construction simple enough to finish in a weekend.
|
Difficulty
Intermediate
|
Time
10–12 Hours
|
Hook Size
5.5mm (I-9)
|
Yarn Weight
Aran / Worsted (4)
|
Finished Size
One Size (Bust 34–40in)
|
Gauge
14 sts x 16 rows = 10cm x 10cm (4in x 4in) in cable pattern, using a 5.5mm (I-9) hook and aran/worsted weight (Category 4) yarn.
Always crochet a gauge swatch first. Cable stitches pull fabric in more than plain double crochet, so your swatch should be worked in the actual cable pattern, not a plain dc swatch, to get an accurate size.
Materials List
- Aran/worsted weight yarn (Category 4), approx. 600–700g in Oatmeal Tan (5–6 skeins of a standard 100g/200m skein, brand of choice)
- 5.5mm (I-9) crochet hook
- Yarn needle for weaving in ends and seaming
- Stitch markers (at least 4)
- Scissors
- Measuring tape
- Optional: 2 wooden toggle beads for tie ends
Abbreviations Table
| Abbreviation | Meaning |
|---|---|
| ch | chain |
| st(s) | stitch(es) |
| sc | single crochet |
| dc | double crochet |
| fpdc | front post double crochet |
| sl st | slip stitch |
| rep | repeat |
| sk | skip |
| tog | together |
| RS | right side |
| WS | wrong side |
| CC | cable cross (see technique note) |
| YO | yarn over |
Pattern Instructions
Technique Note: Cable Cross (CC)
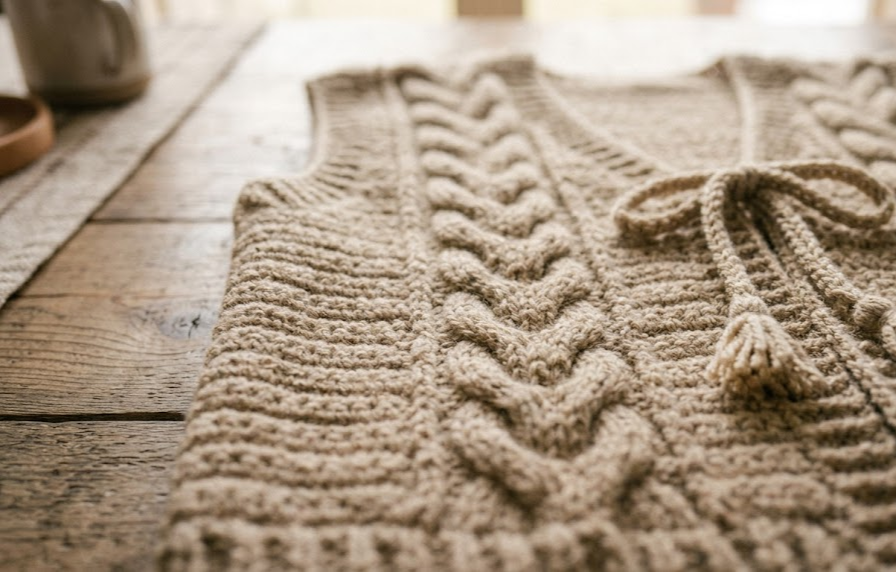
Skip the next 2 sts, work fpdc around each of the following 2 sts (working in front of the skipped sts), then go back and work fpdc around each of the 2 skipped sts (working behind the just-completed sts). This crosses the stitches and creates the raised cable look. Front post double crochet is worked by inserting your hook from front to back to front around the post of the stitch below, rather than into the top loops.
Back Panel
Ch 66.
Row 1 (RS): Dc in 3rd ch from hook and each ch across. (64 sts)
Row 2 (WS): Ch 2 (counts as first dc), dc in each st across. (64 sts)
Row 3 (RS): Ch 2, *dc 2, CC, dc 2; rep from * across to last 2 sts, dc 2. (64 sts)
Row 4 (WS): Ch 2, dc in each st across, working normal dc (not fpdc) into all cable posts. (64 sts)
Rows 5–24: Repeat Rows 3–4, alternating, until the panel measures 40cm (16in) from the foundation chain.
Armhole shaping (Row 25): Sl st across first 4 sts, ch 2, pattern across to last 4 sts, leave remaining sts unworked. (56 sts)
Continue in pattern for 20cm (8in) more for the back yoke height.
Fasten off.
Left Front Panel
Ch 34.
Row 1 (RS): Dc in 3rd ch from hook and each ch across. (32 sts)
Row 2 (WS): Ch 2, dc in each st across. (32 sts)
Row 3 (RS): Ch 2, *dc 2, CC, dc 2; rep from * across to last 2 sts, dc 2. (32 sts)
Row 4 (WS): Ch 2, dc in each st across. (32 sts)
Repeat Rows 3–4 until panel measures 40cm (16in), matching the back panel length.
Armhole shaping (armhole edge only, Row 25): Sl st across first 4 sts (armhole side), ch 2, pattern across remaining sts. (28 sts)
Continue in pattern for 20cm (8in) more.
Fasten off.
Right Front Panel
Work as Left Front Panel, but shape the armhole at the opposite edge (end of row instead of beginning) so the two fronts mirror each other.
Trim (Neckline, Front Edges, and Hem)
With RS facing, join yarn at hem corner of Left Front. Work sc evenly around the entire outer edge — up the front edge, around the neckline, down the other front edge, and along the hem of both fronts and back — working 3 sc into each outer corner to keep the trim flat. Join with a sl st to first sc. (Stitch count will vary by exact edge length; work until the trim lies flat without rippling or puckering.)
Round 2: Ch 1, sc in each st around, working 3 sc in each corner. Join with sl st. Fasten off.
Armhole Trim
Join yarn at underarm point of one armhole. Work sc evenly around the armhole opening, join with sl st. Repeat for second armhole. This keeps the raw edge neat and adds a touch of structure to the shoulder.
Tie Cord
Ch 120 (or desired length). Sc in 2nd ch from hook and each ch across. Fasten off, leaving a 15cm tail on each end for attaching beads or tassels.
Assembly Steps
- Lay the Back Panel flat, right side up.
- Pin the Left and Right Front Panels to the Back Panel at the shoulders, matching the top 10cm (4in) of the armhole shaping edges. Sew shoulder seams using a whip stitch and matching yarn, working through both loops for a secure seam.
- Pin the side seams from the hem up to the underarm shaping, leaving the top 20cm (8in) open for the armhole. Sew side seams using the same whip stitch method.
- Weave the Tie Cord through the fabric at the neckline, roughly 2cm (¾in) below the collarbone, spacing entry points 3–4cm apart across the front opening.
- Thread a wooden toggle bead onto each end of the tie cord if using, then knot to secure.
- Weave in all remaining ends using a yarn needle, running each tail through at least 5cm of fabric before trimming.
- Steam block the finished vest by lightly pressing with a steam iron held 2–3cm above the fabric (do not touch the iron directly to the yarn) to even out the cable texture and help the vest lie flat.
Tips for Beginner/Intermediate Crocheters
- Place a stitch marker at the start of every row until you’re confident reading your cable repeats — it’s easy to lose your place in row 3’s pattern.
- Front post stitches use more yarn than regular stitches, so don’t panic if your ball runs down faster during cable rows.
- Keep tension consistent by working fpdc stitches at the same speed as your regular dc — rushing them tends to make them tighter and pucker the fabric.
- If your cable panel is curling at the edges before blocking, that’s normal; steam blocking at the end will flatten it out.
Variations
- Chunky Weekend Version: Use bulky (Category 5) yarn and a 6.5mm hook for a thicker, quicker-to-make vest, adjusting stitch counts down for gauge.
- Cropped Style: Shorten the panel length by 10cm before starting armhole shaping for a cropped, high-waisted silhouette.
- Colorblock Cables: Work the Back Panel in one color and both Front Panels in a contrasting color for a modern colorblock look.
- Fringe Trim: Instead of sc trim on the hem, add 15cm yarn fringe every 3cm along the bottom edge for a boho fringed finish.
Save This Pattern
Love this cozy cable-knit vest? Save this pin so you can find it again next time you’re ready to pick up your hook, and tag your finished project so others can see it too! #FoodieRippleCrochet



