
The Best Fluffy Pancakes recipe you will fall in love with. Full of tips and tricks to help you make the best pancakes.

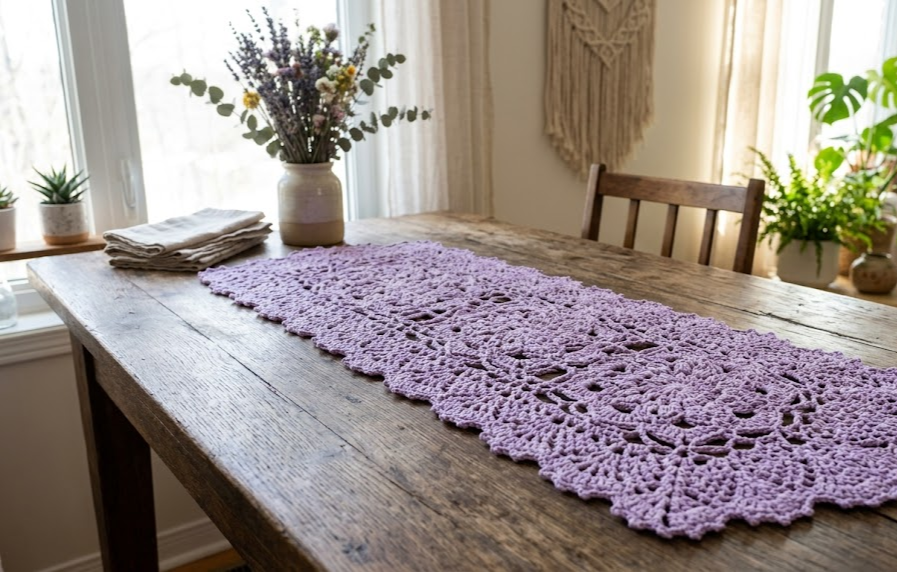
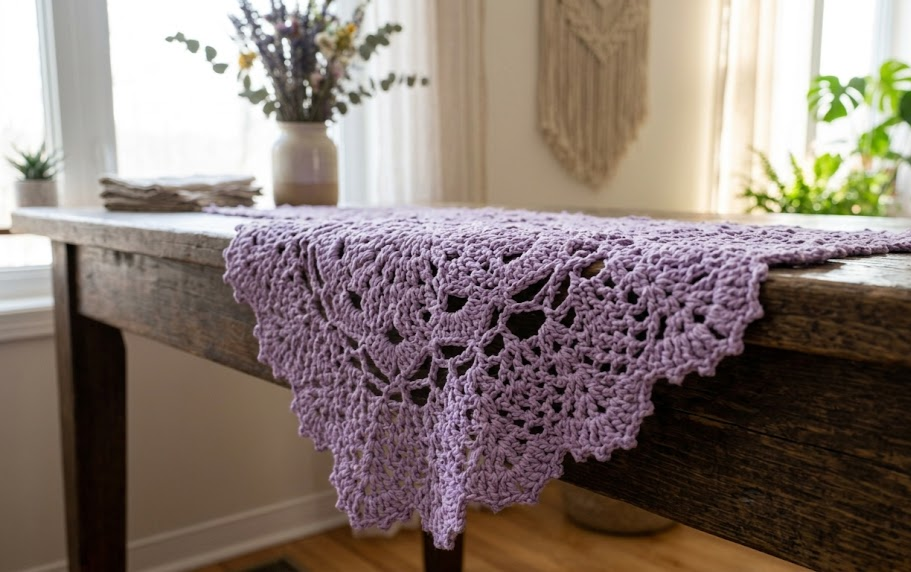
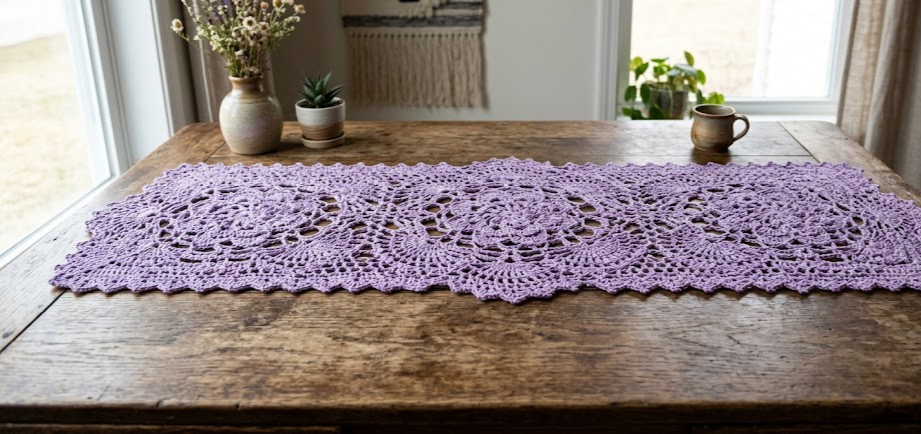
If you’ve ever wanted your dining table to feel like a little slice of a countryside tea room, this lavender lace table runner is exactly the project to make it happen. Built from a repeating chain of floral medallions bordered by a delicate fan-and-picot edge, this runner adds a soft, romantic touch to any table setting. It works beautifully under a vase of fresh flowers, a stack of teacups, or simply on its own as a shelf accent. This pattern is written for the intermediate crocheter who is comfortable with basic lace stitches and ready to try shell patterns, picots, and simple motif joining. The finished piece measures roughly 14 inches wide by 42 inches long, perfect for a standard dining table, though sizing adjustments are covered in the variations section below.
|
Difficulty
Intermediate
|
Time
9 Hours
|
Hook Size
3.5mm (E/4)
|
Yarn Weight
Light (DK / #3)
|
Finished Size
14″ x 42″
|
Gauge
- 18 stitches x 8 rows = 10cm x 10cm in fan/shell lace pattern
- Hook used: 3.5mm (E/4)
- Yarn weight used: Light weight / DK / #3
Always make a small gauge swatch before starting. Because lace patterns rely on open spacing, a slightly looser or tighter gauge will still look attractive, but matching gauge ensures your finished runner hits the target dimensions.
Materials List
- 3 skeins (approx. 600 yards total) light-weight (DK/#3) cotton yarn in lavender purple
- 3.5mm (E/4) crochet hook
- Yarn needle for weaving in ends
- Stitch markers (4-6)
- Scissors
- Measuring tape
- Optional: fabric stiffening spray if you want a firmer, more structured runner
Abbreviations Table
| Abbreviation | Meaning |
|---|---|
| ch | chain |
| sl st | slip stitch |
| sc | single crochet |
| dc | double crochet |
| tr | treble crochet |
| ch-sp | chain space |
| picot | small decorative loop made with chain + slip stitch |
| MR | magic ring |
| sk | skip |
| rep | repeat |
| st(s) | stitch(es) |
| RS | right side |
Pattern Instructions
Part 1: Center Medallion (make 4)
Each medallion forms one repeating “flower” in the runner’s central spine.
Round 1: Make a magic ring (a magic ring is an adjustable loop that lets you close the center hole tightly after your first round is complete). Ch 3 (counts as first dc), work 15 dc into the ring, pull tail to close ring, join with sl st to top of ch-3. (16 dc)
Round 2: Ch 1, sc in same st, *ch 3, sk 1 st, sc in next st; rep from * around, ch 3, join with sl st to first sc. (8 ch-3 spaces)
Round 3: Sl st into first ch-3 space, ch 1, (sc, 3 dc, sc) in same space — this forms one petal — rep (sc, 3 dc, sc) in each ch-3 space around. (8 petals)
Round 4: Working behind the petals into Round 2 sts, ch 1, sc around back post of each Round 2 sc, ch 4 between each. (8 ch-4 spaces)
Round 5: In each ch-4 space work (sc, 5 dc, sc) to form outer petals. (8 outer petals) Fasten off, leaving a 12-inch tail for joining.
Part 2: Joining the Medallions
Lay the 4 completed medallions in a straight line, touching at opposite outer petal tips. Using the tail from each medallion, whipstitch the tip of one outer petal to the tip of the neighboring medallion’s outer petal, joining 2-3 stitches per connection point for stability. This creates the spine of the runner running end to end.
Part 3: Fan Border (worked directly onto joined medallions)
Row 1 (long sides): With RS facing, join yarn in the first outer petal at one end, ch 3 (counts as dc), work 2 dc in same st, *sk 2 sts, 3 dc in next st; rep from * evenly along the long edge of the joined medallions, ending with 3 dc in last st. Turn. (Stitch count will vary slightly by shaping; count in groups of 3-dc shells rather than individual stitches — aim for 14-16 shells per long side)
Row 2: Ch 3, dc in same st, *ch 1, sk shell gap, (dc, ch 1, dc) in center st of next shell; rep from * across, ending with dc in top of turning ch. Turn.
Row 3 (picot scallop edge): Ch 1, sc in first st, *ch 3, sl st in 3rd ch from hook (this makes a picot — a tiny decorative loop), sc in next ch-1 space; rep from * across. Fasten off.
Repeat Rows 1-3 along the opposite long edge.
Part 4: Pointed End Scallops
At each short end of the runner, work into the end medallion’s outer petals:
Row 1: Join yarn at corner, ch 3, 2 dc, ch 2, sl st in same st (corner shell), *sk 1 st, (2 dc, ch 2, sl st) in next st; rep from * to opposite corner, decreasing shell count toward the center point to create a gentle triangular taper. Fasten off.
Repeat at the second short end.
Assembly Steps
- Block all 4 medallions before joining: pin each to a blocking mat, spray lightly with water, and let dry fully flat. This opens up the lace pattern evenly.
- Whipstitch medallions together end to end as described in Part 2, keeping joins flush so the spine lies flat with no puckering.
- Work the fan border (Part 3) along both long edges directly onto the joined spine.
- Work the pointed end scallops (Part 4) at both short ends.
- Weave in all ends securely using a yarn needle, running each tail through at least 2 inches of stitching before trimming.
- Final block the entire assembled runner: pin out points and scallops on a large flat surface, spray with water, and let dry completely for 24 hours before use. This step is essential for lace to lie flat and show its full pattern definition.
- Finished dimensions after blocking: approximately 14 inches wide x 42 inches long.
Beginner/Intermediate Tips
- If picots feel fiddly, practice the ch-3, sl-st-in-3rd-ch motion on a scrap chain before starting Row 3 of the border — muscle memory makes it much faster.
- Use stitch markers on the first stitch of each round in the medallions; lace rounds are easy to lose track of when chain spaces multiply.
- Keep tension slightly looser than your usual gauge for the shell rows — lace shells need room to fan out and lie flat.
- Cotton yarn shows blocking results dramatically better than acrylic; if you substitute yarn, choose a plant fiber or cotton blend for the crispest lace definition.
Variations
- Two-tone version: Work the medallions in lavender and the border in cream or white for a contrast lace look.
- Mini runner: Reduce to 2 medallions for a narrow table or dresser topper, roughly 22 inches long.
- Round doily: Use just one medallion with an extended border for a standalone lace doily centerpiece.
- Seasonal palette: Swap lavender for sage green and cream for a spring/Easter table, or deep red and gold for a holiday runner.
- Wider runner: Add a 5th medallion in the spine and extend both borders proportionally for a longer farmhouse-style table.
Save this pattern to your crochet board so you can find it again next time you’re ready to stitch up something beautiful for your table. Tag your finished runner with #FoodieRippleCrochet — we love seeing your version come to life!



