
The Best Fluffy Pancakes recipe you will fall in love with. Full of tips and tricks to help you make the best pancakes.

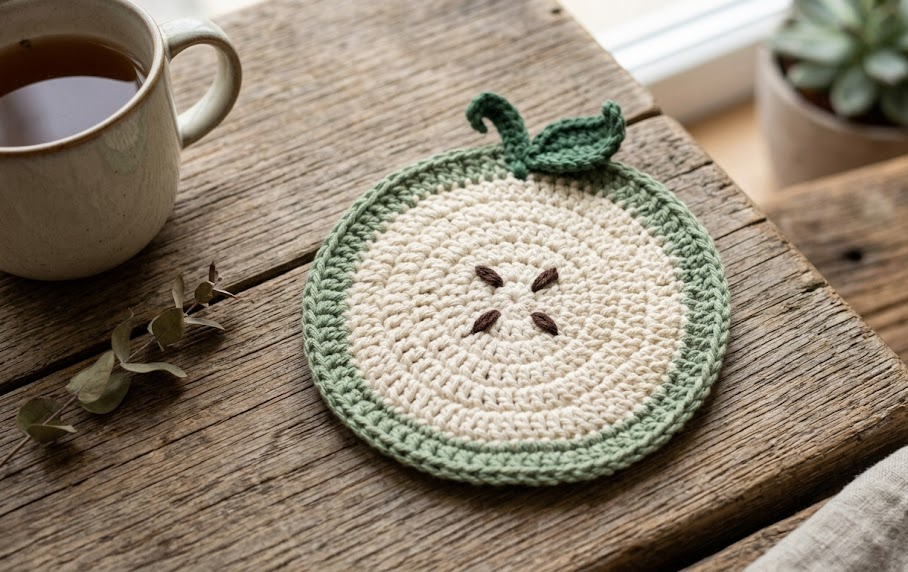
There’s something quietly satisfying about a crochet apple slice sitting on your desk or kitchen counter — half nostalgia, half tiny piece of art. This crochet apple slice coaster captures that perfect cross-section look: a soft sage green rind, creamy ivory flesh, two little embroidered seeds, and a curled stem on top. It works up quickly with basic single crochet and one color change, making it an ideal weekend project for anyone who wants a fast, satisfying finish.
Use it as a coaster under your morning coffee mug, a catch-all for rings and jewelry by the sink, a piece of kitchen décor pinned to a cork board, or bundle a few together for a fruit-themed garland. It also makes a lovely handmade gift when paired with a jar of tea or a bundle of fresh flowers. Because the pattern only uses two colors and one basic increase structure, it’s approachable for confident beginners while still being satisfying for intermediate crocheters who want a fast, pretty project.
This pattern is fully self-contained — everything you need, from gauge to finishing, is written out below. No outside references required.
|
Difficulty
Intermediate
|
Time
2–3 Hours
|
Hook Size
4mm (US G/6)
|
Yarn Weight
Worsted (#4)
|
Finished Size
~10cm diameter
|
Gauge
- 12 single crochet stitches x 12 rounds = 10cm x 10cm square
- Hook used for gauge: 4mm (US G/6)
- Yarn used for gauge: Worsted/Aran weight (US #4) cotton yarn
Gauge is not critical for this project since it’s a flat decorative coaster, but matching it will help you land close to the finished size listed below. If your circle is coming out too loose or wavy, go down a hook size; if it’s cupping inward, go up a hook size.
Materials List
- Worsted/Aran weight (US #4) cotton yarn in Sage Green — approx. 15g
- Worsted/Aran weight (US #4) cotton yarn in Cream/Ivory — approx. 25g
- Small amount of Dark Brown or Black yarn/embroidery thread for seed detail
- 4mm (US G/6) crochet hook
- Yarn needle (for weaving in ends and embroidering seeds)
- Stitch marker
- Scissors
- Small amount of polyester fiberfill (optional, for a slightly puffed finish)
Abbreviations Table
| Abbreviation | Meaning |
|---|---|
| ch | chain |
| sc | single crochet |
| sl st | slip stitch |
| st(s) | stitch(es) |
| rnd(s) | round(s) |
| inc | increase (2 sc in same stitch) |
| MR | magic ring |
| BLO | back loop only |
| ( ) | stitch count at end of round |
Pattern Instructions
Part 1: Apple Body (Cream/Ivory)
Begin with a magic ring: this is a way to start crocheting in the round with no center hole, made by wrapping the yarn around your fingers, working stitches into the loop, then pulling the tail to close it tight.
Rnd 1: Using Cream/Ivory, make a magic ring, ch 1, 6 sc into ring, pull tail to close, sl st to first sc. (6)
Rnd 2: Ch 1, 2 sc in each st around, sl st to first sc. (12)
Rnd 3: Ch 1, *sc 1, inc 1; repeat from * around, sl st to first sc. (18)
Rnd 4: Ch 1, *sc 2, inc 1; repeat from * around, sl st to first sc. (24)
Rnd 5: Ch 1, *sc 3, inc 1; repeat from * around, sl st to first sc. (30)
Rnd 6: Ch 1, *sc 4, inc 1; repeat from * around, sl st to first sc. (36)
Rnd 7: Ch 1, *sc 5, inc 1; repeat from * around, sl st to first sc. (42)
Rnd 8: Ch 1, sc in each st around, sl st to first sc. (42)
Rnd 9: Ch 1, sc in each st around, sl st to first sc. (42)
This completes the flat cream circle that forms the “flesh” of the apple. Do not fasten off — you’ll switch colors for the rind in the next section.
Part 2: Apple Rind (Sage Green)
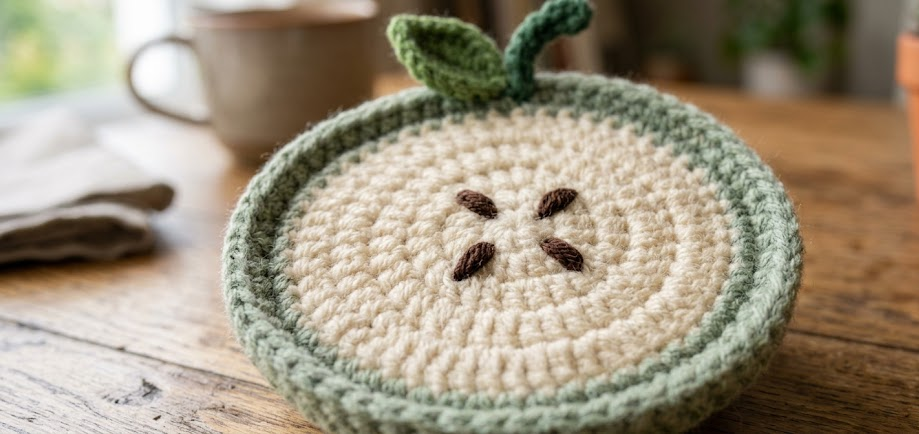
Rnd 10: Join Sage Green in any stitch (drop Cream, do not cut yet). Working in BLO (back loop only — insert your hook under just the back strand of each stitch instead of both loops, which creates a visible ridge line separating the two colors), ch 1, sc in each st around, sl st to first sc. (42)
Technique note: working in BLO on this round is what creates the crisp visual border between the cream flesh and green rind, mimicking a real apple cross-section.
Rnd 11: Ch 1, sc in each st around, sl st to first sc. Fasten off, leaving a 15cm tail. (42)
If you’d like a slightly puffed, dimensional coaster rather than a flat one, this is the point to insert a thin, even layer of fiberfill between two identical apple pieces (see Assembly Step 1) before closing the seam.
Part 3: Stem
Row 1: Using Sage Green, ch 8.
Row 2: Starting in 2nd ch from hook (this skipped chain acts as the turning chain and won’t be worked into), sl st in each ch across to the end. Fasten off, leaving a 10cm tail on each end.
This creates a small curled stem strip. It will naturally curl slightly due to the slip stitch construction — this is the desired look.
Part 4: Seed Embroidery
Using Dark Brown or Black yarn threaded on a yarn needle, embroider two small straight stitches (each about 1cm long) side by side in the lower-center portion of the cream section, angled slightly outward like a “V” to resemble apple seeds. Secure the ends on the back side and weave in.
Assembly Steps
- If making a puffed coaster: Make two full apple body + rind pieces (Rnds 1–11). Hold both wrong sides together and sc through both layers around the outer edge, stuffing lightly with fiberfill as you close the last 5cm of the seam. Sl st to close and fasten off.
- If making a flat coaster: Simply weave in all ends on your single completed piece from Rnds 1–11.
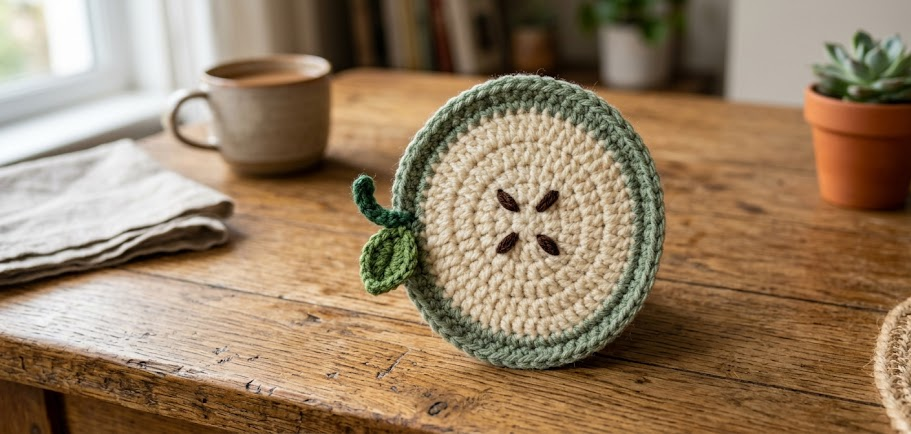
- Position the stem at the top edge of the apple, angled slightly to one side. Using the tail ends from the stem, sew it in place with 3–4 small stitches, inserting it about 1cm into the seam edge of the apple for a secure hold.
- Curl the stem gently with your fingers for a natural look and tack the curled tip lightly to the rind with one small stitch if it needs to hold its shape.
- Place your embroidered seeds so they sit centered, about 2cm below the stem attachment point.
- Steam-block lightly if the circle is not lying flat (hover a steam iron 3–5cm above the piece, do not touch it directly).
Finished size: approximately 10cm diameter, 1cm thick (flat version) or 2cm thick (stuffed version).
Beginner/Intermediate Tips
- Keep tension even through Rnds 3–7 — this is where most circles start to cup or ruffle. If your circle is cupping inward, your tension is too tight or your increases are off; count stitches after every round.
- When switching colors at Rnd 10, carry the cream strand loosely up the wrong side rather than cutting it, so you can weave it in cleanly afterward without extra knots.
- The BLO round is subtle — go slowly on your first few stitches to make sure you’re only catching the back loop, since this is what gives the clean two-tone line.
- If your stem curls too tightly, block it flat under a damp cloth for 10 minutes before attaching it.
- Use stitch markers on Rnd 1 and Rnd 7 to keep track of your round start point, since it’s easy to lose your place in a solid-color circle.
Variations
- Autumn Apple: Swap the cream for a warm butter yellow and use a deeper forest green rind for a fall-toned version.
- Mini Ornament: Stop increasing after Rnd 5 for a smaller 6cm version, perfect as a Christmas tree ornament with a hanging loop added at the stem.
- Two-Tone Blush: Add a third color — a soft pink gradient ring between the cream and green — worked as one extra round before the BLO switch, to mimic a blushing apple skin.
- Coaster Set: Make four in coordinating fruit colors (apple, pear, peach, plum) using the same base pattern with different rind colors for a matching kitchen set.
- Garland Style: Skip the stuffing, make 6–8 flat pieces, and string them together with jute twine through the stem loops for a rustic kitchen garland.
Save this pattern so you can come back to it anytime, and tag your finished apple coasters — I’d love to see your version! Pin this for later and follow along for more cozy, handmade patterns. #FoodieRippleCrochet



