
The Best Fluffy Pancakes recipe you will fall in love with. Full of tips and tricks to help you make the best pancakes.

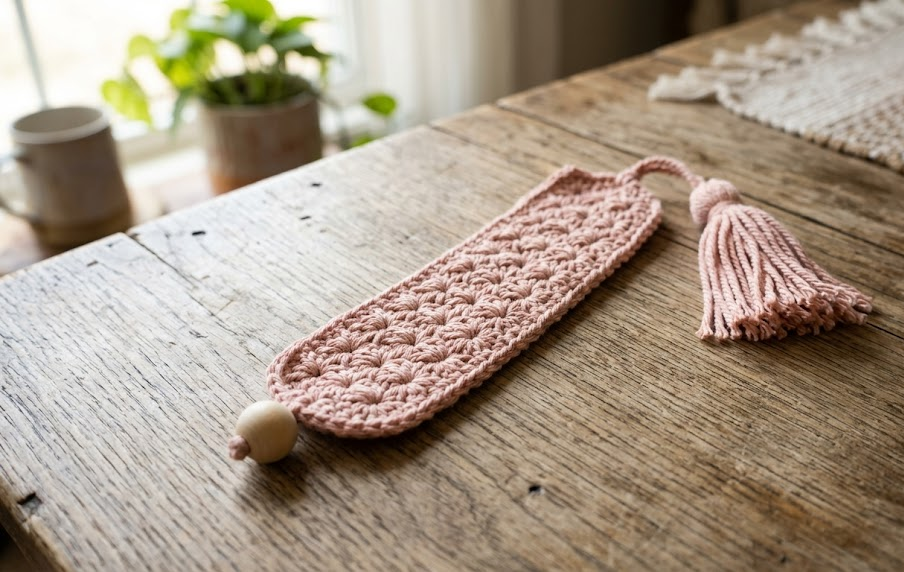
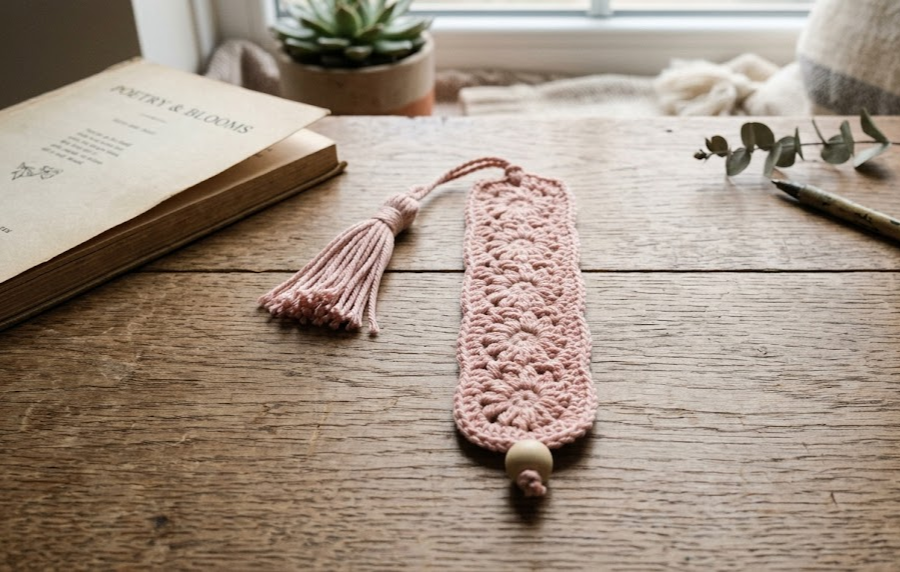
If you’ve ever dog-eared a page because you couldn’t find your bookmark, this pattern is for you. The Daisy Stitch Bookmark is a slim, textured strip made entirely from a repeating daisy-like stitch, finished with a soft tassel at the top and a wooden bead at the bottom point. It’s small enough to finish in an afternoon, uses barely any yarn, and makes a beautiful handmade gift for readers, teachers, or book club friends. The star stitch used here creates a lovely floral texture without any complicated shaping, making it an ideal project for someone ready to try their first “special stitch” after mastering the basics.
This bookmark works up as a long, narrow rectangle, so there’s no fussy shaping to worry about — just steady repetition, a satisfying rhythm once you get the stitch down, and a beautiful finished texture that looks far more advanced than it actually is. Whether you’re making one for yourself or a whole set as gifts, this project is endlessly customizable in color and length.
Gauge
4 star stitch repeats x 8 rows = 10cm x 10cm (4in x 4in), using a 3mm hook and DK weight cotton yarn.
Gauge is not critical for this project since it’s a bookmark rather than a fitted item, but matching gauge will keep your finished piece close to 18cm long and 3cm wide. If your swatch comes out smaller, move up a hook size; if larger, move down.
Materials List
- DK weight (weight 3) cotton yarn, approx. 15g / 30 yards in your main color (blush pink shown)
- 3mm (US C/2–D/3) crochet hook
- Yarn needle for weaving in ends
- Scissors
- 1 wooden bead with a hole large enough for 2 strands of yarn to pass through
- Cardboard or a book (for making the tassel)
- Optional: fabric glue to secure the bead in place
Abbreviations Table
| Abbreviation | Meaning |
|---|---|
| ch | chain |
| sc | single crochet |
| sl st | slip stitch |
| st(s) | stitch(es) |
| yo | yarn over |
| rep | repeat |
| Star st | Star stitch (special stitch, explained below) |
| ( ) | stitch count at end of row |
Pattern Instructions
Part 1: Foundation Chain
Ch 15.
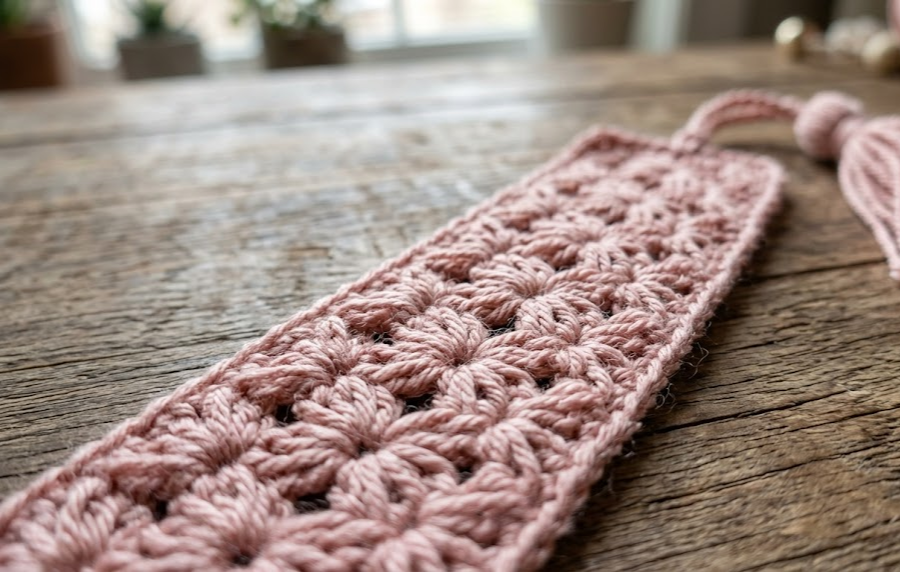
Technique note — Star Stitch: The star stitch creates a daisy-like cluster by pulling up multiple loops, closing them together into one point (called the “eye”), and then chaining to lock it in place. It looks complicated written out but becomes rhythmic after the first two stars.
Part 2: Body of the Bookmark
Row 1 (Foundation Star Row):
Insert hook into 2nd ch from hook, yo, pull up a loop (2 loops on hook). Insert hook into next ch, yo, pull up a loop (3 loops on hook). Insert hook into next ch, yo, pull up a loop (4 loops on hook). Yo and pull through all 4 loops on hook. Ch 1 to close the eye of the star — this locks the star in place. This completes Star 1.
Insert hook into the same point where you closed the last star’s eye, yo, pull up a loop (2 loops on hook). Insert hook into next unworked ch, yo, pull up a loop (3 loops on hook). Insert hook into next unworked ch, yo, pull up a loop (4 loops on hook). Yo and pull through all 4 loops. Ch 1 to close the eye. Rep from * across the row until you reach the last chain. Work 1 sc into the last chain to finish the row. (6 stars, 7 sts total)
Row 2:
Ch 2 (this counts as the first “leg” of the next star). Insert hook into the eye of the last star of the previous row, yo, pull up a loop (2 loops on hook). Insert hook into the eye of the next star, yo, pull up a loop (3 loops on hook). Insert hook into the top of the sc from the end of the previous row, yo, pull up a loop (4 loops on hook). Yo, pull through all 4 loops. Ch 1 to close.
Insert hook into same closing point, yo, pull up loop (2 loops on hook). Insert hook into eye of next star from previous row, yo, pull up loop (3 loops on hook). Insert hook into eye of next star, yo, pull up loop (4 loops on hook). Yo, pull through all 4 loops. Ch 1 to close. Rep from * across. End with 1 sc worked into the last star’s eye. (5 stars, 6 sts total)
Rows 3–36:
Repeat Rows 1 and 2 alternately, working stars into the eyes of the stars below, until your strip measures approximately 17cm (about 34 rows), ending on a completed Row 2. Stitch count will alternate between 6 and 5 stars per row as established above.
Final Row:
Sc evenly across the last row of star tops (approximately 7 sts). (7 sc)
Fasten off, leaving a 20cm tail at the top for attaching the tassel.
Part 3: Bottom Point (Optional Taper)
For the tapered point seen in the finished sample, on your last 2 rows, skip the final star repeat on each side (work one fewer star per row) to narrow the strip gradually, ending with a single sc point. (1 sc at point)
Assembly Steps
- Weave in all loose ends except the 20cm tail left at the top of the strip.
- Thread the wooden bead onto a 15cm length of yarn, folded in half, and knot below the bead to hold it in place, about 1cm from the bottom point of the bookmark.
- Using a yarn needle, attach the beaded strand to the bottom point of the bookmark by threading it through the last stitch and knotting securely on the wrong side. Trim excess to 1cm and add a small dot of fabric glue if desired.
- To make the tassel, wrap yarn around a 6cm piece of cardboard 20 times. Slide the wraps off carefully.
- Thread the top tail of the bookmark through the top of the tassel bundle, then wrap tightly around the bundle about 1cm from the top and knot securely.
- Trim the tassel ends evenly to about 5cm in length.
- Fold the top loop of the tassel through the top stitch of the bookmark and pull the tassel through to attach it securely at the top of the strip.
Beginner/Intermediate Tips
- Count your loops before each yarn-over-and-pull-through on the star stitch — missing a loop is the most common mistake and throws off your stitch count.
- Keep tension slightly looser than usual on the star stitch closing chain; it tends to pull tight and can distort the star shape if worked too snugly.
- If you lose track of where the “eye” of the previous star is, look for the small chain-1 bump sitting between the two legs — that’s always your next insertion point.
- Block your finished bookmark by pinning it flat and lightly steaming for a crisp, professional edge.
Variations
- Ombre Bookmark: Use a gradient or self-striping cotton yarn for a subtle color shift from top to bottom.
- Extra-Long Reading Ribbon: Add 10–15 extra rows for a longer bookmark that can wrap around a book cover.
- Double Tassel: Add tassels to both the top and bottom for a fuller, more decorative look instead of a single bead point.
- Chunky Version: Rework in worsted weight yarn with a 4mm hook for a bolder, thicker bookmark with fewer, larger stars.
- Seasonal Sets: Make a set of three in different colorways (like the blush, cream, and sage shown) to gift together as a reader’s bundle.
Save This Pattern
Love this project? Save this pin so you can find it again next time you’re ready to crochet! #FoodieRippleCrochet



