
The Best Fluffy Pancakes recipe you will fall in love with. Full of tips and tricks to help you make the best pancakes.

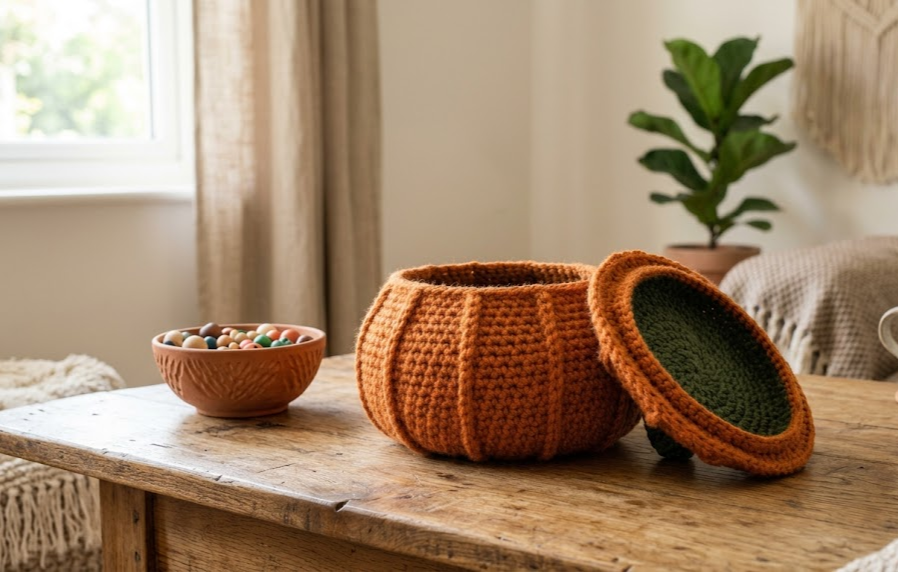
There’s something about a chunky, ribbed pumpkin basket sitting on a shelf that instantly makes a room feel warmer. This crochet pumpkin basket pattern combines the coziness of fall décor with the practicality of a real storage piece — perfect for holding trinkets, spare yarn, bathroom essentials, or a little seasonal display of mini pumpkins and pinecones. It works up in soft, squishy bulky yarn using simple stitches, so even confident beginners will feel right at home, while the ribbed shaping gives it a satisfying, professional finish. Whether you want a rustic addition to your entryway table or a thoughtful handmade gift, this basket delivers big texture with surprisingly manageable technique.
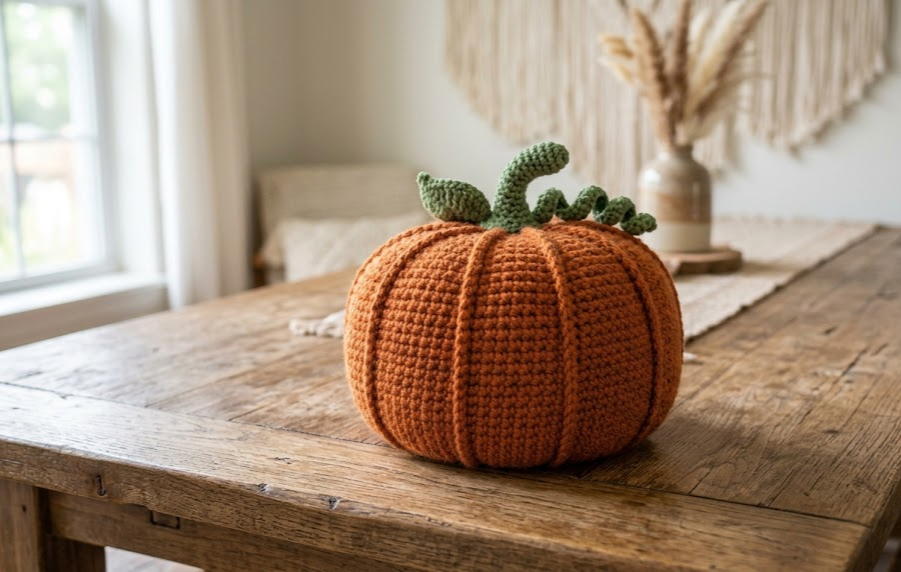
|
Difficulty
Intermediate
|
Time
4–5 hrs
|
Hook Size
6mm (J/10)
|
Yarn Weight
Bulky (5)
|
Finished Size
~20cm x 12cm
|
Gauge
10 sts x 10 rows = 10cm x 10cm in double crochet (dc), using a 6mm (US J/10) hook and bulky weight yarn.
Always make a small swatch before starting — gauge affects the final size of your basket. If your swatch is smaller than 10cm, go up a hook size; if larger, go down.
Materials List
- Bulky weight yarn (5), approx. 250g in pumpkin orange (Color A)
- Bulky weight yarn (5), approx. 20g in leaf green (Color B)
- 6mm (US J/10) crochet hook
- Yarn needle for weaving in ends
- Stitch marker
- Scissors
- Small piece of florist wire or pipe cleaner, approx. 15cm (optional, for stem support)
- Polyester fiberfill, small amount (for stuffing the stem only)
Abbreviations Table
| Abbreviation | Meaning |
|---|---|
| ch | chain |
| sc | single crochet |
| dc | double crochet |
| hdc | half double crochet |
| st(s) | stitch(es) |
| sl st | slip stitch |
| rnd | round |
| MR | magic ring |
| inc | increase (2 sts in same st) |
| dec | decrease (invisible decrease) |
| BLO | back loop only |
| FO | fasten off |
| ( ) | stitch count at end of round |
Technique notes for first use:
- Magic ring (MR): an adjustable loop that lets you start crocheting in the round and pull the center closed tightly afterward, leaving no gap.
- Invisible decrease (dec): insert your hook into the front loops of the next two stitches only, then pull up a loop and finish as a single crochet — this keeps decreases nearly invisible on the surface.
- Back loop only (BLO): work your stitch into just the back loop of the stitch below, leaving the front loop free — this is what creates the ribbed, textured look on the sides of the basket.
Pattern Instructions
Part 1: Base
With Color A and 6mm hook:
Rnd 1: MR, 6 sc into ring. (6)
Rnd 2: 2 sc in each st around. (12)
Rnd 3: *2 sc in next st, sc in next st; repeat from * around. (18)
Rnd 4: *2 sc in next st, sc in next 2 sts; repeat from * around. (24)
Rnd 5: *2 sc in next st, sc in next 3 sts; repeat from * around. (30)
Rnd 6: *2 sc in next st, sc in next 4 sts; repeat from * around. (36)
Rnd 7: *2 sc in next st, sc in next 5 sts; repeat from * around. (42)
Rnd 8: sc in each st around. (42)
Your base should measure approximately 16cm across. This forms the flat bottom of the basket.
Part 2: Ribbed Body (sides)
Switch to working in BLO from here to create the vertical ribbing.
Rnd 9: ch 1 (does not count as st), sc in BLO of each st around, sl st to join. (42)
Rnds 10–16: repeat Rnd 9. (42 each round)
This gives you 8 total rounds of ribbing, creating sides approximately 10–11cm tall. For a deeper basket, add 2–4 more rounds here before moving on.
Part 3: Curved Shoulder (top shaping)
Switch back to working in both loops for a smooth finish.
Rnd 17: *dec, sc in next 5 sts; repeat from * around. (36)
Rnd 18: sc in each st around. (36)
Rnd 19: *dec, sc in next 4 sts; repeat from * around. (30)
Rnd 20: sc in each st around. (30)
Rnd 21: *dec, sc in next 3 sts; repeat from * around. (24)
FO, leaving a 20cm tail for weaving in and for attaching pumpkin ridges (Part 4 optional detail).
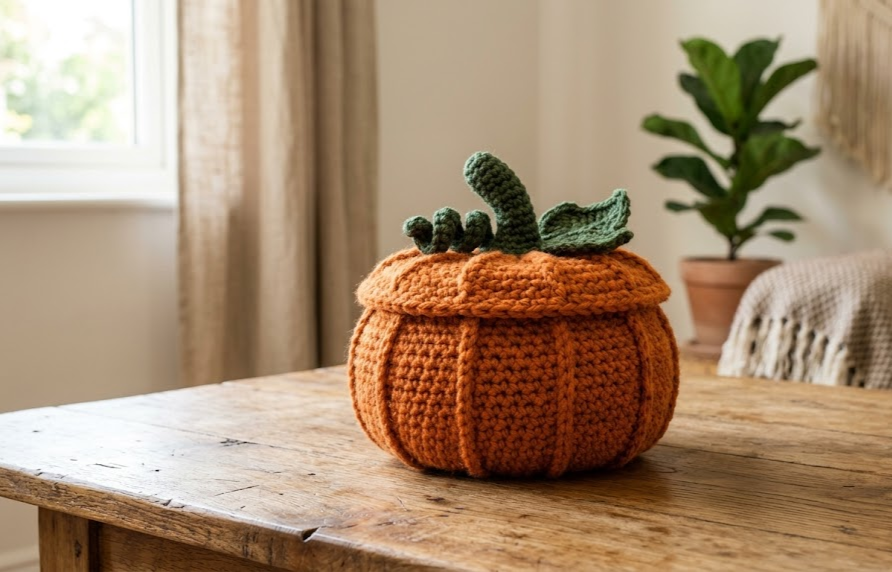
Part 4: Pumpkin Ridge Detail (surface texture — optional but recommended)
With Color A, using a yarn needle and the tail from Rnd 21 (or a fresh strand):
- Working from the top opening down to the base, sew a single strand of yarn along one rib line, pulling snug every few stitches to create a soft, cinched pumpkin “seam.” Fasten off and weave in.
- Repeat this 5–6 times evenly spaced around the basket to mimic classic pumpkin ridges.
Part 5: Stem
With Color B and 6mm hook:
Rnd 1: MR, 6 sc into ring. (6)
Rnd 2: sc in each st around. (6)
Rnds 3–7: sc in each st around. (6 each round)
At Rnd 5, insert your 15cm piece of florist wire down through the center of the tube (this gives the stem structure so it can hold a gentle curl). Stuff lightly around the wire with a pinch of fiberfill as you finish the remaining rounds — just enough to round it out, not pack it tight.
Rnd 8: dec, sc in next 4 sts, dec. (4)
FO, leaving a 15cm tail. Bend the wire gently to curl the stem to one side, mimicking a real pumpkin stem.
Part 6: Leaf (make 2)
With Color B:
Ch 8.
Row 1: sc in 2nd ch from hook, hdc in next 2 ch, dc in next 2 ch, hdc in next ch, sc in last ch. (7)
Technique note: “working the second side of the chain” means once you reach the end of your starting chain, you rotate your work and continue stitching back down the opposite side of the same chain to build out the other edge of the leaf shape.
Continue working down the second side of the starting chain: sc in next ch, hdc in next 2 ch, dc in next 2 ch, hdc in next ch, sc in last ch, sl st to first sc to close. (14)
FO, leaving a 10cm tail.
Assembly Steps
- Weave in all ends on the basket body and set aside.
- Position the stem in the center of the basket’s top opening. Insert the base of the stem about 1.5cm down into the top opening and stitch it securely in place using the tail, going around the stem base at least twice for strength.
- Attach both leaves at the base of the stem, angling them outward in opposite directions (roughly 180° apart) so they rest naturally against the top of the basket. Sew through 4–5 stitches per leaf to secure.
- Weave in all remaining tails on the stem and leaves.
- Gently steam-block the ribbed sides by hovering a steam iron 5cm above the surface (do not touch the yarn directly) to help the ribbing sit flat and even. Let cool fully before use.
Beginner/Intermediate Tips
- Keep tension consistent through the BLO rounds — since only the back loop is caught, stitches can loosen up faster than usual, so check your row height every 2–3 rounds against the piece.
- If your basket is leaning or uneven, it’s usually from missed increases in the base rounds — count stitches after every round in Part 1 before moving on.
- When inserting the wire into the stem, curve it slightly before pushing it through so the stem curls naturally rather than looking stiff and straight.
- Use a stitch marker on Rnd 1 of every part so you never lose track of where your round starts, especially once you’re working in continuous rounds without joining.
Variations
- Mini Version: Use a 4mm hook and DK weight yarn for a set of tiny pumpkin baskets perfect for a fall table runner display.
- White Pumpkin Basket: Swap Color A for cream or off-white yarn and use a warm tan for the stem for a modern neutral farmhouse look.
- Striped Harvest Basket: Alternate 2 rounds of orange with 2 rounds of burnt red or mustard yellow through the ribbed body for a striped pumpkin effect.
- Gift Basket Set: Make three in graduating sizes (adjust base rounds to 6, 8, and 10 increase rounds) for a nesting pumpkin basket trio.
Save this pattern now so you don’t lose it — tag your finished basket with #FoodieRippleCrochet, we’d love to see your version!



