
The Best Fluffy Pancakes recipe you will fall in love with. Full of tips and tricks to help you make the best pancakes.

If you’ve ever run your hand over a waffle-knit blanket and wished you could recreate that deep, cushiony texture in crochet, this pillow cover is exactly what you need. The waffle stitch (sometimes called the thermal stitch) builds a raised, grid-like surface entirely out of front post treble crochet stitches, giving you a plush, tactile fabric that looks far more complicated than it actually is. Worked in a soft sage green worsted weight yarn, this pillow brings warmth and texture to a sofa, reading nook, or bed without a single fussy technique. It’s an ideal project for a beginner who has mastered basic double crochet and wants to try their first textured stitch, and it’s just as satisfying for an intermediate crocheter looking for a relaxing, repetitive make. The finished cover fits a standard 18-inch pillow form and works up as two flat panels seamed together, so there’s no shaping, no counting rounds, and no fiddly finishing beyond a simple whip stitch seam.
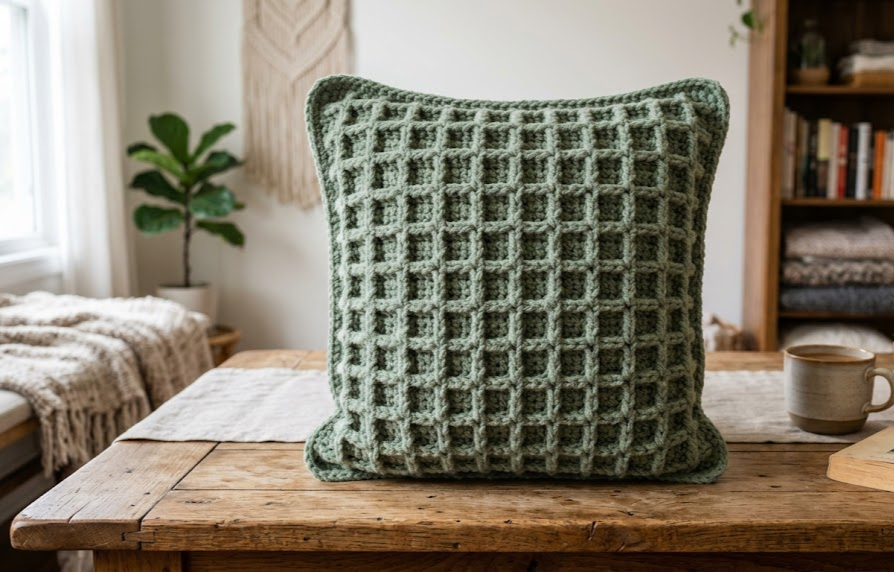
|
Difficulty
Beginner Friendly
|
Time
6–8 Hours
|
Hook Size
5.5mm (I/9)
|
Yarn Weight
Worsted (#4)
|
Finished Size
18″ x 18″
|
Gauge
14 stitches x 16 rows = 10cm x 10cm (4in x 4in) in waffle stitch pattern, using a 5.5mm (US I/9) hook and worsted weight (Medium, #4) yarn.
Always crochet a gauge swatch before starting. Chain 22, work the waffle stitch pattern below for at least 6 rows, then measure. If your swatch is smaller than 10cm, size up your hook; if larger, size down. Matching gauge ensures your finished pillow cover fits an 18-inch pillow form snugly.
Materials List
- Worsted weight yarn (Medium, #4), approximately 450–500g (about 900–1000 yards) in Sage Green — 4–5 skeins depending on brand
- 5.5mm (US I/9) crochet hook
- Yarn needle for weaving in ends and seaming
- Scissors
- Stitch markers (2–3)
- 18-inch square pillow form (or polyester stuffing as an alternative filler)
- Measuring tape
Abbreviations Table
| Abbreviation | Meaning |
|---|---|
| ch | chain |
| st(s) | stitch(es) |
| dc | double crochet |
| FPtr | front post treble crochet |
| RS | right side |
| WS | wrong side |
| sk | skip |
| rep | repeat |
| sp | space |
Pattern Instructions
Part 1: Pillow Front Panel
Foundation Row: Ch 66. Dc in 4th ch from hook (the skipped 3 ch count as your first dc) and in each ch across. (64 sts)
Row 1 (WS): Ch 3 (counts as first dc throughout), dc in each st across, turn. (64 sts)
Row 2 (RS): Ch 3, dc in next st, *FPtr around the post of the dc directly below (2 rows down), sk the st behind it, dc in next st; rep from * across to last st, dc in top of turning ch. (64 sts)
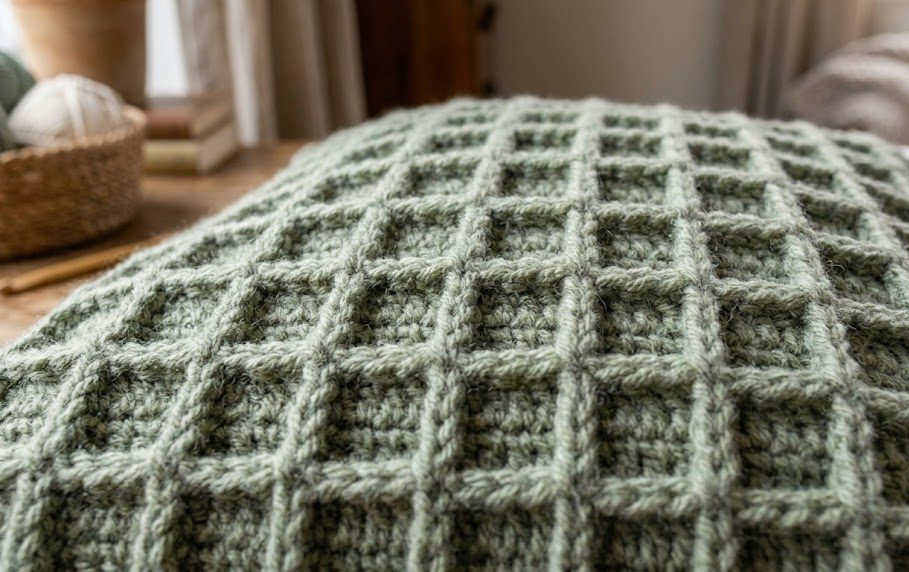
Technique note: FPtr (front post treble crochet) is worked by yarning over twice, then inserting your hook from front to back to front around the post (the vertical body) of the stitch below, rather than into the top of the stitch. This pulls that stitch forward and creates the raised waffle ridge.
Row 3 (WS): Ch 3, dc in each st across, turn. (64 sts)
Row 4 (RS): Ch 3, dc in next 3 sts, *FPtr around the post of the dc 2 rows below (this will be positioned one stitch over from the previous FPtr row, creating the offset grid), sk st behind, dc in next 3 sts; rep from * across, adjusting final repeat to end with dc in top of turning ch. (64 sts)
Repeat Rows 1–4 as the pattern repeat, alternating the FPtr placement by shifting it one or two stitches each FPtr row so the raised ridges form a checkerboard grid rather than straight columns. Continue until the panel measures 45cm (18in) from the foundation chain, ending after a WS row.
Fasten off, leaving a 30cm tail for seaming.
Part 2: Pillow Back Panel
Work two identical rectangular panels instead of one square, so the back opens like an envelope for easy insert removal.
Panel A:
Foundation Row: Ch 66. Dc in 4th ch from hook and each ch across. (64 sts)
Rows 1–end: Work in dc only (no waffle texture needed on the back) for simplicity and speed: ch 3, dc in each st across, turn. (64 sts every row) Continue until panel measures 28cm (11in). Fasten off.
Panel B: Repeat Panel A exactly, working until it measures 28cm (11in). Fasten off.
Technique note: the two back panels overlap by about 10cm in the center, which lets you slide the pillow form in and out without a zipper.
Assembly Steps
- Block the front panel gently by pinning it to measurements (45cm x 45cm) on a towel and lightly steaming, letting it dry fully before assembly. This helps the waffle texture sit evenly.
- Lay the front panel right side up on a flat surface.
- Place Back Panel A right side down on top, aligning the outer edges with the front panel’s edges, with the panel’s finished edge toward the pillow center.
- Place Back Panel B right side down on top of that, overlapping Panel A by approximately 10cm (4in) in the middle, with its finished edge also toward the center.
- Pin all layers together around the entire outer edge.
- Using a yarn needle and the tail left from the front panel, whip stitch through all layers around all four sides, working 1 stitch into the top of every stitch/row-end for an even seam.
- Weave in all remaining yarn ends along the wrong side.
- Turn the cover right side out through the overlapping back opening.
- Insert the 18-inch pillow form through the back opening, pushing it into all four corners so the front panel lies flat and taut.
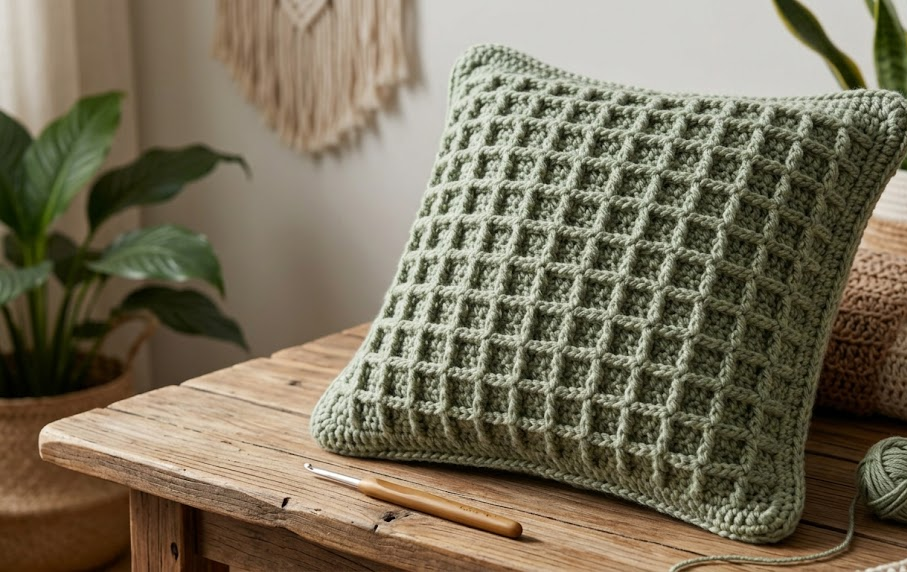
Beginner/Intermediate Tips
- Keep tension even on your FPtr stitches by wrapping the yarn a touch looser than usual — post stitches naturally pull tighter than standard stitches, and overly tight FPtrs will pucker the fabric.
- Use a stitch marker on the last stitch of each row until you’re comfortable spotting the turning chain, since it’s easy to miss the final stitch in a wide panel.
- If counting the offset FPtr placement gets confusing, lay a strand of contrasting scrap yarn vertically through one column of ridges as a visual guide while you work the next FPtr row.
- Worsted weight yarn with good stitch definition (avoid fuzzy or heavily textured yarns) will show off the waffle grid far more clearly than a smooth or variegated yarn.
- Wash and block your gauge swatch the same way you plan to treat the finished pillow, since post stitches can relax slightly after washing.
Variations
- Color Block Waffle: Work the front panel in two colors, switching every 20 rows for a modern striped-waffle look.
- Mini Waffle Cushion: Reduce the foundation chain to ch 42 and work until 30cm square for a smaller 12-inch accent pillow.
- Chunky Fireside Version: Use a super bulky yarn with a 9mm hook for an oversized, extra-plush floor cushion.
- Ombre Waffle: Choose a gradient or ombré yarn cake so the ridges shift color subtly from top to bottom.
- Tasseled Edge: Add a hand-tied tassel fringe around all four seams for a boho-textile finish.
Save This Pattern
Love this cozy texture? Save this pin now so you can find your way back to this pattern anytime you’re ready to crochet it — #FoodieRippleCrochet



