
The Best Fluffy Pancakes recipe you will fall in love with. Full of tips and tricks to help you make the best pancakes.

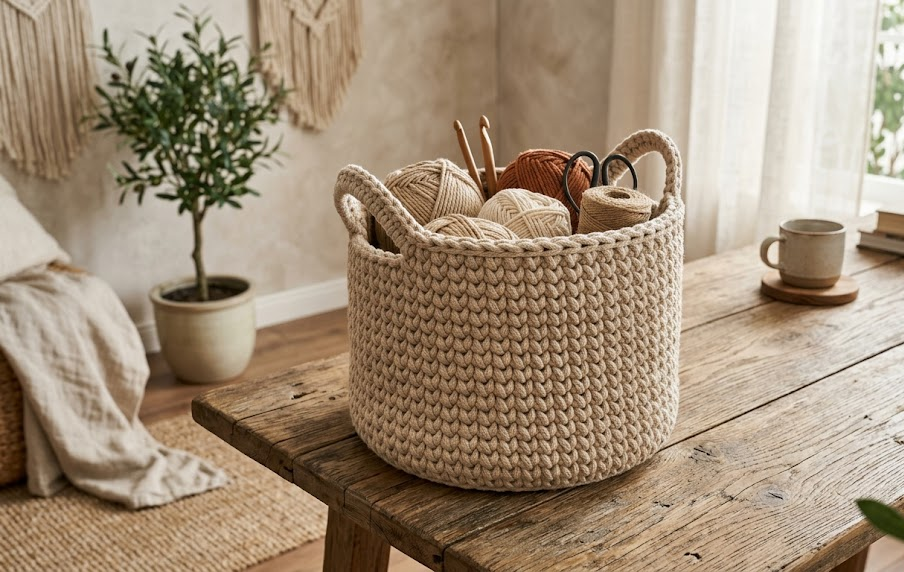
If you’ve been looking for a project that’s equal parts practical and pretty, this crochet cord yarn basket checks every box. It works up quickly thanks to super bulky cord yarn, holds its shape beautifully without any stiffening spray, and gives you a sturdy storage piece you’ll actually reach for every day. Toss in blankets, yarn stash, magazines, plant pots, or bathroom essentials — this basket does it all while looking like it belongs in a boho-styled home.
This pattern is written for beginner crocherters who already know how to single crochet and want to try their first three-dimensional project. The finished basket has a flat, sturdy base, tall sides worked entirely in single crochet, and two integrated handle openings so it’s easy to carry from room to room. No sewing on handles separately, no wire, no stiffening required — the cord yarn itself is thick and structured enough to hold the shape on its own.
|
Difficulty
Beginner Friendly
|
Time
3–4 Hours
|
Hook Size
8mm (US L/11)
|
Yarn Weight
Super Bulky Cord
|
Finished Size
20cm x 16cm
|
Gauge
- 8 sc x 9 rows = 10cm x 10cm (4in x 4in) square, worked in single crochet
- Hook used: 8mm (US L/11)
- Yarn weight used: Super bulky cord yarn (5mm cotton cord)
Gauge isn’t critical for this project since fit doesn’t matter the way it does for wearables, but matching gauge will get you closest to the finished measurements listed below. If your stitches are looser, size down to a 7mm hook. If your basket feels floppy, size down a hook as well.
Materials List
- Super bulky cord yarn (5mm cotton cord), natural/beige color, approximately 150m (164 yards) — 1 skein
- 8mm (US L/11) crochet hook
- Yarn needle for weaving in ends
- Scissors
- Stitch marker (highly recommended for tracking round starts)
Abbreviations
| Abbreviation | Meaning |
|---|---|
| ch | chain |
| sc | single crochet |
| sl st | slip stitch |
| st(s) | stitch(es) |
| rnd(s) | round(s) |
| MR | magic ring |
| BLO | back loop only |
| ( ) | stitch count at end of round |
Pattern Instructions
Part 1: Base
Start with a magic ring (MR): this is a adjustable loop technique that lets you cinch the center tight after your first round, avoiding a hole in the middle of your circle.
Rnd 1: Ch 1 (does not count as a st), 6 sc into MR, pull tail to close ring, sl st to first sc to join. (6)
Rnd 2: Ch 1, 2 sc in each st around, sl st to join. (12)
Rnd 3: Ch 1, *1 sc, 2 sc in next st; repeat from * around, sl st to join. (18)
Rnd 4: Ch 1, *2 sc, 2 sc in next st; repeat from * around, sl st to join. (24)
Rnd 5: Ch 1, *3 sc, 2 sc in next st; repeat from * around, sl st to join. (30)
Rnd 6: Ch 1, *4 sc, 2 sc in next st; repeat from * around, sl st to join. (36)
Your base should lie flat and measure roughly 15-16cm (6in) across. If it’s cupping upward, your tension is too tight — try a bigger hook. If it’s rippling at the edges, your tension is too loose.
Part 2: Sides
Rnd 7: Working in back loops only (BLO — insert your hook only under the back loop of each stitch instead of both loops; this creates a visible ridge line that marks where the base meets the sides), sc in each st around, sl st to join. (36)
Rnds 8-9: Ch 1, sc in each st around, sl st to join. (36) — repeat this round twice.
Part 3: Handle Openings
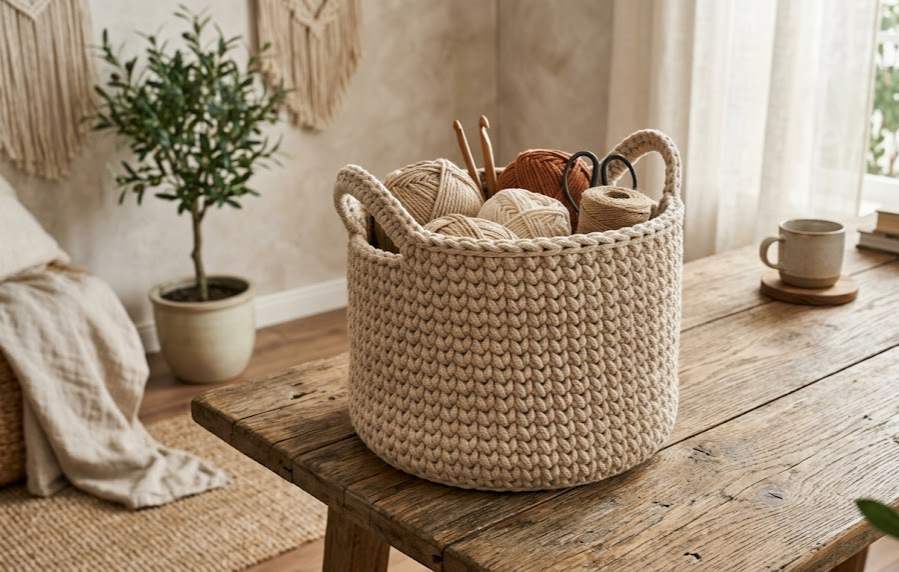
Rnd 10: Ch 1, sc 6, ch 6 (skip next 6 sts — this chain bridges the gap to create your first handle opening), sc 12, ch 6 (skip next 6 sts — second handle opening, positioned directly opposite the first), sc 6, sl st to join. (36 total: 24 sc + 2 ch-6 spaces)
Rnd 11: Ch 1, sc in each st around, working 6 sc evenly across each ch-6 space from the previous round (treat each chain space as 6 individual stitches to work into), sl st to join. (36)
Part 4: Upper Sides
Rnds 12-16: Ch 1, sc in each st around, sl st to join. (36) — repeat this round five times.
Rnd 17: Working in BLO, sc in each st around, sl st to join. (36) — this creates a matching ridge detail near the rim, echoing the base fold line.
Rnd 18: Ch 1, sc in each st around, sl st to join. (36)
Fasten off, leaving a 20cm (8in) tail for weaving in.
Assembly Steps
- Weave in your starting tail from the magic ring first, pulling it through several stitches on the wrong side to secure it invisibly.
- Weave in the fasten-off tail the same way, running it through 4-5 stitches in different directions so it won’t work loose with handling.
- Check both handle openings sit directly opposite each other — they should line up when you fold the basket in half.
- If the handle edges feel a little loose, work a single reinforcing round of sc directly around the opening (through the chain-6 space and the stitches on either side) for a firmer grip. This is optional but recommended if you’ll be carrying heavier items.
- Steam the basket lightly (hover a clothes steamer 5-8cm away, don’t touch the yarn directly) to help the sides sit evenly if they’re bowing slightly — cord yarn responds well to light steam blocking.
- Let the basket rest upright for a few hours before use so the stitches settle into their final shape.
Beginner Tips
- Use a stitch marker on the first stitch of every round — cord yarn is thick and it’s easy to lose track of where a round starts.
- Keep tension slightly firm rather than loose. A too-loose basket won’t hold its shape once you fill it with items.
- If your hands tire working with thick cord yarn, take breaks every few rounds — the tension needed for structural stitching is more demanding than working with standard worsted yarn.
- When working into the chain-6 spaces in Rnd 11, spread the stitches evenly (2 into the chain itself, plus using the chain as anchor points) rather than crowding them all at one end.
- Count your stitches at the end of every single round before moving on. It’s much easier to fix a stitch count error one round after it happens than five rounds later.
Variations
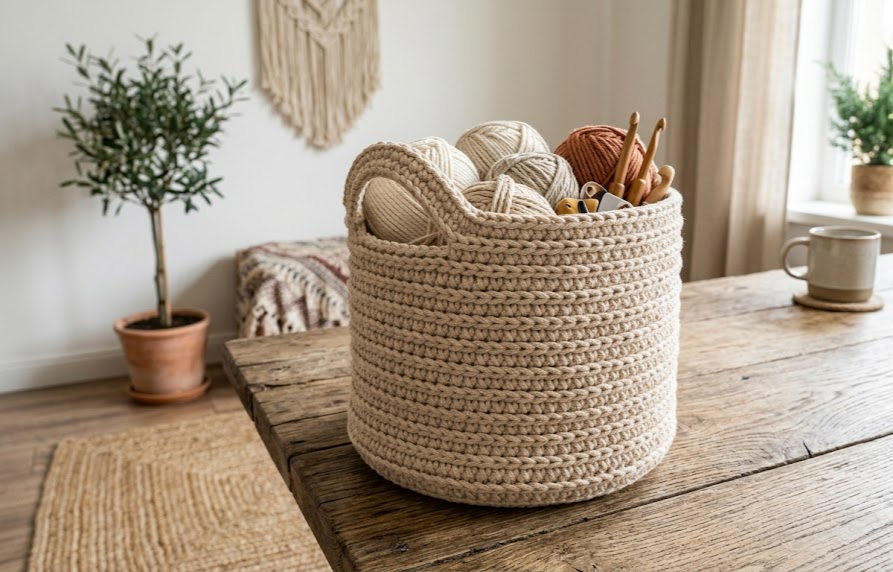
- Two-Tone Basket — switch to a contrasting cord yarn color for the last 3 rounds (Rnds 16-18) to create a color-blocked rim.
- Mini Version — start with the same base pattern but stop increasing at Rnd 4 (24 sts) for a smaller catch-all basket, perfect for keys or jewelry.
- Tall Planter Cover — continue Rnds 12-16 for an extra 6-8 rounds before adding handles, turning this into a floor planter cozy for larger pots.
- Fringe Trim — after Rnd 18, add a round of long fringe (cut 15cm strands, fold in half, pull through stitches with a crochet hook) around the top edge for a boho textured finish.
- Chunky Braided Handles — instead of the integrated chain openings, skip Rnd 10 and instead crochet two separate chain-and-sc handle straps to sew on after finishing, for a more pronounced carry handle.
Save this pattern to your crochet board so you don’t lose it — and tag your finished basket #FoodieRippleCrochet, we’d love to see your version!



