
The Best Fluffy Pancakes recipe you will fall in love with. Full of tips and tricks to help you make the best pancakes.

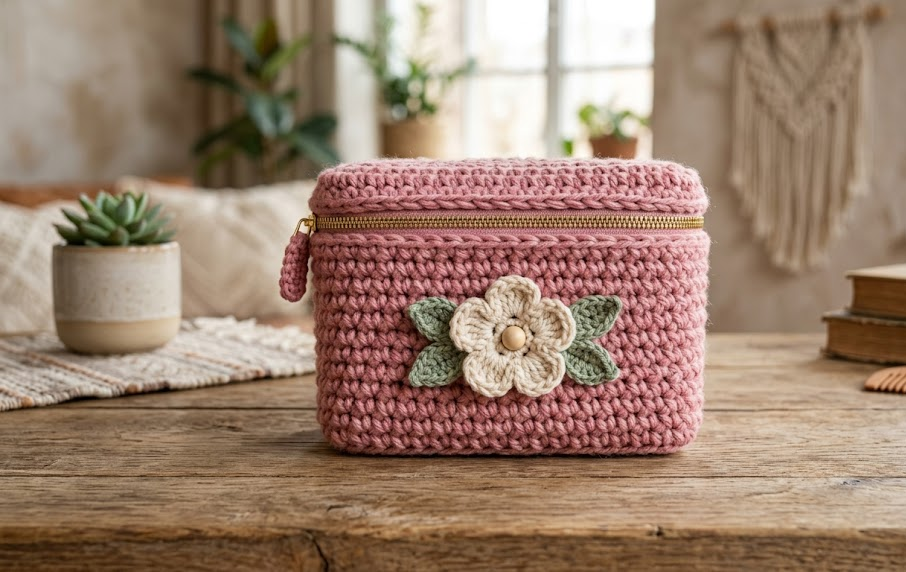
If you have been searching for a crochet project that is small enough to finish in an afternoon but sturdy enough to actually use every single day, this crochet makeup case is exactly what you need. Worked up in soft, plush pink yarn with a sweet little flower appliqué on the front, this boxy zip pouch holds its shape beautifully thanks to a simple single crochet construction that creates a firm, fabric-like texture. It is the kind of project that looks far more advanced than it actually is, which makes it a wonderful next-step pattern for beginners who have mastered the basics and are ready to try something dimensional.
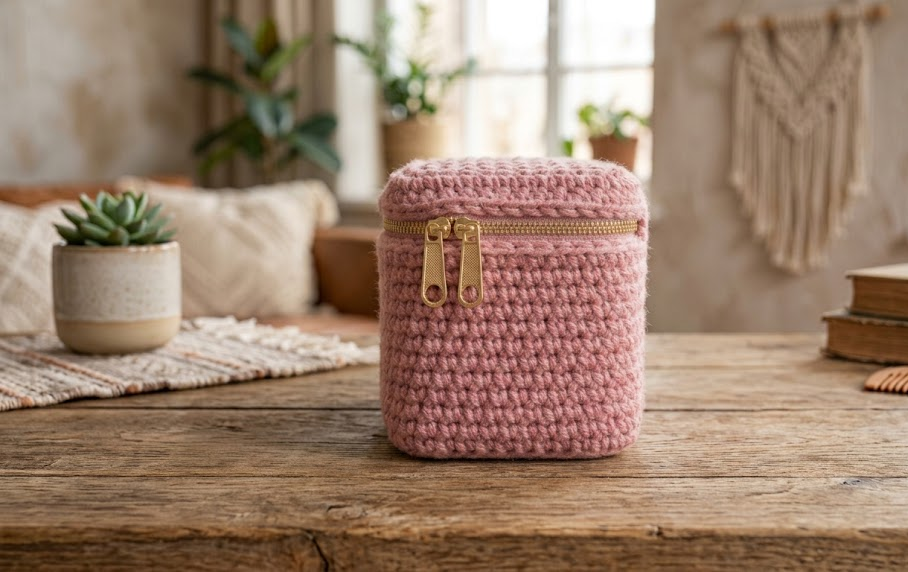
This case is sized perfectly for the essentials: a couple of lipsticks, a small foundation bottle, a compact, and a skincare tube or two. Slip it into a larger bag for travel, keep it on a bathroom shelf to corral your daily skincare routine, or make one as a thoughtful handmade gift. Because the whole thing is worked flat and then folded into shape, there is no complicated shaping to worry about, just straightforward rows and rounds that build into a really satisfying finished object.
Below you will find the complete pattern, from gauge and materials through to the final assembly, written out in full so you can sit down and crochet the entire case using only what is here.
|
Difficulty
Beginner–Easy Intermediate
|
Time
4–5 Hours
|
Hook Size
5mm (H-8)
|
Yarn Weight
Worsted / Velvet (#4)
|
Finished Size
18 x 10 x 8cm
|
Gauge
12 sc x 14 rows = 10cm x 10cm (4in x 4in) square, using a 5mm (H-8) hook and worsted weight velvet yarn.
Gauge is not critical for this project since it is a case rather than a garment, but working a quick swatch first will help you confirm your finished size and yarn usage before you begin the full pattern.
Materials List
- Worsted weight (medium, #4) velvet or chenille yarn in dusty rose pink — approximately 150g
- A small amount of cream/off-white worsted weight yarn for the flower — approximately 10g
- A small amount of sage green worsted weight yarn for the leaves — approximately 5g
- 5mm (H-8) crochet hook
- Yarn needle for weaving in ends and sewing pieces together
- Stitch markers
- One 20cm (8in) zipper in a coordinating color
- Sewing needle and matching thread for attaching the zipper
- Scissors
Abbreviations Table
| Abbreviation | Meaning |
|---|---|
| ch | chain |
| sl st | slip stitch |
| sc | single crochet |
| inc | increase (2 sc in same stitch) |
| dec | decrease (single crochet 2 stitches together) |
| BLO | back loop only |
| st(s) | stitch(es) |
| rnd(s) | round(s) |
| rep | repeat |
| MR | magic ring |
| RS | right side |
| ( ) | stitch count at end of round/row |
Pattern Instructions
Part 1: Base
Row 1: Ch 21. Sc in 2nd ch from hook and in each ch across (this is called working into the “second side of the chain,” meaning you skip the very first loop closest to the hook and start your single crochet in the next one). (20 sc)
Row 2–11: Ch 1, turn. Sc in each st across. (20 sc)
Fasten off, leaving a long tail for seaming later, or continue directly into Part 2 if working the sides in continuous rounds.
Part 2: Sides (worked directly around the base)
Rnd 1: With RS facing, ch 1, do not turn. Working around the outer edge of the base rectangle, sc evenly around all four sides, working 3 sc into each of the four corners to keep the work flat (this corner increase prevents the base from cupping or curling as you build the walls). Join with a sl st to the first sc.
Rnd 2–7 (6 rounds total for the walls): Ch 1, do not turn. Sc in each st around, continuing to work 3 sc in the same corner stitch on every round to maintain the rectangular shape. Join with a sl st to first sc at the end of each round. (Stitch count will stay consistent once your corners are established — check that all four sides sit at 90 degrees before moving on.)
Fasten off and weave in ends.
Part 3: Lid
Work exactly as Part 1 (Base): ch 21, sc across for 11 rows. (20 sc)
Part 4: Lid Sides
Rnd 1–3: Repeat Rnd 1 exactly as written in Part 2, working 3 rounds total to create a shallow lid wall that will sit just over the top edge of the case. Join and fasten off, leaving a long tail.
Part 5: Flower Appliqué
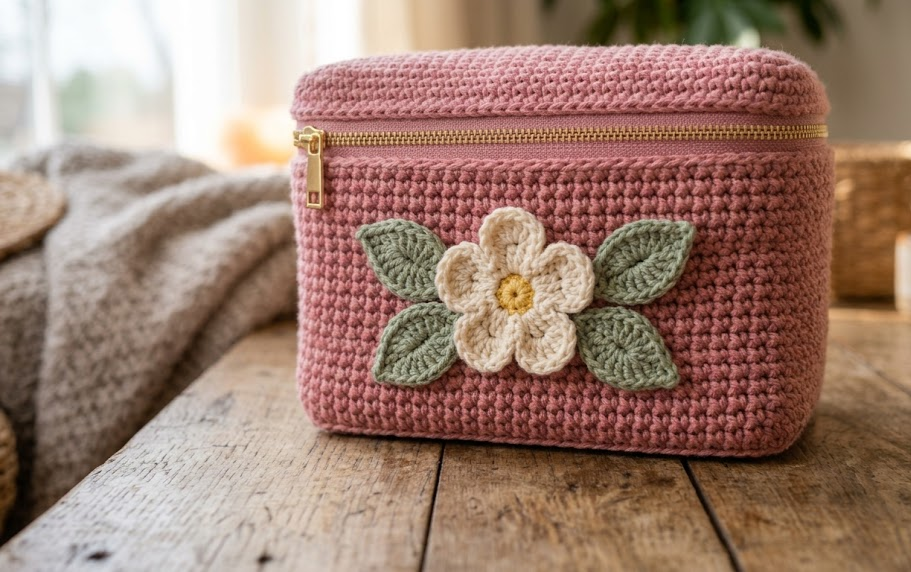
Using cream yarn, MR (magic ring — this is a small adjustable loop that lets you crochet several stitches into a center point and then pull the ring closed, avoiding a hole in the middle of round pieces).
Rnd 1: Ch 1, 10 sc into MR, pull tail to close ring. Join with sl st. (10 sc)
Petals: *Ch 3, sl st in next st along the base circle, rep from * around until you have 5 loops. Into each ch-3 loop, work (sl st, hdc, dc, hdc, sl st) to form a rounded petal. Fasten off, leaving a tail for sewing.
Part 6: Leaves (make 2)
Using sage green yarn, ch 6.
Row 1: Sl st in 2nd ch from hook, sc in next ch, hdc in next ch, dc in next ch, 3 dc in last ch, then working back down the other side of the chain: dc in next ch, hdc in next ch, sc in next ch, sl st in last ch. Fasten off, leaving a tail for sewing.
Assembly Steps
- Turn the case body right side out and set it on your work surface with the top opening facing up.
- Center the lid piece over the top opening so the lid’s short sides align with the case’s short sides.
- Using a whip stitch and matching thread or yarn, hand-sew the zipper along the inside top edge of both the case body and the lid, with the zipper teeth centered so it opens and closes smoothly. Sew approximately 0.5cm (¼in) in from the top edge on both pieces.
- Once the zipper is secured on both sides, check that the case opens and closes fully before trimming any excess zipper tape.
- Position the flower appliqué on the front panel of the case, roughly 3cm (1¼in) up from the base and centered left to right. Pin in place.
- Tuck the two leaves under the bottom edge of the flower, angled slightly outward on either side.
- Using the yarn tails, sew the flower and leaves securely to the front panel, weaving in all ends on the inside of the case when finished.
- Give the finished case a light steam or press (avoiding direct heat on the yarn if using synthetic velvet) to help the walls sit flat and square.
Beginner/Intermediate Tips
- Working into the “second side of the chain” (Row 1 of the base) can feel tricky at first. Turn your starting chain so you can clearly see the bumps on the back, and work into those bumps for a neater, more even edge.
- Consistent corner increases are what keep this case looking crisp and boxy rather than round. Mark your four corner stitches with stitch markers before Rnd 1 of the sides so you never lose track of them.
- Velvet and chenille yarns can be slippery to work with. Crochet a little more slowly than usual and check your stitch count every couple of rows until you get a feel for the yarn.
- If hand-sewing a zipper feels intimidating, baste it in place first with contrasting thread in long, loose stitches, try opening and closing it, and only then go back with your final small, secure stitches.
Variations
- Two-Tone Version: Work the base and sides in one color and the lid in a contrasting color for a playful color-blocked look.
- Mini Size: Reduce the starting chain to 15 and work only 8 rows for a smaller card or coin case.
- No-Flower Minimalist: Skip the flower and leaves entirely and instead work a single row of contrasting single crochet around the top edge for a clean, modern finish.
- Bow Instead of Flower: Replace the flower appliqué with a simple crochet bow for a different decorative accent.
- Travel-Size Toiletry Bag: Lengthen the base chain to 31 and add extra rounds to the sides to fit larger bottles and tubes.
Pinterest CTA
Save this pattern now so you always have it on hand for your next crochet project, and tag your finished makeup case with #FoodieRippleCrochet so we can see your version come to life!



