
The Best Fluffy Pancakes recipe you will fall in love with. Full of tips and tricks to help you make the best pancakes.

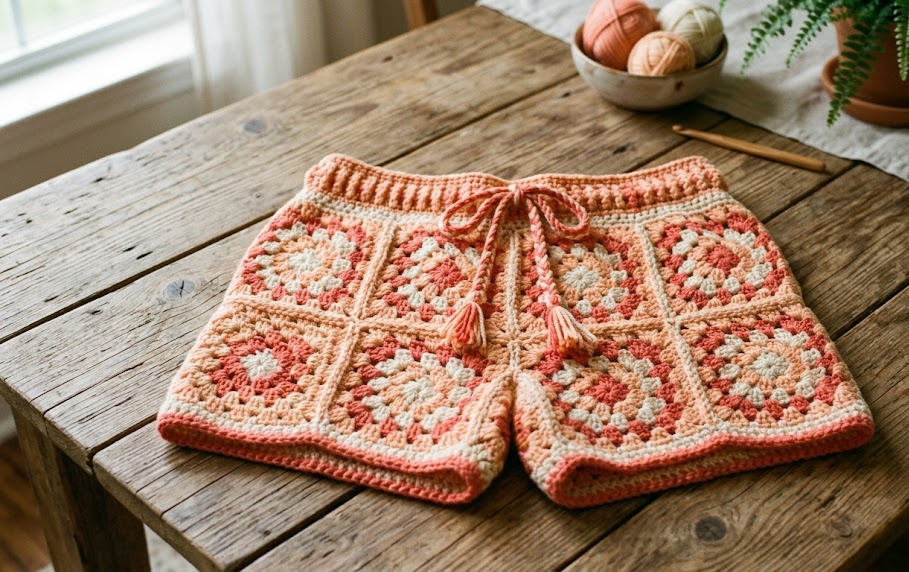
There’s something about granny squares that just says summer — the bright pops of color, the nostalgic texture, the way each square feels like a tiny handmade sunburst. These crochet granny square shorts take that classic motif and turn it into a wearable, breezy garment perfect for beach days, festival season, or lounging on the porch with a cold drink. Made from soft DK weight cotton yarn in a peachy, sandy color palette, these shorts are lightweight, breathable, and endlessly customizable. If you’ve made a few granny squares before but haven’t tried seaming them into a garment, this pattern is your next step up — approachable, well-explained, and genuinely fun to make.
Whether you’re crocheting for yourself, a friend, or to sell at a summer market, these shorts strike a great balance: the squares themselves are simple and repetitive (perfect for TV-watching crochet), while the assembly teaches real garment-construction skills you’ll use again and again.
|
Difficulty
Intermediate
|
Time
12–16 hours
|
Hook Size
4.0mm (G/6)
|
Yarn Weight
DK / Light Worsted
|
Finished Size
Adjustable (S–XL)
|
Gauge
One granny square motif = 4.5in / 11.5cm square (measured after 3 rounds), using a 4.0mm hook and DK weight yarn.
Standard tension swatch: 14 sts x 14 rows = 10cm x 10cm (4in x 4in) in single crochet, using DK weight yarn and a 4.0mm hook.
Always make a test square first and adjust hook size up or down to match this measurement — square size is the single biggest factor in how your finished shorts will fit.
Materials List
- DK weight (light worsted, #3) cotton-blend yarn:
- Color A (Peach) — approx. 150g
- Color B (Cream) — approx. 120g
- Color C (Coral) — approx. 90g
- Color D (Sand) — approx. 60g
- 4.0mm (G/6) crochet hook
- Scissors
- Tapestry/yarn needle
- Stitch markers (at least 4)
- 1in (2.5cm) wide elastic, cut to your waist measurement minus 1–2in
- Safety pin or bodkin (for threading elastic)
Abbreviations
| Abbreviation | Meaning |
|---|---|
| ch | chain |
| sl st | slip stitch |
| sc | single crochet |
| dc | double crochet |
| sp | space |
| st(s) | stitch(es) |
| rnd(s) | round(s) |
| rep | repeat |
| BLO | back loop only |
| tog | together |
| ( ) | stitch count at end of round/row |
| [ ] | repeat instructions inside brackets |
Pattern Instructions
Part 1: Granny Square Motif (make 12 for a size Small/Medium; add 2 squares per size up)
Rnd 1 (Color A): Make a magic ring (a slip-knot-free loop you tighten after working stitches into it, so there’s no hole at the center). Ch 3 (counts as first dc throughout), 2 dc into ring, ch 2, [3 dc into ring, ch 2] 3 times, join with sl st to top of starting ch-3. Pull magic ring tight. (12 dc, 4 ch-2 corner spaces)
Rnd 2 (join Color B): Join in any ch-2 sp with a sl st. Ch 3, 2 dc, ch 2, 3 dc all in same sp (this is your first corner). Ch 1, [3 dc, ch 2, 3 dc] in next ch-2 sp (corner made). Rep from * around 2 more times. Ch 1, join with sl st to top of ch-3. (24 dc, 4 corner sps, 4 side ch-1 sps)
Rnd 3 (join Color C): Join in any ch-2 corner sp. Ch 3, 2 dc, ch 2, 3 dc in same sp. Ch 1, 3 dc in next ch-1 sp, ch 1, [3 dc, ch 2, 3 dc] in next ch-2 corner sp. Rep from * around 2 more times. Ch 1, 3 dc in last ch-1 sp, ch 1, join with sl st to top of ch-3. Fasten off. (36 dc, 4 corner sps, 8 side ch-1 sps)
Weave in ends as you go to save finishing time later — leave a 6in tail on each color change and weave it into the back loops of the same-color stitches.
Part 2: Front Panel
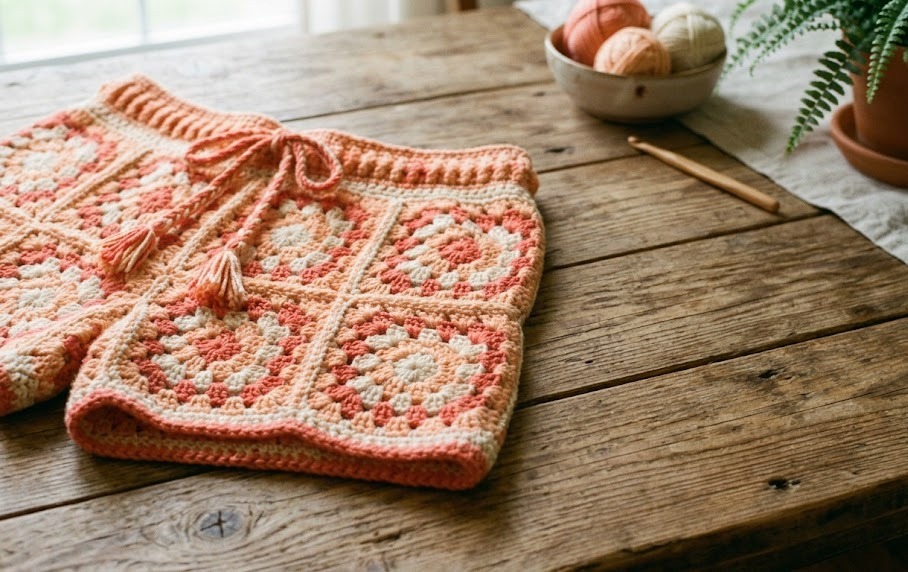
Lay out 6 squares in a 3-across x 2-down grid (this is your front panel size for S/M — for larger sizes, add squares to width, not height).
Joining method (whipstitch): Place two squares right sides together, matching stitch-for-stitch. Using color D and a tapestry needle, whipstitch through both loops of each matching stitch along the edge, working from corner to corner. Fasten off and weave in.
Join squares first into 2 rows of 3, then join those two rows together along their long edge to form the front panel (2 rows x 3 columns).
Part 3: Back Panel
Repeat Part 2 exactly, using your remaining 6 squares, to create a matching back panel.
Part 4: Side Seams
With right sides together, align the front and back panels along their outer edges (left and right sides). Using Color D, whipstitch each side seam from the top waist edge down to where you want your leg opening to begin — leave the bottom 4.5in (11.5cm), or one full square-height, unseamed on each side. This unseamed portion becomes your leg opening.
Part 5: Leg and Crotch Seams (Rise)
This is the step that turns two flat panels into wearable shorts.
- With the shorts still right-side-out, turn them so the front and back panels are separated at the bottom (like a tube on each leg).
- Fold so the front panel’s bottom-center point meets the back panel’s bottom-center point, right sides together.
- Whipstitch a curved seam from the inner point of each leg opening up to the center point where front and back meet — this creates the crotch curve. Curve the seam gently rather than sewing a straight line; a straight seam here will feel uncomfortable to wear.
- Repeat for the second leg.
- Turn right-side out and try on for fit before finishing the waistband — this is the easiest point to adjust seam depth if the rise feels too high or low.
Part 6: Waistband
Rnd 1–2: With Color A, join yarn at any point along the top edge. Work 2 sc into each dc-corner space and 1 sc into each remaining st around the entire waist opening, join with sl st. Rep this round once more, working sc into each sc. (Stitch count will vary by size — count your first round and match it on round 2.)
Rnd 3 (casing row): Ch 1, working into the BLO of every st (this leaves a visible ridge to mark the fold line and keeps the casing seam flexible), sc around, join. (same count as Rnd 2)
Rnd 4–6: Sc around through both loops as normal for 3 more rounds, join each round. (same count throughout)
Fasten off, leaving a long tail. Fold the waistband down at the BLO ridge line so rounds 4–6 fold to the inside, creating a tube (casing). Whipstitch the folded edge down to the base of round 3 all the way around, leaving a 2in gap unsewn for elastic threading.
Elastic insertion: Attach a safety pin or bodkin to one end of your cut elastic and thread it through the casing tube, all the way around, using the gap you left. Overlap the two elastic ends by 1in and sew them securely together with a needle and thread. Sew the casing gap closed.
Part 7: Drawstring (optional)
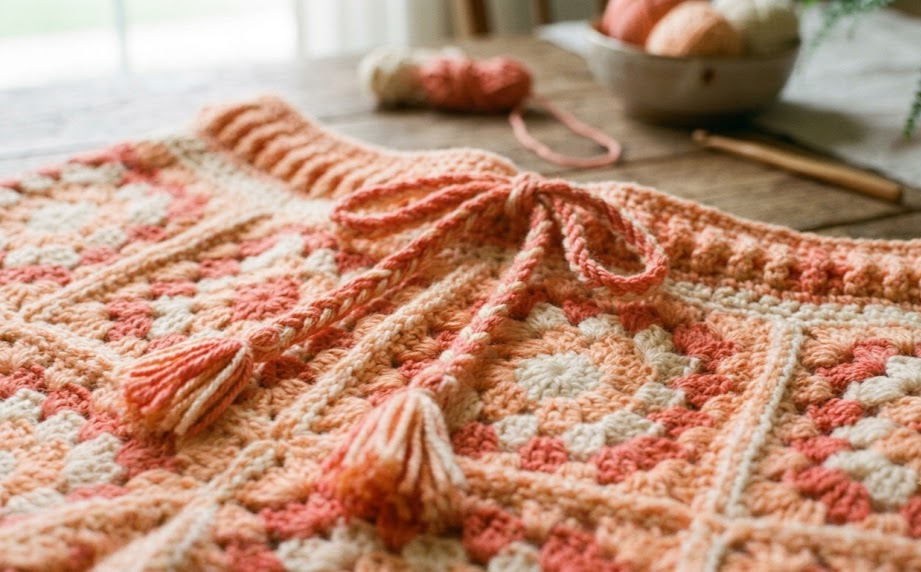
Using Color C, ch a length equal to your waist measurement plus 12in. Fasten off and trim. Fold in half and thread through 2–3 eyelet gaps in your waistband casing (or crochet 2 button-hole style gaps into Rnd 3 if you want a permanent opening), tying in a bow at center front.
Assembly Steps
- Block all 12 squares to exactly 4.5in x 4.5in before joining — this single step determines whether your seams line up cleanly.
- Join 6 squares into the front panel (3 across x 2 down).
- Join 6 squares into the back panel (3 across x 2 down).
- Whipstitch side seams, leaving the bottom 4.5in of each side open for leg openings.
- Sew the curved crotch/rise seam on each leg.
- Try shorts on before proceeding — adjust rise seam depth here if needed.
- Work waistband rounds 1–6 directly onto the top edge.
- Fold and sew waistband casing, leaving a 2in gap.
- Thread and secure elastic through the casing.
- Sew the gap closed and weave in all remaining ends.
Beginner/Intermediate Tips
- Block every square to the same size before joining — even small size differences compound across 12 squares and will throw off your side seams.
- When whipstitching, keep tension consistent; pulling too tight will pucker the seam and make the shorts sit oddly at the hip.
- The crotch curve is the trickiest part of this pattern — go slowly, try the shorts on inside-out before fastening off, and adjust the curve depth rather than forcing a straight seam.
- If you’re new to garment crochet, make one full extra square as a “seaming practice” piece before starting your side seams.
- Cotton-blend DK yarn holds its shape better than acrylic for wearables like this and breathes better in summer heat.
Variations
- Monochrome version: Use a single color for all 12 squares for a bold solid-color look instead of the peachy multi-tone palette.
- Mini version: Reduce to 2 rounds per square and use fewer squares per panel for a shorter, hip-length cut.
- High-waist version: Add 2 extra waistband rounds before the casing for a retro high-rise silhouette.
- Skirt conversion: Skip the crotch/rise seam entirely and instead seam the front and back panels together at both sides for a wrap-style granny square mini skirt.
- Ombré edition: Instead of repeating the same 4-color sequence on every square, shift the color order square by square to create a gradual ombré effect across the finished panels.
Save this pattern now so you don’t lose it — grab your hook and yarn and make your own pair of peachy granny square shorts this summer. Tag your finished shorts and pin this for later using #FoodieRippleCrochet!



