
The Best Fluffy Pancakes recipe you will fall in love with. Full of tips and tricks to help you make the best pancakes.

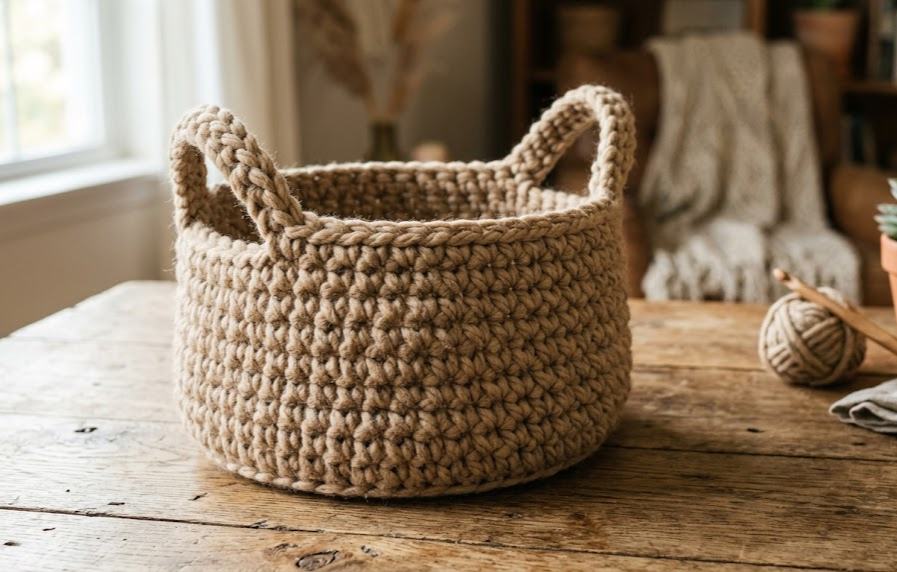
If you’ve been searching for a crochet project that’s equal parts practical and beautiful, this chunky storage basket is it. Made with bulky yarn and a giant hook, it works up fast and turns into a sturdy, spacious basket you’ll actually use every day — for blankets, toys, plants, magazines, or that pile of odds and ends that never has a home. The two built-in handles make it easy to carry from room to room, and the natural tan yarn gives it an effortless boho look that fits right into any living room, nursery, or entryway. This pattern is written for confident beginners and intermediate crocheters who are comfortable working in continuous rounds and increasing evenly. By the end, you’ll have a basket sturdy enough to hold real weight and beautiful enough to leave out on display.
|
Difficulty
Intermediate
|
Time
6–8 Hours
|
Hook Size
8.0mm (L-11)
|
Yarn Weight
Bulky / Jumbo
|
Finished Size
38cm / 15in Ø
28cm / 11in H |
Gauge
- 8 sc x 8 rows = 10cm x 10cm (4in x 4in) square, worked in single crochet
- Hook used for gauge swatch: 8.0mm (US L-11)
- Yarn used for gauge swatch: Bulky/Jumbo weight (Category 5–6)
- Gauge is less critical for this project than for wearables, but if your swatch comes out significantly smaller than stated, size up your hook; if larger, size down, to keep the finished basket close to 38cm (15in) in diameter.
Materials List
- Bulky/Jumbo weight yarn in tan or natural beige — approximately 250–300g (2–3 skeins, depending on brand)
- 8.0mm (US L-11) crochet hook
- Yarn needle (large-eye, for weaving in thick ends)
- Scissors
- Stitch marker (optional, helpful for tracking the start of each round)
Abbreviations Table
| Abbreviation | Meaning |
|---|---|
| ch | chain |
| sc | single crochet |
| st(s) | stitch(es) |
| rnd(s) | round(s) |
| inc | increase (2 sc worked in the same stitch) |
| rep | repeat |
| ( ) | stitch count at end of round |
| * … * | repeat instructions between asterisks as stated |
Pattern Instructions
Notes before you begin:
- This basket is worked in continuous rounds — do not join or turn unless stated. Use a stitch marker to mark the first stitch of each round so you don’t lose your place.
- Ch 1 at the start of a round does not count as a stitch.
- “2 sc in same st” is your increase; it means you work two full single crochet stitches into one stitch from the previous round, which is how the base grows wider.
Part 1: Base (worked flat, then it becomes the bottom of the basket)
- Rnd 1: Ch 2, work 6 sc into the 2nd ch from hook. (6 sts)
- Rnd 2: 2 sc in each st around. (12 sts)
- Rnd 3: 1 sc, 2 sc in next st rep around. (18 sts)
- Rnd 4: 2 sc, 2 sc in next st rep around. (24 sts)
- Rnd 5: 3 sc, 2 sc in next st rep around. (30 sts)
- Rnd 6: 4 sc, 2 sc in next st rep around. (36 sts)
- Rnd 7: 5 sc, 2 sc in next st rep around. (42 sts)
- Rnd 8: 6 sc, 2 sc in next st rep around. (48 sts)
At this point your flat circular base should measure approximately 38cm (15in) across. This becomes the floor of your basket.
Part 2: Sides (worked straight up, no more increases)
- Rnds 9–22 (14 rounds): 1 sc in each st around, working into the back loop or both loops consistently (pick one and stick with it for a clean, even wall) — this is where the base turns the corner and the basket walls begin rising straight up. (48 sts, every round)
Continue until the wall measures approximately 20cm (8in) tall from the base.
Part 3: Handle Round
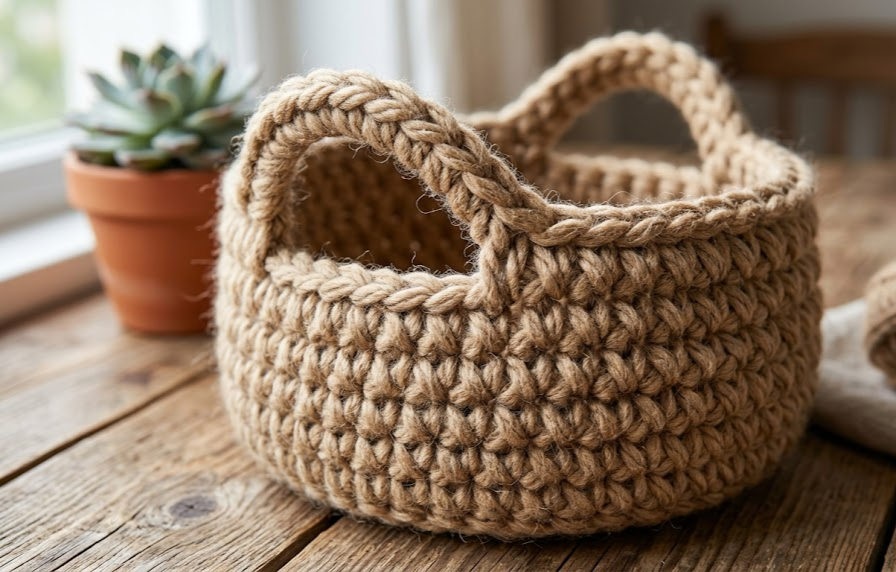
- Rnd 23 (Handle Round): Sc in next 14 sts, ch 14 (skip the next 14 sts — this skipped section becomes the open handle gap), sc in next 20 sts, ch 14 (skip the next 14 sts), sc in last 14 sts. (48 sts total when you count the 2 chains of 14 as placeholders for the skipped stitches)
Technique note: Skipping stitches and chaining over the gap is how you create an opening without cutting your yarn — the chain spans the gap and gives the next round something to crochet into, so the hole stays reinforced and doesn’t stretch out of shape.
Part 4: Rim / Handle Reinforcement
- Rnds 24–28 (5 rounds): 1 sc in each st and in each ch across the ch-14 spaces around. (48 sts, every round)
Working into the chain spaces on Rnd 24 closes the loop back up into a full round of 48 stitches and builds up the handle opening so it’s thick, sturdy, and comfortable to grip.
Finishing: Fasten off, leaving a 15cm (6in) tail. Weave in all ends securely with your yarn needle — bulky yarn tails should be woven through several stitches and then trimmed close, since they’re more visible than thin yarn if left loose.
Assembly Steps
- Lay your finished basket flat and steam-block lightly if the sides are curling inward — this relaxes the stitches and helps the walls stand up straight.
- Check that both handle openings are symmetrical; they should sit directly across from each other on the rim, each measuring about 14cm (5.5in) wide when relaxed.
- If you want extra structure, cut a circle of stiff plastic canvas or cardboard slightly smaller than the base (about 36cm/14in across) and slip it inside the bottom before use — this keeps the basket from sagging under weight.
- For an optional fabric liner, cut a circle for the base plus a rectangle for the sides, adding a 1cm seam allowance, and hand-stitch the liner to the inside rim just below the handle round.
- Give the basket a final shape by pressing gently from the inside outward so the sides bow out slightly rather than staying perfectly straight — this gives it a fuller, more traditional basket silhouette.
Beginner/Intermediate Tips
- Bulky yarn hides small tension inconsistencies well, which makes this a forgiving project if you’re newer to continuous-round crochet.
- Count your stitches at the end of every single round during the base (Rnds 1–8) — increases compound fast, and one missed increase early on will throw off the whole shape.
- Use a stitch marker moved up every round; with 48 stitches per round in the body, it’s very easy to lose track of where you started.
- When working the handle round, count your skipped stitches twice before chaining — an uneven handle gap is the most common mistake on this pattern.
- If your basket walls flare outward instead of going straight up, you’re likely still increasing by accident; double check you’re doing a plain sc round, not an increase round, for Rnds 9–22.
Variations
- Two-Tone Basket: Work the base and lower walls in tan, then switch to a contrasting cream or rust color for the last 6 rounds and the handles for a color-blocked look.
- Mini Version: Stop increasing at Rnd 5 (30 sts) instead of Rnd 8, and shorten the straight sides to 8 rounds, for a smaller catch-all basket perfect for keys or remotes.
- No-Handle Display Bowl: Skip Part 3 and Part 4 entirely and simply continue plain sc rounds after the sides — this turns the pattern into a wide, handle-free bowl ideal for plants or fruit.
- Braided Handle Upgrade: Instead of working the handle opening as a simple chain gap, crochet two separate straps in rows of sc, braid three strands of leftover yarn together, and stitch them on as reinforced carrying handles.
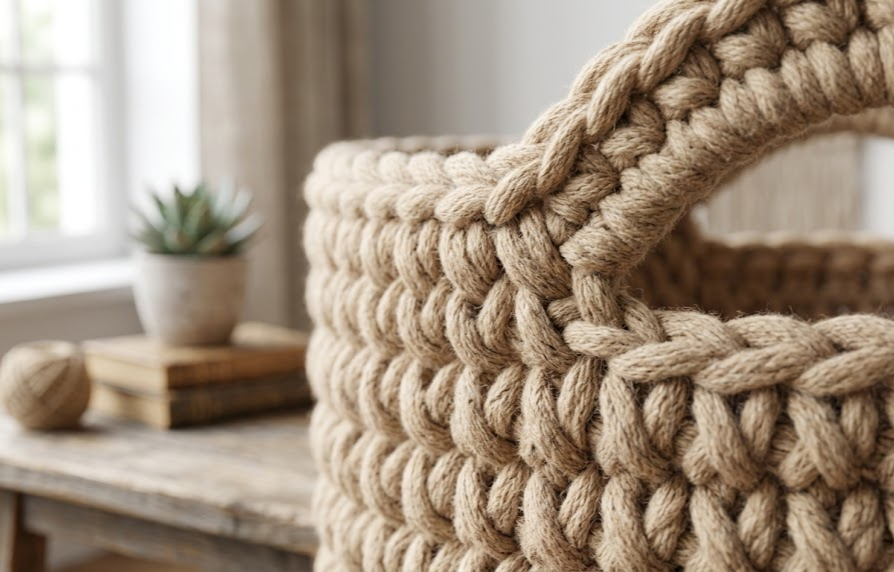
- Jute-Look Rustic Basket: Use a natural jute or hemp-blend bulky yarn instead of cotton for a more rustic, farmhouse-style finish that pairs well with woven rugs and rattan furniture.
Save This Pattern
If you love how this basket turned out, save this pin so you can find it again next time you’re ready to crochet! Tag your finished basket and share your version — I’d love to see your colorway. #FoodieRippleCrochet



